by Nay | Aug 22, 2013 | Newly Natural, Tips
Love these curls!
You probably have noticed that I’ve been doing some research on the science behind our natural hair.
You say: Luuuuccy, you’ve got some ‘splaining to do!
I say (throws hands in the air): But Riiiicky, let me explain!
In case that all went over your head, you gotta catch at least one episode of I Love Lucy–throwback!
Back to my point. I basically wanted to nail down and discuss (in an easily digestible way) some of the key items that affect our hair. This includes all the things that I skipped learning about while I was also learning to embrace my natural hair … for the second time!
Yes, you got that right. A few years ago, I decided to embrace my curly hair (during round two, following straightening addiction), but I overlooked some important elements becaaaause … weeeelllll … there was all this talk about all sorts of scientificy stuff. Ain’t nobody got time for that (folds hands at chest)! Well, at least that’s what I initially thought until I realized that it was taking forrrreeevvvver for my hair to grow! I decided that it couldn’t hurt to do some hair homework.
Between that time and now, I’ve gathered some information, which has been included in my new free, e-book (shameless plug). One of those topics that you need to know about is discussed below–humectants. In case you’re not quite sure how these suckers work, I’ve broken it down for you below. Have no fear, Super Nay is here! 😉 Read more after the jump.
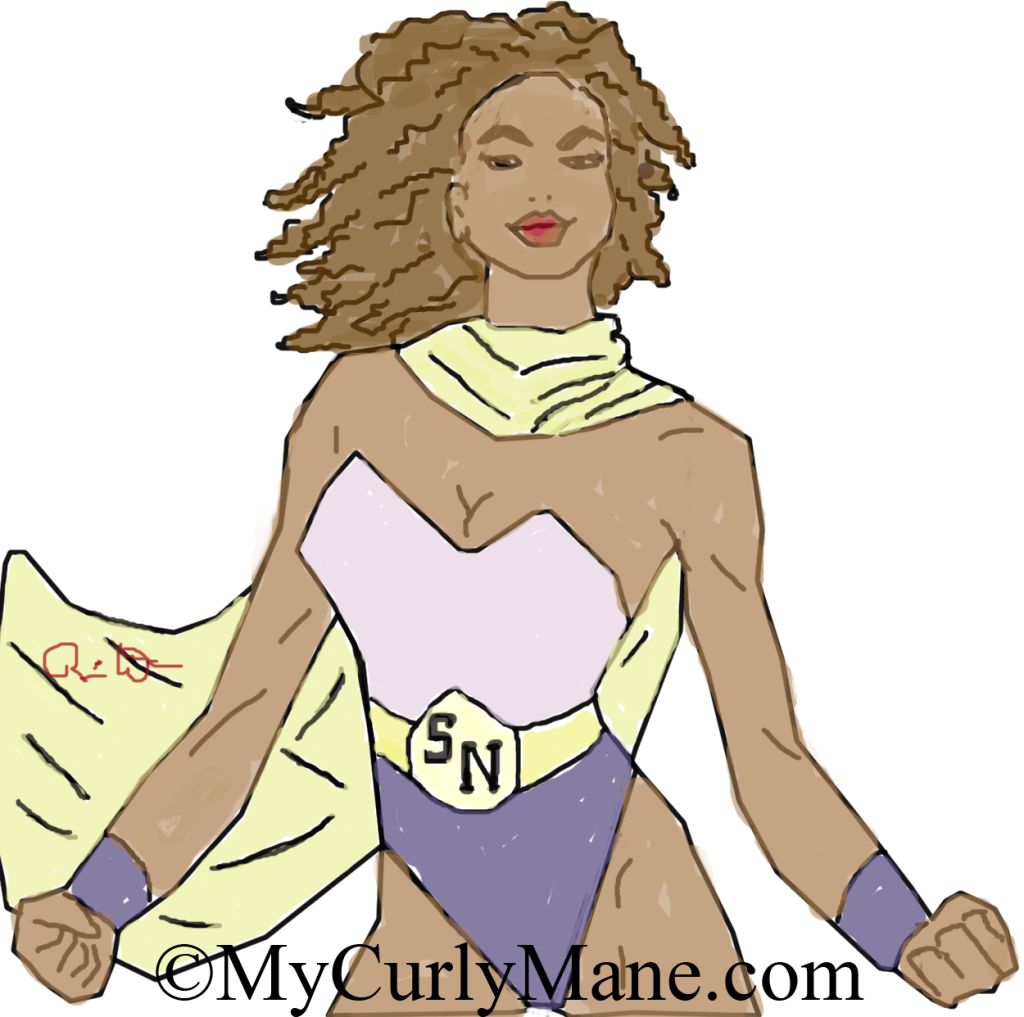
Super Nay (the heroine in my head, ha!). Art by Nay, inspired by Wonder Woman.
What Are Humectants?
Humectants are ingredients and/or products that promote moisture retention. I won’t delve too deeply into compounds and molecules. Just know that these items have a chemical structure that attracts water from the atmosphere and binds it to the molecule. In other words, humectants are attracted to moisture, whether it is in your hair or in the atmosphere, but they work best in moderate climates.
What’s The Impact of High Humidity?
When it is highly humid outside, there is a large amount of water vapor in the air. Dry and damaged hair that is free of products aka porous, thirsty tresses (read more about porosity for detailed information) will naturally seek to absorb the moisture in the air. However, taking in such a large amount of moisture will make your hair full … to the point of swelling and lifting the cuticle layer (the outer layer of hair). This will create frizzy and tangled hair.
Now, if you have a humectant in your thirsty tresses, this will only exasperate the problem. Your hair will become soggy, sticky, and poofy all at once! Recalling a few instances?
What’s The Impact of Low Humidity?
When the humidity is minimal, as seen on most dry, winter days, there isn’t a lot of moisture in the air. If your hair is styled with a product that contains humectants, these items will either:
- Hang onto the moisture in your hair and prevent it from evaporating. This may or may not prove to be successful. Your best bet is to stick with moisturizing products, like leave-in conditioners.
- Remove moisture from your hair’s cortex and send it into the air. Remember that thing about attraction? Your hair will do this because it so kindly believes that the air needs the moisture, of course. Unfortunately, this will also dry out your hair.
What Are Some Examples of Humectants?
Before you use any product, you should read the ingredients to see whether or not humectants are included. This will help you to better prep your hair for the current humidity levels. In other words, you’ll say “aha!” whenever your hair decides to rise up and become a frizzilicious ball on your head.
Just so you have a heads up, here are a few popular humectants found in hair care products:
- Agave Nectar
- Aloe Vera Gel
- Fructose
- Glycerin
- Honey
- Hydrolyzed silk protein
- Panthenol
Now that you’ve got it down, are you ready to take on humidity with humectants? Wham! Bang! Zing!
by Nay | Aug 18, 2012 | Newly Natural, Products, Tips
Updated 8/4/13: This post lists key items to help you maintain your natural hair. Please note that there’s an eBook with the same title, A Curly Girl’s Essentials: A Guide for Navigating Your Curly Mane, that is now available for FREE when you sign up for My Curly Mane’s updates! The eBook includes basic information (including the list below) that will help you attain healthy hair. Subscribe and see!
____________________________________________________________________________________________
Back to the deets: The net is bubbling up with information on caring for naturally curly hair. Woo hoo! While there are more resources at our fingertips, it also makes it a bit more difficult to find simple, basic information on how to care for natural hair. I don’t want to confuse you even more, particularly you newbies out there.
Instead, I’m going to break down for you a few essential items that every curly girl needs in her stash. For my easy, breezy minimalist gals, this one’s up your alley! The products for natural hair and tools below are listed in the order in which they’re most likely used.
1. Moisturizing & Clarifying Shampoo / Sulfate Free Shampoo
If you are using products (mainly stylers) that contain mineral oil or non-water soluble silicones, you will need to use a shampoo to clarify your curly mane. Mineral oil and silicones can trap moisture within your strands or prevent it from entering your hair shaft. They tend to build up onto your hair, particularly African-American natural hair, and are best removed with shampoos.
Typically, shampoos contain sodium lauryl sulfate, a detergent that creates a foamy lather and strips hair of its natural oils. Frequent shampooing dries out our curly manes, making them susceptible to breakage. Unless your hair is naturally oily, please shampoo minimally. Your best bet is to purchase a shampoo that is also moisturizing.

If you’re following Lorraine Massey’s Curly Girl Method (Curly Girl: The Handbook ) aka the noo poo (no shampoo)/co-washing (conditioner washing) method, there may be times in which your curly natural hair is over moisturized. Yep, would you believe that one? Hair that is holding too much moisture will be limp. If you fall under this category, use a sulfate free shampoo to clarify and help wake up your strands. Just an aside, a protein treatment may help as well.
Recommendations:
Sulfate-free: Miss Jessie’s Crème De La Curl Cleansing Crème and Creme of Nature Moisture & Shine Shampoo with Argan Oil
Moisturizing: Creme of Nature Detangling Ultra Moisturizing Conditioning Shampoo and Dabur Vatika Moisturizing Shampoo with Sweet Almond
2. Moisturizing Conditioner
This is a must, especially if you use shampoo. Conditioners help to restore the moisture that shampoos take away. Not to mention, they add necessary slip for detangling tresses. In addition, conditioners can be left in your hair as a styler. This is known as Teri LaFlesh’s Tightly Curly Method. While I haven’t had success with this method, it may prove positive for you.
Recommendation: Herbal Essence’s Hello Hydration

3. Leave-in Conditioner
Another must have! Leave-ins are crucial to many, if not most, curly girls. When used under your styler and sealed with oil (unless your styler contains enough oils), leave-ins keep curly hair moisturized. It also adds definition and reduces frizz.
You can use a regular conditioner as a leave-in, just beware that some conditioners react to stylers and cause white balls to appear on one’s hair. Not all products play together nicely. 😉
Recommendations: I have recently switched from using Avanti Silicon Mix and swear by Beautiful Textures Tangle Taming Leave-in Conditioner. This product is amazing!! Check out my product review.
4. Wide Tooth Comb/Detangling Brush
Unless you’re seeking a wickedly neat part, leave your fine tooth combs in the back of your draw. Our tresses need wide tooth combs to easily glide their way through our hair. They are extremely helpful when paired with a moisturizing conditioner to detangle hair in the shower. Some curlies prefer to use a Denman brush or Tangle Teezer. This is particularly helpful if you’re using the Tightly Curly Method mentioned above. I prefer wide-tooth combs, as I’m one of those curlies who get serious shrinkage and lose a lot hair from brushes.
5. Oil and/or Butter
Your curly mane may work well with butter, oil … or both! Either one will seal moisture into your strands, literally making your hair feel like butta! This should be included as a step in your wash and go (see my 10 steps for wash and gos). You can also use oil or butter as a heat protectant when straightening. In addition (yes, there’s more!), they can be used nightly to seal in moisture into your hair or help to soften and revive your look in the morning.


Recommendations: Almond Oil, Coconut Oil, Dabur Vatika Coconut Hair Oil , Jojoba Oil, and Olive Oil
6. Styler
Not every girl needs a styler, but this curlie does. Stylers are products that literally help to style your hair. They increase definition, can freeze curls, and can reduce shrinkage. Stylers prevent my hair from completely transforming into a cotton ball. If this is your desired look, then skip it.
Recommendations: III Sisters of Nature Curly Whip Pudding, Eco Styler Gel, Fantasia IC Olive Oil Style Gel, Fruit of the Earth 100% Aloe Vera Gel , Hair Rules Kinky Curling Cream, and Miss Jessie’s Quick Curls,
7. Hair Clips
They aid in styling your hair or can be used as part of your finished looked. Hair clips section your hair as your work through your head. They are particularly helpful as your hair grows longer. It’s either that or invest in more hands!
8. Spray Bottle
Water is nature’s moisturizer. It is a curly girls’ best friend. At some point in your regiment, you’ll need a spray bottle to help douse your hair as you style it. If you’re into rewetting your hair throughout the day, a spray bottle will ease the process.

9. Satin or Silk Pillowcase/ Scarf/Sleeping Cap
Another must! You can read my information on Nighttime Routines & Sexy Sleeping For Naturals for more details on satin materials. Please note that satin and silk materials do not absorb the moisture in your hair (unlike cotton), preventing your hair from drying out and breaking. Not to mention, it will save you from “bed head.”
10. Camera
This is a must for chronicling your curls. Documenting your hair journey through photos or videos will help you to keep track of your routine and hair health. Aside from badgering your friends, how else will you know what’s working for you?
Once you have these items, you’re pretty much set to go. For those of you in pursuit of how to grow natural hair, these items will keep you on course. Of course, if you are seeking additional styling aids, there are tons of other tools (hair dryers, flat irons, etc.) and products in which you can add to your arsenal. Don’t worry. I’ll keep you posted! 😉
by Nay | Jul 31, 2012 | Nay's Curly Mane, Newly Natural, Tips, Uncategorized

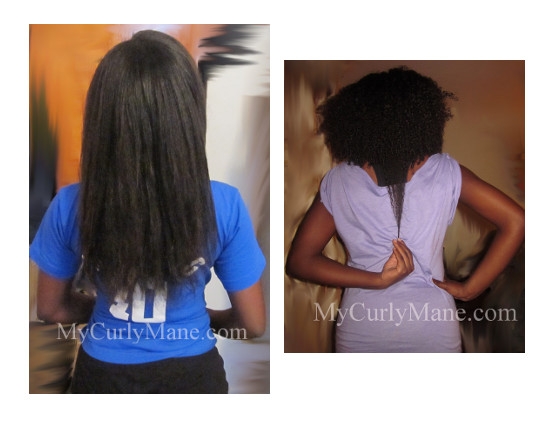
On the left: My curly mane in 2009/2010. Note the straight piece in the front. On right: My curly mane in 2012.
You’ve done the big chop or transitioned into having natural hair. Now what? Aside from picking up a few essential tools (click here for a listing), there is one thing you should immediately do—pull out your camera and strike your best pose. It’s time to document your hair!
If you’ve read my hair story (click here for details), you’ll know that I grew out my heat damaged strands a few years ago. In doing so, I placed myself on a no flat iron diet (my curls were scrawny enough!) and cut off several inches of damaged ends. I also spent a lot of time looking at my curly mane. No, it wasn’t a “fairest of them all” moment. I was adjusting to seeing myself without straight tresses and analyzing my curls. I could see the front and sides, but I couldn’t see the back of my head. Plus, I wanted to see my hair as other people saw it, so I picked up a camera.
Documenting your hair journey through photos or videos is one of the most important things that you can do. It can help you to:
- Remember the products that worked for you. I hope that you don’t go down the deep, dark path that is product junkism (guilty, hangs head in shame). Should you make that wrong turn, your photos will help you to know which products are winners and which can join the collection under your bathroom sink.
- Nail down a routine. As you try new styles and products, you may lose track of what’s actually working for you. Your photos/video will serve as a guide towards establishing healthy hair habits and lock down the right products and techniques for you.

- Obtain a true view. It’s one thing to look in a mirror and completely another to see your hair on camera and/or animated on film. With a record, you’ll know how your curls stack up against itself through different seasons and over periods of time.
- Monitor health and identify setbacks. Before the summer, I spent several months straightening my hair … Yes, I relapsed a bit (guilty, hangs head in shame … again). As a result, I had to trim a few inches of split and knotted ends. By looking at my pics, I can see how excessive straightening dried out my hair and prevented me from gaining my desired length (see attached photo). Now I can adjust my routine as needed.
- Stay motivated. If it weren’t for taking photos, I would believe that my hair hasn’t progressed much over the past 3 years. Fortunately, this blog has forced me to revisit my collection of images. Gone are the highlights I once had (When did they grow out?), and hello length! For the longest time, I’ve been doing the dance between feeling as if my hair is growing (I’m on a quest for length) and completely writing it off as stubbornly fixed at another length. Seeing these improvements, I know how far I’ve come and how close I can be to my hair goal—waist length tresses (crossing fingers)!
On left: My curly mane in May 2012, with ragged ends. On right: My curly mane with fresh ends in July 2012.
With commuting, work, family, school, and hopefully play, our lives are full. You may believe that this leaves little room for photo shoots. I completely understand. Please understand that you don’t need to devote a lot of time to this, especially if you are taking photos for your own safekeeping.
When trying a new product or ’do, take a quick snap or two from your camera/camera phone. That’s all you need. You don’t even need to face the camera, as the focus is on your hair … unless you want to ham it up, of course!
Capture the moment now and reflect on them later. Who knows, like our fave bloggers and vloggers, your documentary may inspire someone else. At the very least, it will allow you to monitor the evolution of your curly mane.
Are you chronicling your curls? If so, in what form?
by Nay | Jul 20, 2012 | Newly Natural, Uncategorized
Hello newbie! Congratulations on becoming a curly girl. Cue the horns!
Whether you strategically big chopped, cut your hair on a whim, or grew out your curly mane, I commend you on embracing your natural self. This journey will have peaks and valleys as you re-introduce yourself to your natural hair or discover it for the first time. While you embark on this journey, please follow these guidelines on how to care for natural hair. Read them at least twice, and put them into action.
DO
1. Find time to play in your hair. You may have gotten repremanded for this in your youth. No more. You need to explore the twists and bends that make up your hair, and this will take time. I understand that working gals are strapped for time, so please take a minimum of 5 minutes before bed or 10 minutes on the weekends to study your curly mane.
2. Compliment your fellow curlies. I always find it strange that hair hating and competition takes place in our curly community. All girls need a little shout out and affirmation that their hair looks good that day. Pay it forward.
3. Read up on blogs and news about curly hair. It will help you to recognize hair issues such as sensitivity to protein and products, issues you may not have faced before.
4. Nail down a simple routine for a while. This will allow you the time needed to pay attention to your hair as opposed to the products you are using. You will be able to see how your hair reacts to your set product and routine throughout seasons.
5. Be gentle while handling your hair. No ripping combs and brushes through it. You will damage your hair strands.
6. Be patient, and you will achieve your hair goals. Unless you are ailing, all hair, African-American natural hair includes, grows. Period. The trick is to retain the length and health of your growth. With proper care, you will achieve your desired length.
7. Embrace your texture and stop obsessing over hair typing. Yes, we all have different size curls, and one size doesn’t make us have better hair than the other. A lot of us have at least three different textures on our heads. Do not fret. You are normal, and your hair is uniquely fab! Also, please, please note that shrinkage comes with the territory.
8. Get your curly essentials. These include: spray bottle, clips, clarifying shampoo, conditioner, leave-in conditioner, oil/butter, styler (optional), and satin pillow/scarf. Click here to read my detailed explanation of these essential items.
9. Listen to your hair. I say this time and again. If your hair is dry, start moisturizing. If it’s suddenly feeling rough, check your styler. You won’t know what route to take unless you listen to your hair and pay attention to its needs.
10. Embrace and love your hair!
DO NOT
1. Beat yourself up for not looking like another curlie. Each mane is unique, and yours is fine as is.
2. Assume your hair cannot be styled in a certain manner without trying it first. Natural hair is versatile and can look many different ways just through styling techniques.
3. Assume your hair will never grow. You may just be staring at the mirror too long. Step away curlie. Just like my mom always says, “A watched pot does not boil.”
4. Buy every product under the sun. Yep, made this mistake. Try a handful first, experimenting with one product for three days to a full week. Try different styles, utilizing that one product. What may not work on a wash and go may work magic in your braid-outs.
5. Freak out by all the natural hair information that is out there. Instead, slowly digest this information, always going back to study your hair.
6. Force tools and techniques to work. Your hair will let you know if a Denman brush is ripping it out or if a styler is drying it out. Listen to your mane.
7. Listen to negative comments as to why you changed your hair. You made a great decision. Don’t let other people’s negativity affect you.
8. Give up and go back to the creamy crack! Give your hair a chance and time. My hair today is much different from how it was a few years ago. Through time, patience, and care, my hair is stronger and healthier looking than it’s been in a while.
9. Ignore your hair because you are overwhelmed with its new look and feel. Once again, you must breathe and have patience. This is all very new to you. You must realize that it will take time to physically and emotionally adjust to a new version of you.
10. Hide your hair because you feel awkward or different. Put your curly mane on full display. It is yours and only yours. Have no shame at how God made you. Wear it proudly!


Recent Comments