
by Nay | Oct 14, 2012 | Tips, Uncategorized
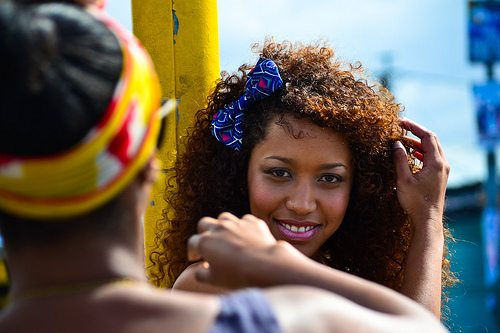
I have a confession to make (stands up and addresses all curlies): I am obsessed with long curly hair! (lets out a sigh of relief). Believe me. I don’t think long hair is any better than short hair or teeny weeny afros (TWAs). I just find myself ogling lengthy, bountiful curls. My weakness for length fuels my hair goal—to achieve waist length hair.
Before achieving my current length, I’ve made several errors and had many hiccups along the way. Now that I know how to care for and maintain my curly mane (and am constantly learning and sharing this information with you), I know that I can achieve this goal. Come back again, and I’ll update you on my progress. For now, let’s talk about a few pesky items that often get in the way of our hair’s health and growth.
SHEDDING
While this doesn’t get in the way of hair growing, it should be explained and distinguished from the items that do. Hairnistas say that everyone’s hair grows at different rates, and the average rate is a half inch per month. They also say that you’ll lose about 100 shed hairs per day. How do you know what are shed hairs? They’re the strands with the white bulbs at the end. These bulbs literally come out of the root, as the hair has reaches the end of its days. There is nothing to worry about unless shedding is excessive aka you’ve created a carpet made of hair! If you do experience extra shedding, you may want to see a doctor/dermatologist about whether this is linked to an illness or an imbalance in hormones and/or stress.
BREAKAGE
Now that you know how to identify shed hairs, let’s separate this from hair loss due to breakage. If your strands are missing a bulb, this is typically hair that has bid adieu because of breakage. These strands, which are typically shorter in length, are damaged by a variety of reasons. They include:
1. Heat – Ah, the gift and the curse. While I like to use blow dryers to speed up my styling time, please refrain from blow frying your hair to death. This includes burning your hair with flat irons and pressing combs.
2. Harsh Chemicals/Perms – Our hair is very delicate and prone to breakage from anything that loosens up the follicles. Hair color and lye, the active ingredient in relaxers, can be dangerous culprits. According to LIVESTRONG.COM, “Lye, or sodium hydroxide, penetrates the hair shaft and breaks down some of its structure, effectively loosening its natural curl. Thus, chemical relaxers’ real function is to damage your hair and make it weaker. This process can’t be reversed.” Yikes!
3. Tight Ponytails and Braids – Yes, they’re cute when done right. However, when styled too tightly (and you can see skin pulling at your crown), you’ve done did it now! Your hair can be literally pulled and tugged from the roots or become broken.
4. Roughing It Up – If you’re a curlie who thinks thrashing and hacking her hair with a comb and brush will tame it, stop right there! This excessively harsh treatment will cause your hair to break.
5. Over Moisturizing – Too much moisture can actually be a bad thing. Yes, believe it or not. It can cause limp, noodle-like tresses that are prone to breakage. Please read more about this in my post on how to moisturize natural hair.
6. Too Much Protein – This can cause your hair to dry out due to the lack of moisture. As you should know, dry hair leads to ____(fill in the blank). 😉
7. Product Build up – Product that piles high on our strands leave little room for the good stuff (moisture) to get into our tresses. When this happens, guess what’s the result? Seeing a theme here?
SPLIT ENDS
When your ends fray, there is little to no solution to fixing it. There are products that claim to moisturize those older ends to prevent the split from worsening. You can also moisturize your ends to prevent splitting, but ultimately, split ends need to be trimmed away. Time for them to literally split!
Now that you know what damaged hair looks like and how it’s caused, please pay close attention to your curly mane. Even if you’re not seeking length, these tips will help you to get healthy hair. Be kind to your curls. Mend all splits or cut them off for good, so you can positively progress in your hair journey.
by Nay | Oct 6, 2012 | Tips, Tools
Above: Photo of my Tangle Teezer via Instagram
About a month ago, I embarked on my usual shopping trip to CVS, which included a mini hair haul–of course! Family-sized bottle of Hello Hydration—check! Latest hair accessory—check! However, this time I spotted the infamous Tangle Teezer. I’ve heard about this detangling brush/comb for a long while now but passed on trying it due to poor relations with the Denman Brush.
A little backstory: Years ago, I tried using the Denman D3 and the modified version of the Denman D3 (with rows removed), since many curlies were having great results. At first I fell in love with the way it clumped my hair, but I soon experienced A LOT of hair removal. Granted, my hair was still rehabbing and recovering from heat damage at the time. Still, it was too much hair loss for comfort.
After discussions at hair forums, I picked up the Denman D41, which has wider spaced bristles and is designed for afro textured hair. This worked much better, but I still lost a lot of hair, so I put it down. If you decide to try a Denman, I recommend the D41 or D31. For me, I’ll revisit this brush a little later.
No more teasing. Back to the Tangle Teezer! I stared at it, pondered what our relationship would amount to, gave it the side eye, and then … jumped in! This could either turn into a great love affair, or it can crash and burn. The only way to find out was to try. With curiosity holding onto this cat, I experimented for about two weeks and discovered five ways in which you can use the Tangle Teezer … or your Denman brush (both produced identical results on my curly mane). Oh, and as you may notice below, a little alliteration never hurt anyone!
1. Shed Shredder – Occasionally, my hair will have periods in which it will shed more than usual. This is accompanied by shed hair that catches my healthy strands, snags it, wrestles, produces knots … and has me in a fit! You too? Calm down curlie! While this requires gentle finger work and sometimes the assistance of scissors (sigh). Don’t rip those hairs out of your head!
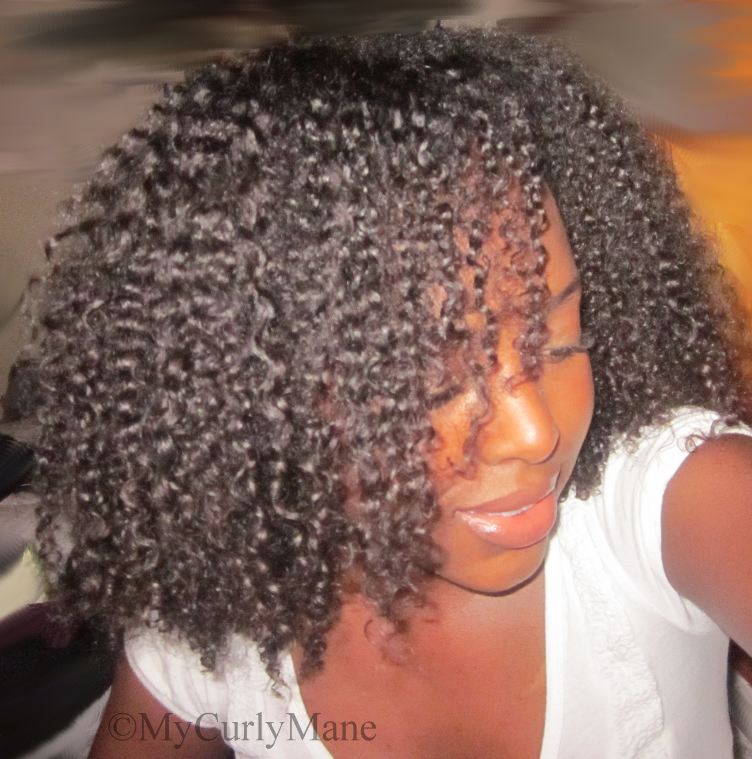
Above: My Curly Mane styled through a wash ‘n go and Hair Rules Kinky Curling Cream (read my review). Shed hair removed via a Tangle Teezer.
Try This: Hop into the shower and apply a generous amount of conditioner to your hair. Detangle your hair with a wide tooth comb, beginning at the back of your head. I use a comb first because on its own, these bristles are a little rough on my delicate tresses. Your hair may be a little more gangsta and can stand up to all brushes on its own. The only way to find out is to experiment, as always.
When done, whip out the Tangle Teezer (try not to drop this little thing, like I do!) and detangle again. I advise that you gently work your way up your strands, as opposed to brushing your hair from the scalp downwards. This method will aid in removing shed hairs. Just remember to use lots of conditioner.
2.Scalp Survivor – I usually sleep on getting my nails done and focus on my hair instead, but I recently began exploring the wonderful world of gel nail polish. I like to preserve my polish to save money and the style. Hey, a gal’s gotta be thrifty! This is when I really like to use the Tangle Teezer instead of my nails to cleanse my scalp. Here’s what you can do. In the shower, as you’re applying shampoo (optional) and/or conditioner to your hair, take your brush and massage your scalp in circular motions. The Tangle Teezer will do the job of cleaning your scalp, without the assistance of nails. I know. I know. You’re supposed to use your fingertips to wash your scalp, but I haven’t quite weaned myself off of my nails!
3. Dope Detangler – As mentioned above, you can begin the detangling process by using a wide tooth comb first. For some curly girls with tighter textures, like my sister, these brushes work wonders on their own. The Tangle Teezer can tremendously help to simplify this process.
4. Curl Clumper – For some ladies, curls are optional. They prefer poofier, undefined styles. If you like this look, skip this tip. For curl seekers, the Tangle Teezer is your friend. This brush makes curls clump and pop. Unfortunately, it also makes my hair shrriiiink! You can combat this by stretching your hair, using a blow dryer.
5. Style Supporter – As you’re applying products onto your hair, use the Tangle Teezer to aid in the application and removal of excess product. This brush also smooths tresses, which is perfect when doing braid-outs or twist-outs. How so? The Tangle Teezer produces sleeker strands, which helps with manipulating and shaping your hair into styles.
As mentioned, the Tangle Teezer and/or Denman D41 Volumizing Brush don’t have to be used solely for brushing. They can come in handy in other ways. It just may take some play time before you find a technique that works for you.
Are you using a Tangle Teezer or Denman? How are you using it and what have been your results?
by Nay | Sep 11, 2012 | Tips, Uncategorized
Judge each day not by the harvest you reap but by the seeds you plant.”
~ Robert Louis Stevenson
It shapes many curlies’ experience with their natural hair. With it, curls retain length and a beautiful, springy mane is formed (aahh). Without it, those same strands will become thirsty and brittle, leading to breakage (gasp!). It is moisture, and it is the essential to naturally curly hair health.
I’ve spoken to many frustrated ladies whose curl quest has been less than stellar due to their hair’s dryness. Others have completely abandoned ship, fleeing back to flat irons, pressing combs, and perms. Stop in your tracks! Put down that creamy crack!
Remember patience is a must when it comes to natural hair, and your hair will reward you once you take the time to find the techniques that work for you.
Note: Your hair consists of a cuticle layer, which is the outermost, shingle-like layer of hair. It is made of keratin and protects the cortex aka hair’s inner layer that protects the medulla. The cortex provides strength, texture, and color. The cuticle can open or close, allowing moisture to enter or exit the hair shaft. Ultimately, you want to close your cuticles and allow them to lay flat. Your hair’s porosity should also be taken into consideration.
Here are a few ways in which you can infuse moisture into your curly mane:
Start With A Clean Slate
First things first. Make sure that you clarify your hair with a moisturizing shampoo (like Creme of Nature Detangling Ultra Moisturizing Conditioning Shampoo) or baking soda. If you don’t have a curl-friendly shampoo, use 1/2 shampoo and 1/2 conditioner to wash your hair. Also remember to avoid shampooing your hair often throughout the week (approximately 3 days work for me). You want to remove products that have built up onto your hair without completely and continuously stripping away your natural oils, which are necessary for keeping hair supple. More on this later.
No Gizmo, Water Is Your Friend
With freshly pressed tresses, you must avoid contact with water, or your hair will revert to its curly state. On the other hand, natural hair, water is a curlies’ best friend. It is nature’s moisturizer, so seek water-based products, particularly leave-in conditioners. Just don’t forget to seal. See details below.
Seal The Deal
Once you moisturize your hair, you must seal this in with either an oil or butter. Oils/butters will coat and trap, not create, moisture within your strands. They also add sheen, de-stiffen hard products, and nourish hair. When I seal my curly mane, I work in sections throughout my hair. I layer either of the following as successful combinations:
a moisturizer (with a leave-in conditioner like Beautiful Textures Tangle Taming Leave-in Conditioner) + oil (Vatika, avacado, or coconut oil) + styler (product that styles hair such Miss Jessie’s Quick Curls)
OR
a moisturizer + styler + oil.
Try Kind Stylers
Watch out for stylers that strip your hair of moisture, particularly products that contain mineral oil and/or silicone. Both products coat rather than absorb into the hair shaft and form a barrier that can either seal in moisture (a good thing) or prevent it from entering into the hair (nooo!). Some curlies have had varied results with these two.
Other stylers may contain humectants like aloe vera gel, honey, or glycerin. By design, humectants cause water retention and will draw moisture into or out of the hair depending on humidity levels. This is particularly helpful during the summer months, as these ingredients will help draw moisture from the atmosphere into dry hair. Be cautious during the winter months, as these same humectants may draw moisture out from your hair and into the dryer atmosphere.
Deep Treatment
Deep conditioning under a hooded dryer or steaming curls weekly for 30 minute sessions can rejuvenate curls. You can also coat your hair in conditioners and cover it with a plastic cap for a few hours. Both techniques helped me to rehab my heat damaged curls.
Freshen Up
Fill a spray bottle with water or water and glycerin (a humectant). Spritz your hair throughout the day, as needed. I’ve tried this method but soon gave up the practice because:
1. I always had flat, wet hair, which I didn’t like. I prefer predictable, dry looks.
2. This was difficult to carry off in an office environment. It was a bit too high maintenance to continuously monitor and spritz throughout the day.
3. It made me look like I was rocking some Soul Glo! Whomp whomp. Unless your goal is to capture the Jheri Curled look, go light with the spritzing.
While it didn’t work for me, don’t let this discourage you. Remember everyone’s hair differs, and your curly mane may love this approach.
Easy Does It
Waaaiiit fooor iiiit … If you overdo the above mentioned tips, your hair will become over moisturized, resulting in soggy, noodle-like hair that’s excessively elastic to the point of breakage. Over moisturized hair needs protein to reverse this problem. Try a protein-based deep treatment like ApHogee and stylers like protein-rich Eco Styler Gel to revive your curls.
Yes, yes, this is indeed tricky and requires balance, but I recommend that you try any of these steps and report back. If you’ve got additional tips, come on in; the water is fine! Share your secrets!
by Nay | Sep 4, 2012 | Life Lessons, Mane Styles, Tips

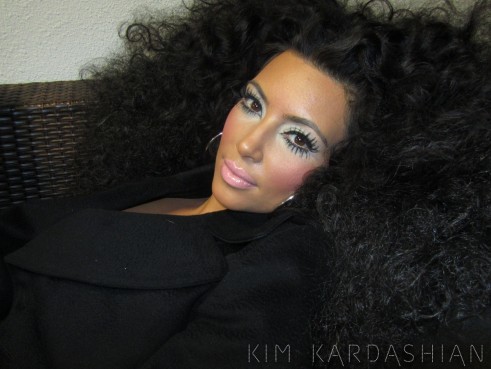
Kim Kardashian channels Diana Ross. Photo by Hype Williams. Photo Credit: kimkardashian.celebuzz.com
From TV to magazines, it’s hard not to keep up with the Kardashians since they are just about everywhere, particularly the family’s star, Kim. Recently, Kim K. publicized her experimental hair style in which she channeled Supreme du jour Diana Ross circa the 1970s. Donning big, curly hair and lots of makeup, Kim Kardashian struck a few diva-esk poses.
In describing the look, Kim says that she and her glam squad “went for a fun, crazy look.” Let’s listen to this again. It was a “fun, crazy look.” Even celeb reporters have covered this story by highlighting Kim’s “wild” look. Call me captain over analytical, but is it true that full, natural hair is also a crazy look? Let’s rewind here and clarify.
I love Kim’s makeup in the pics, which is for most purposes too dramatic for day wear but perfect for this shoot. I’m honing in on her hair, which I adore. That same ‘do is quintessential Diana Ross back in her heyday, and she was herald for it. Today, as women are embracing their naturally curly hair once more, I have to pause and ask, “Is natural hair a wild, crazy look?”
Natural hair is big and can even reach the same lengths and volume in real life that Kim possessed with her magic hair. Does this mean that this same look is fun and crazy when it’s for kicks and not as the actual look coming from your head? Is it only acceptable when being experimental?

Kim Kardashian’s look is inspired by Diana Ross. Photo by Hype Williams. Photo Credit: kimkardashian.celebuzz.com
I’m only drawing this correlation because of the many hair commercials that you and I have seen. How many times have you heard products—mousses, gels, sprays, serums, and chemical concoctions—aimed at “fixing frizz” and “taming wild hair?” This is of course followed by models of all ethnicities celebrating the results of their straightened locks instead of their “frizzy” curly hair. We even have a host of salons that cater to cuts that tame curly hair, helping to reduce the bulk.
This brings me back to my initial question. Is curly hair equivalent to wild hair? Hmmm. Perhaps, depending on your comfort with natural hair. As a naturally curly gal my whole life, I’m quick to say that my curly mane is … my hair. It is what it is, and I am who I am. Yes, it’s big. As it flops and swirls in the wind, it can look a bit free spirited. However, it isn’t something that necessarily needs taming or fixing. There’s no need to beat it into submission through products or other methods … or is that exactly what us curly girls do on our quest for products that work for us?
Whether you consider it naturally wild or not, naturally curly manes can roar. Its beauty commands attention by nature. To gain it, the curls will often volumize itself. For those of you with quieter manes, there are techniques you can use to turn up the volume (see my post on using an afro pik).
If having naturally curly hair is living on the wild side, ladies it’s time to channel your inner Miss Ross. Bend over, shake, fluff, or pic your mane. Go big or go home! 😉
by Nay | Aug 18, 2012 | Newly Natural, Products, Tips
Updated 8/4/13: This post lists key items to help you maintain your natural hair. Please note that there’s an eBook with the same title, A Curly Girl’s Essentials: A Guide for Navigating Your Curly Mane, that is now available for FREE when you sign up for My Curly Mane’s updates! The eBook includes basic information (including the list below) that will help you attain healthy hair. Subscribe and see!
____________________________________________________________________________________________
Back to the deets: The net is bubbling up with information on caring for naturally curly hair. Woo hoo! While there are more resources at our fingertips, it also makes it a bit more difficult to find simple, basic information on how to care for natural hair. I don’t want to confuse you even more, particularly you newbies out there.
Instead, I’m going to break down for you a few essential items that every curly girl needs in her stash. For my easy, breezy minimalist gals, this one’s up your alley! The products for natural hair and tools below are listed in the order in which they’re most likely used.
1. Moisturizing & Clarifying Shampoo / Sulfate Free Shampoo
If you are using products (mainly stylers) that contain mineral oil or non-water soluble silicones, you will need to use a shampoo to clarify your curly mane. Mineral oil and silicones can trap moisture within your strands or prevent it from entering your hair shaft. They tend to build up onto your hair, particularly African-American natural hair, and are best removed with shampoos.
Typically, shampoos contain sodium lauryl sulfate, a detergent that creates a foamy lather and strips hair of its natural oils. Frequent shampooing dries out our curly manes, making them susceptible to breakage. Unless your hair is naturally oily, please shampoo minimally. Your best bet is to purchase a shampoo that is also moisturizing.

If you’re following Lorraine Massey’s Curly Girl Method (Curly Girl: The Handbook ) aka the noo poo (no shampoo)/co-washing (conditioner washing) method, there may be times in which your curly natural hair is over moisturized. Yep, would you believe that one? Hair that is holding too much moisture will be limp. If you fall under this category, use a sulfate free shampoo to clarify and help wake up your strands. Just an aside, a protein treatment may help as well.
Recommendations:
Sulfate-free: Miss Jessie’s Crème De La Curl Cleansing Crème and Creme of Nature Moisture & Shine Shampoo with Argan Oil
Moisturizing: Creme of Nature Detangling Ultra Moisturizing Conditioning Shampoo and Dabur Vatika Moisturizing Shampoo with Sweet Almond
2. Moisturizing Conditioner
This is a must, especially if you use shampoo. Conditioners help to restore the moisture that shampoos take away. Not to mention, they add necessary slip for detangling tresses. In addition, conditioners can be left in your hair as a styler. This is known as Teri LaFlesh’s Tightly Curly Method. While I haven’t had success with this method, it may prove positive for you.
Recommendation: Herbal Essence’s Hello Hydration

3. Leave-in Conditioner
Another must have! Leave-ins are crucial to many, if not most, curly girls. When used under your styler and sealed with oil (unless your styler contains enough oils), leave-ins keep curly hair moisturized. It also adds definition and reduces frizz.
You can use a regular conditioner as a leave-in, just beware that some conditioners react to stylers and cause white balls to appear on one’s hair. Not all products play together nicely. 😉
Recommendations: I have recently switched from using Avanti Silicon Mix and swear by Beautiful Textures Tangle Taming Leave-in Conditioner. This product is amazing!! Check out my product review.
4. Wide Tooth Comb/Detangling Brush
Unless you’re seeking a wickedly neat part, leave your fine tooth combs in the back of your draw. Our tresses need wide tooth combs to easily glide their way through our hair. They are extremely helpful when paired with a moisturizing conditioner to detangle hair in the shower. Some curlies prefer to use a Denman brush or Tangle Teezer. This is particularly helpful if you’re using the Tightly Curly Method mentioned above. I prefer wide-tooth combs, as I’m one of those curlies who get serious shrinkage and lose a lot hair from brushes.
5. Oil and/or Butter
Your curly mane may work well with butter, oil … or both! Either one will seal moisture into your strands, literally making your hair feel like butta! This should be included as a step in your wash and go (see my 10 steps for wash and gos). You can also use oil or butter as a heat protectant when straightening. In addition (yes, there’s more!), they can be used nightly to seal in moisture into your hair or help to soften and revive your look in the morning.


Recommendations: Almond Oil, Coconut Oil, Dabur Vatika Coconut Hair Oil , Jojoba Oil, and Olive Oil
6. Styler
Not every girl needs a styler, but this curlie does. Stylers are products that literally help to style your hair. They increase definition, can freeze curls, and can reduce shrinkage. Stylers prevent my hair from completely transforming into a cotton ball. If this is your desired look, then skip it.
Recommendations: III Sisters of Nature Curly Whip Pudding, Eco Styler Gel, Fantasia IC Olive Oil Style Gel, Fruit of the Earth 100% Aloe Vera Gel , Hair Rules Kinky Curling Cream, and Miss Jessie’s Quick Curls,
7. Hair Clips
They aid in styling your hair or can be used as part of your finished looked. Hair clips section your hair as your work through your head. They are particularly helpful as your hair grows longer. It’s either that or invest in more hands!
8. Spray Bottle
Water is nature’s moisturizer. It is a curly girls’ best friend. At some point in your regiment, you’ll need a spray bottle to help douse your hair as you style it. If you’re into rewetting your hair throughout the day, a spray bottle will ease the process.

9. Satin or Silk Pillowcase/ Scarf/Sleeping Cap
Another must! You can read my information on Nighttime Routines & Sexy Sleeping For Naturals for more details on satin materials. Please note that satin and silk materials do not absorb the moisture in your hair (unlike cotton), preventing your hair from drying out and breaking. Not to mention, it will save you from “bed head.”
10. Camera
This is a must for chronicling your curls. Documenting your hair journey through photos or videos will help you to keep track of your routine and hair health. Aside from badgering your friends, how else will you know what’s working for you?
Once you have these items, you’re pretty much set to go. For those of you in pursuit of how to grow natural hair, these items will keep you on course. Of course, if you are seeking additional styling aids, there are tons of other tools (hair dryers, flat irons, etc.) and products in which you can add to your arsenal. Don’t worry. I’ll keep you posted! 😉
by Nay | Jul 31, 2012 | Nay's Curly Mane, Newly Natural, Tips, Uncategorized

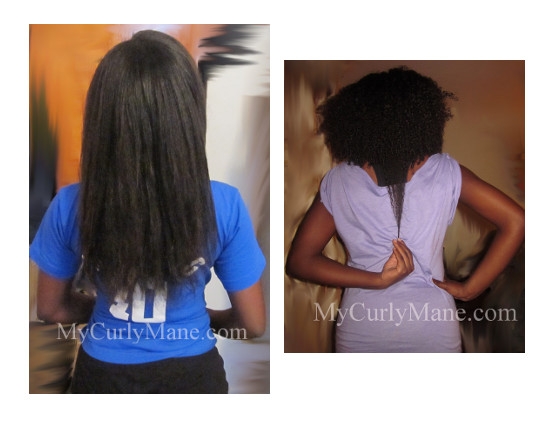
On the left: My curly mane in 2009/2010. Note the straight piece in the front. On right: My curly mane in 2012.
You’ve done the big chop or transitioned into having natural hair. Now what? Aside from picking up a few essential tools (click here for a listing), there is one thing you should immediately do—pull out your camera and strike your best pose. It’s time to document your hair!
If you’ve read my hair story (click here for details), you’ll know that I grew out my heat damaged strands a few years ago. In doing so, I placed myself on a no flat iron diet (my curls were scrawny enough!) and cut off several inches of damaged ends. I also spent a lot of time looking at my curly mane. No, it wasn’t a “fairest of them all” moment. I was adjusting to seeing myself without straight tresses and analyzing my curls. I could see the front and sides, but I couldn’t see the back of my head. Plus, I wanted to see my hair as other people saw it, so I picked up a camera.
Documenting your hair journey through photos or videos is one of the most important things that you can do. It can help you to:
- Remember the products that worked for you. I hope that you don’t go down the deep, dark path that is product junkism (guilty, hangs head in shame). Should you make that wrong turn, your photos will help you to know which products are winners and which can join the collection under your bathroom sink.
- Nail down a routine. As you try new styles and products, you may lose track of what’s actually working for you. Your photos/video will serve as a guide towards establishing healthy hair habits and lock down the right products and techniques for you.

- Obtain a true view. It’s one thing to look in a mirror and completely another to see your hair on camera and/or animated on film. With a record, you’ll know how your curls stack up against itself through different seasons and over periods of time.
- Monitor health and identify setbacks. Before the summer, I spent several months straightening my hair … Yes, I relapsed a bit (guilty, hangs head in shame … again). As a result, I had to trim a few inches of split and knotted ends. By looking at my pics, I can see how excessive straightening dried out my hair and prevented me from gaining my desired length (see attached photo). Now I can adjust my routine as needed.
- Stay motivated. If it weren’t for taking photos, I would believe that my hair hasn’t progressed much over the past 3 years. Fortunately, this blog has forced me to revisit my collection of images. Gone are the highlights I once had (When did they grow out?), and hello length! For the longest time, I’ve been doing the dance between feeling as if my hair is growing (I’m on a quest for length) and completely writing it off as stubbornly fixed at another length. Seeing these improvements, I know how far I’ve come and how close I can be to my hair goal—waist length tresses (crossing fingers)!
On left: My curly mane in May 2012, with ragged ends. On right: My curly mane with fresh ends in July 2012.
With commuting, work, family, school, and hopefully play, our lives are full. You may believe that this leaves little room for photo shoots. I completely understand. Please understand that you don’t need to devote a lot of time to this, especially if you are taking photos for your own safekeeping.
When trying a new product or ’do, take a quick snap or two from your camera/camera phone. That’s all you need. You don’t even need to face the camera, as the focus is on your hair … unless you want to ham it up, of course!
Capture the moment now and reflect on them later. Who knows, like our fave bloggers and vloggers, your documentary may inspire someone else. At the very least, it will allow you to monitor the evolution of your curly mane.
Are you chronicling your curls? If so, in what form?


Recent Comments