It’s been a long while, but I’ve finally put together this video tutorial! My wash and go routine remains the same, and the consistency has proven positive for my curly mane. You’ll notice that I still use my go-to products but feel free to swap them out as needed to work with your hair. I hope this helps your curly mane. Got questions? As always, drop your q’s down below. Want to see more videos, please subscribe to my YouTube channel.
You probably have noticed that I’ve been doing some research on the science behind our natural hair.
You say: Luuuuccy, you’ve got some ‘splaining to do!
I say (throws hands in the air): But Riiiicky, let me explain!
In case that all went over your head, you gotta catch at least one episode of I Love Lucy–throwback!
Back to my point. I basically wanted to nail down and discuss (in an easily digestible way) some of the key items that affect our hair. This includes all the things that I skipped learning about while I was also learning to embrace my natural hair … for the second time!
Yes, you got that right. A few years ago, I decided to embrace my curly hair (during round two, following straightening addiction), but I overlooked some important elements becaaaause … weeeelllll … there was all this talk about all sorts of scientificy stuff. Ain’t nobody got time for that (folds hands at chest)! Well, at least that’s what I initially thought until I realized that it was taking forrrreeevvvver for my hair to grow! I decided that it couldn’t hurt to do some hair homework.
Between that time and now, I’ve gathered some information, which has been included in my new free, e-book (shameless plug). One of those topics that you need to know about is discussed below–humectants. In case you’re not quite sure how these suckers work, I’ve broken it down for you below. Have no fear, Super Nay is here! 😉 Read more after the jump.
Super Nay (the heroine in my head, ha!). Art by Nay, inspired by Wonder Woman.
What Are Humectants?
Humectants are ingredients and/or products that promote moisture retention. I won’t delve too deeply into compounds and molecules. Just know that these items have a chemical structure that attracts water from the atmosphere and binds it to the molecule. In other words, humectants are attracted to moisture, whether it is in your hair or in the atmosphere, but they work best in moderate climates.
What’s The Impact of High Humidity?
When it is highly humid outside, there is a large amount of water vapor in the air. Dry and damaged hair that is free of products aka porous, thirsty tresses (read more about porosity for detailed information) will naturally seek to absorb the moisture in the air. However, taking in such a large amount of moisture will make your hair full … to the point of swelling and lifting the cuticle layer (the outer layer of hair). This will create frizzy and tangled hair.
Now, if you have a humectant in your thirsty tresses, this will only exasperate the problem. Your hair will become soggy, sticky, and poofy all at once! Recalling a few instances?
What’s The Impact of Low Humidity?
When the humidity is minimal, as seen on most dry, winter days, there isn’t a lot of moisture in the air. If your hair is styled with a product that contains humectants, these items will either:
Hang onto the moisture in your hair and prevent it from evaporating. This may or may not prove to be successful. Your best bet is to stick with moisturizing products, like leave-in conditioners.
Remove moisture from your hair’s cortex and send it into the air. Remember that thing about attraction? Your hair will do this because it so kindly believes that the air needs the moisture, of course. Unfortunately, this will also dry out your hair.
What Are Some Examples of Humectants?
Before you use any product, you should read the ingredients to see whether or not humectants are included. This will help you to better prep your hair for the current humidity levels. In other words, you’ll say “aha!” whenever your hair decides to rise up and become a frizzilicious ball on your head.
Just so you have a heads up, here are a few popular humectants found in hair care products:
Agave Nectar
Aloe Vera Gel
Fructose
Glycerin
Honey
Hydrolyzed silk protein
Panthenol
Now that you’ve got it down, are you ready to take on humidity with humectants? Wham! Bang! Zing!
The best protection any woman can have… is courage.” ~Elizabeth Cady Stanton
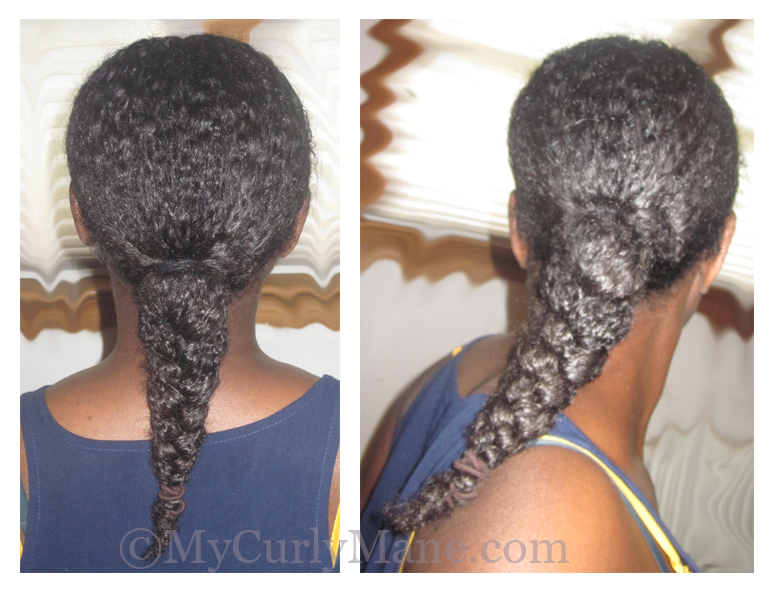
My curly mane in a perpetual ponytail!
For the past few months, I have been basking in the yummy warmth that summer presents. You could easily find me stretched out (in a quiet, bug free zone!), with my arms and legs extended wide. When my eyes are closed, a simple smile spreads across my face in the utter delight that the good Lord has given me light … literally!
I lay there lingering while the sun’s rays penetrate my bones. I feel my toes, legs, arms, and face grow warm. I freely surrender to the sun, and listen closely to the sound of my body inhaling and exhaling.
I thank God, the father, son, holy spirit, Allah, universe, and all for the summer and these utter sweet moments. To put it simply, I. Love. Summer.
However, somewhere in all that basking and sun worshiping, I lost my mojo! Yes, I went through a hair funk from May through June. I just couldn’t lift a finger to do another twist, rake and smooth another product through my hair, or experiment with more than a handful of products. Sorry, I know I slow rolled and let you down (hangs head in shame). You see, I just went through an easy, breezy period where I was beyond wash and go’s. I wanted to pull it back into a pony, braid the length, smooth the hairline with gel, and go-go-gadget! Aaaand that’s just what I did.
When I initially made the switch, I had a lot of people taking double takes. My own mother even asked (somewhat sadly), “Where’d all the hair go?” Now if you’re familiar with natural hair, you’ll know that it shrinks and reduces volume in its curly state. That’s what happened to me. When I turned around, I revealed my braid … and relieved my mother’s worries.
While snatching and gelling my hair into a pony, it encouraged me to explore the wonderful world of makeup, since the focus was already on me serving face. I enjoyed it, but I have to admit, come July, I wanted my curls back. I returned to wash and go’s, and recently, I’ve been sporting braid-outs.
I really do believe that the time I spent wearing my hair in a ponytail really helped my hair, namely because it is a protective style. It kept my hair and ends protected since they were neatly tucked into a braid and secured from friction and tugging. By the time I was ready to release the kraken, my curly mane was all sorts of popping and curling thanks to aloe vera gel (AVG).
To recap, here’s a quick and dirty breakdown of my summer routine, thus far. Oh, and by the way … drum roll! I think I may have reached waist length! Okay, okay, a few strands are hitting my waist, but the majority is at under boob length. I know you can’t tell by these pics. Ah, natural hair! When the weather cools, I’ll straighten it and share my length check to give you an accurate account. Here’s my routine so far:
May and June = braided ponytail with As I Am leave-in conditioner and hair slicked down with aloe vera gel
July = wash and go with aloe vera gel (I gave Eco Styler Gel a pause since AVG was working so well with As I Am)
August = braid-outs with As I Am’s Twist Defining Cream. Review to come!
Ponytail protective styling with aloe vera gel
Have you been feeling experimental this summer, or have you simplified your routine? Caught in a rut? Spill the beans below!
May it be a light to you in dark places, when all other lights go out.”
~ J.R.R. Tolkien, The Fellowship of the Ring
Washing my curly mane in the sink. No, don’t use the dish washing liquid shown! 🙂
Before she even arrived, Hurricane Sandy was called the perfect storm. Perhaps this is because she was perfectly disastrous. On the east coast, Miss Sandy uprooted many trees, destroyed homes, cars, streets, and left many without electricity, including myself. Our lifestyle definitely went back to basics. With work still a possibility the next day, I needed to have my hair somewhat presentable in the event that I was called into the office. This required a much needed washing of my hair … without hot water!
Those of us with easy access to clean, hot water are veeerrrry lucky. I remember my first experience as a child visiting family in Jamaica and experiencing the culture shock … of my own culture! At that time many places in Jamaica did not have hot water running through the pipes. Today, here in the states, Sandy has contaminated water supplies and left many without access to power and ultimately clean, warm water. I extend my prayers to all whom have been affected by this travesty.
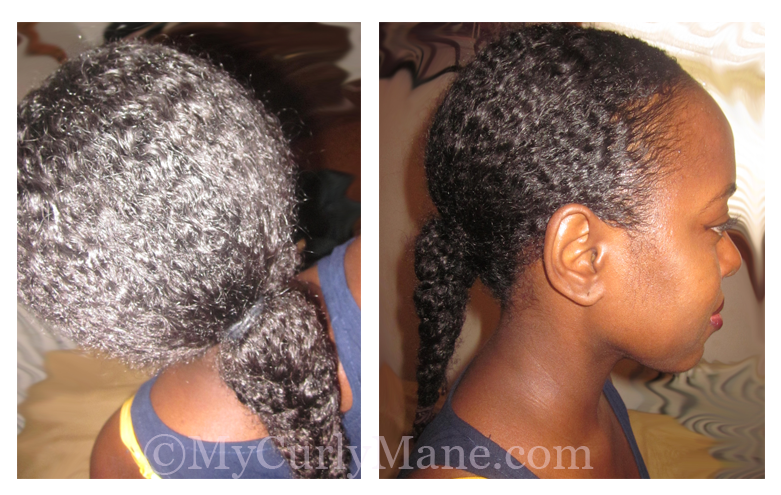
First day results of a braid-out with aloe vera gel.
In the sake of actual necessity and much needed levity, let me share some hair care tips in the event that you’re left without warm water and for some reason or another need to wash your hair. This is simple and maybe common sense, but sometimes, you’re thrown off when comforts are removed. We’re gonna take this back Little House on the Prairie-style! 😉
Tools:
Kettle
Large Pot
Sink or Bathtub (to wash hair in)
Water (seriously, you’ll need this)
Gas/electric or solely gas burning stove (seriously!)
Preferred Moisturizing Shampoo – skip if you’re doing the conditioner only/Curly Girl Method. I used Crème of Nature Argan Oil Moisture and Shine Shampoo.
Preferred Conditioner – My staple is Herbal Essences Hello Hydration Moisturizing Conditioner.
Steps:
Pre-poo – Before washing my hair, I applied conditioner onto it, since I recently straightened my curly mane and wanted to restore its moisture balance. You can do this too if you simply want to ensure that your shampoo doesn’t completely strip your hair from oils. I left the conditioner in for about 10 minutes.
Heat water in a kettle – Gauge the amount based on your curly mane’s needs.
Place large pot aside, where you can easily grab and use it. You will pour water from the pot onto your hair—not straight from the kettle! Hey, some curlies need a slower pace and heads up. I’m not mad at you!
Transfer some of the heated water into your pot. You’ll want to leave some water for additional rinsing of your hair.
Shampoo hair in a sink or bathtub.
Add cold water to the pot with hot water. The temperature should be comfortable for pouring onto your hair.
Pour warmed water from the pot onto your hair.
Condition your hair.
Transfer more hot water from kettle to the pot and add cold water.
Pour warmed water from the pot onto your hair.
Second day results of re-braided hair using Beautiful Textures Moisture Butter
Work in this manner (combining water from the kettle and cold water from your sink into the pot) until your hair is clarified. Simple!
Styling:
You can proceed with a wash and go. However, I knew that I wouldn’t be able to stretch and style my hair using a blow dryer (no electricity), as I typically do. If you have time on your hands, here’s what you can do—Braid-outs!
Check out my post on how to get stretched results with Fruit of the Earth 100% Aloe Vera Gel. Of course, you’ll have to skip the steps in which a blow dryer is used. I used aloe vera gel on the first day and Beautiful Textures Moisture Butter Whipped Curl Creme to re-braid my hair on the second day. Details on this butter will be shared in an upcoming post.
I re-braided my hair at night until our hot water returned, saving water and electricity, while gaining time needed to tend to my family. That’s it! Simple lifestyle, easy hair care, many blessings.
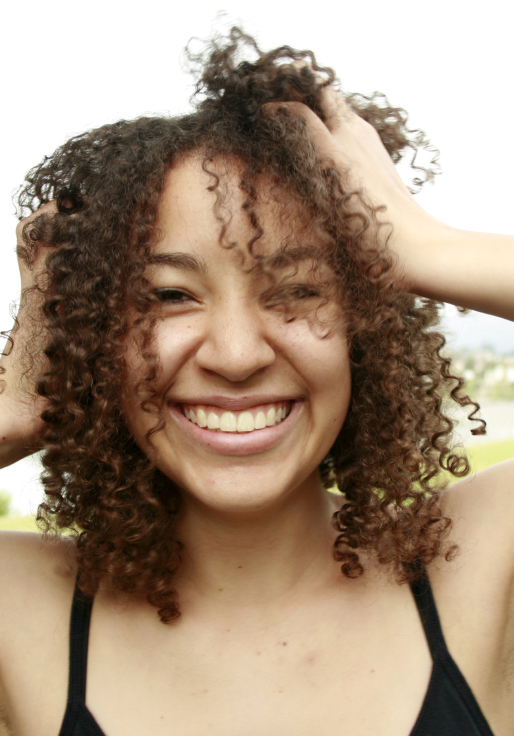
Pop! Bounce! Sway! That’s the sound of my tresses doing their dance the minute they’re caressed by Beautiful Textures Tangle Taming Leave-in Conditioner. I have used this leave-in consistently for the last month, and … I am a fan of this product! Attention! Attention! Here lies a product that actually lives up to its promise. Yes, curlies. We have lift-off.
Here’s the rundown. A few months ago, I discovered Beautiful Textures on a trip to one of my go-to beauty supply stores (BBS). I entered the store with the intention of purchasing my previous staple, Silicon Mix’s Leave-in Conditioner. I turned the corner toward the Dominican section. You know the aisle with Lacio Lacio, La Bomba, and the other major Dominican players?
Well, on my way towards that area, I heard audio coming from another aisle. I walked over and was nearly blinded by a sea of bright yellow and orange. The colorful packaging of Beautiful Textures’ entire product line was on display, accompanied by a looping video of apparent biracial women swinging their pretty curly manes (some curls looked much better than the others that were featured).
Why biracial babes? Beautiful Textures is marketed as being “for mixed textures,” which made me pause and question if any of the products would work for tighter textures like my own. I also questioned the quality of the packaging and some of the model’s hair, but that lasted for a minute, as my curiosity and product junkism reared its ugly head again. Within a few seconds of scanning the product line, I swiped the Tangle Taming Leave-in Conditioner (approximately $6), Curl Control Defining Pudding, and Moisture Butter Whipped Curl Créme—all of which I will review just for you!
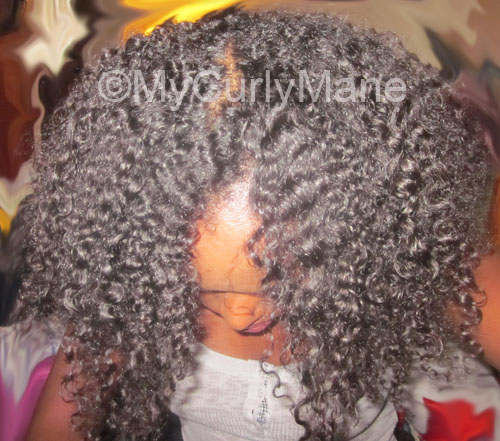
A preview of my hair with Beautiful Textures Tangle Taming Leave-in Conditioner and Beautiful Textures Moisture Butter Whipped Curl Creme. Read my review of this butter.
Let’s begin today by focusing on the Tangle Taming Leave-in Conditioner. I’m still surprised to admit that I’m hooked on this bad boy! Yes, I have fallen hard, but I don’t want to be too hasty! I’ve got to let the love affair take its steady course. 😉
Beautiful Textures Tangle Taming Leave-in Conditioner has a thick, creamy consistency, so gauge your application according to your strands. I apply a generous amount to my freshly washed hair, basking in its fruity scent. Not to worry. The smell isn’t overpowering, at least not for me. If it does bother you, take comfort in the fact that it doesn’t linger for long.
The minute the cream touches my hair, it melts into it. I instantly notice a difference. My strands curl and spring into place, easily becoming defined. This isn’t a chemical reaction. Rather, it’s my hair soaking up the yummy goodness that the leave-in provides. The slippage this product gives is amazing. It allows me to easily separate my curls for finger combing and styling. It also works well with my stylers (aloe vera gel included), possibly even enhancing them.
While the distribution is impressive, this tangle tamer clearly nourishes my tresses from the inside out. After using it, my hair is much softer and moisturized compared to other products. In case you don’t already know, naturally curly hair thrives with moisture. Without it, you’ll quickly spiral into the land of hair breakage.
This product is jam packed with oils upon oils as well as aloe vera gel, which my hair loves. Other ingredients include: Aqua, Olea Europaea Fruit Oil/Olive Oil, Argania Spinosa Nut Oil/Argan Oil, Glycine Soja Oil/Soybean Oil, Cocos Nucifera Oil/Coconut Oil, Butyrospermum Parkii Fruit/Shea Butter, Mangifera Indica Seed Butter/Mango Butter, Rosmarinus Officinalis Leaf Extract/Rosemary Extract, Aloe Barbadensis Leaf Extract/Aloe Vera, Dimethicone, Panax Ginseng Root Extract/ Ginseng Extract, Polyquaternium 37, Propylene Glycol Dicaprylate/Dicaprate, Hydrogenated Vegetable Oil, Glycerin, DMDM Hydantoin, Cetearyl Alcohol, Ceteareth 20, Polysorbate 20, Propylene Glycol, Imidazolidinyl Urea, Phenyl Trimethicone, CI 15985/Yellow 6, Parfum/Fragrance, Benzyl Benzoate, Benzyl Salicylate, Coumarin, d-Limonene, Hexyl Cinnamal, Lyral, Methyl Ionone Gamma. It is free from: paraben and protein.
Beautiful Textures’ product line, as seen at my local beauty supply store. Can you spot the sea of orange, yellow, and blue?
Pull the brakes! If your hair hates oils and aloe vera, sadly, this one may be a no go for you. Stick with whatever product your hair likes best and ignore me … well, just this once! LOL!
I really do hope that someday there will be one miracle product that fits all curlies, and we can skip along together, curls bouncing along into the sunset. Of course, that would mean that all of our curly manes would be the same, and what a boring world that would be!
Beautiful Textures has finally launched its Web site. You can learn more about the product line and catch those videos that piqued some of my interest by visiting: http://www.beautifultextures.com