by Nay | Apr 9, 2016 | Nay's Curly Mane
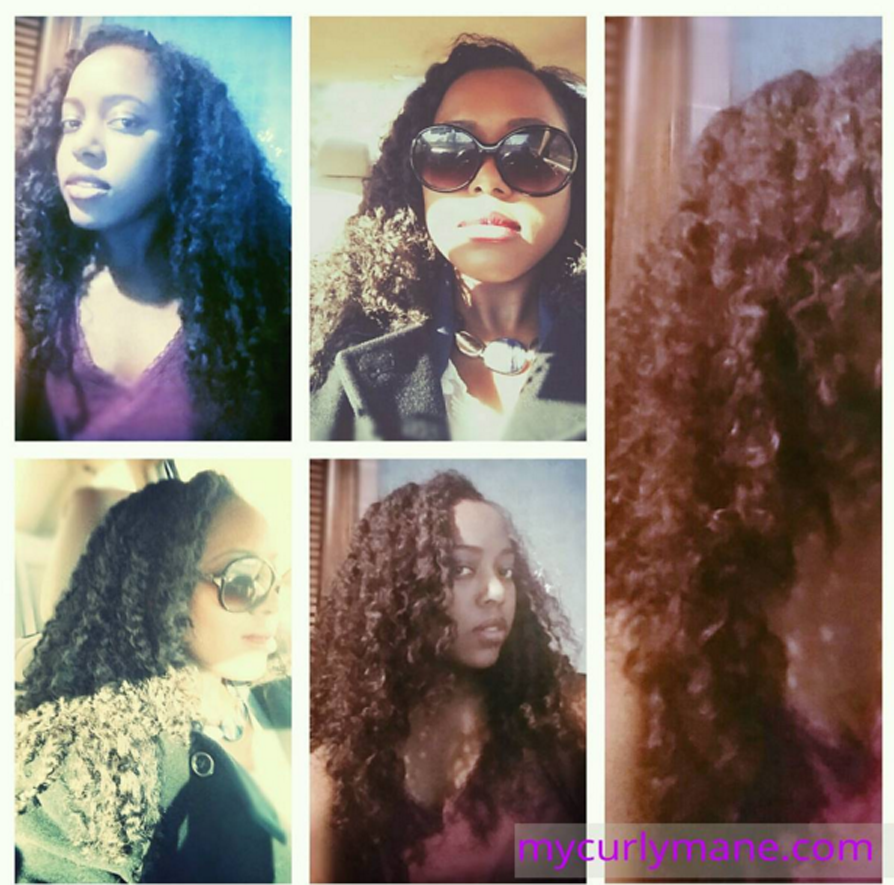
Yes, it’s been a minute, but guess what? I’ve recently returned to chronicling my hair … on Instagram! See above. Fortunately, My Curly Mane has been retaining lengths, with rapid growth in the last 6 months. Woot woot! I’ve been rattling my head as to what changes have taken place (a lot in life!). My investigation leads me to believe that it’s a combo of my body changing, shifts in my diet (not necessarily for the better, gulp), and … soft water! Yeeeeaaaaas!
If you check out my older post, I go on and on about the damaging effects of hard water on hair. Well, I recently moved and fortunately have much softer water in my new home. How did I notice this? Well, my cleansers work 10xs better, and I see waaaaay less hair in the shower after washing. I’m still in shock and awe over how much this affects my products’ performance. I now need to use less product and experience fewer build up. It’s no wonder that one product can have such varying effects on people’s hair.
Hair typing aside, it also has to do with molecular, scientific-y stuff (wasn’t about to throw on my lab coat and break it down today!). On a serious note, you should revisit that post if you’re interested in softening your water system. Believe me. It really does make a difference. I can only image my hair length today had I had softer water in years past.
If you’re not into being social on social (ha, ha!), no need to worry. I’ll still drop some updates here as well as in my emails. Have you signed up for notifications yet and gotten your free e-book? It’s jam packed with helpful tips. Yes, for free! More tips that you can use as well as deets on my hair changes and goals are coming soon.
Shifting gears again: As much as I love the look of this site (my baby), I’m thinking about updating it’s look. Is it time for My Curly Mane to have a makeover? You decided. Chime in below! Oh, and don’t forget to follow me on Instagram.
by Nay | Aug 21, 2013 | Uncategorized
The best protection any woman can have… is courage.” ~Elizabeth Cady Stanton
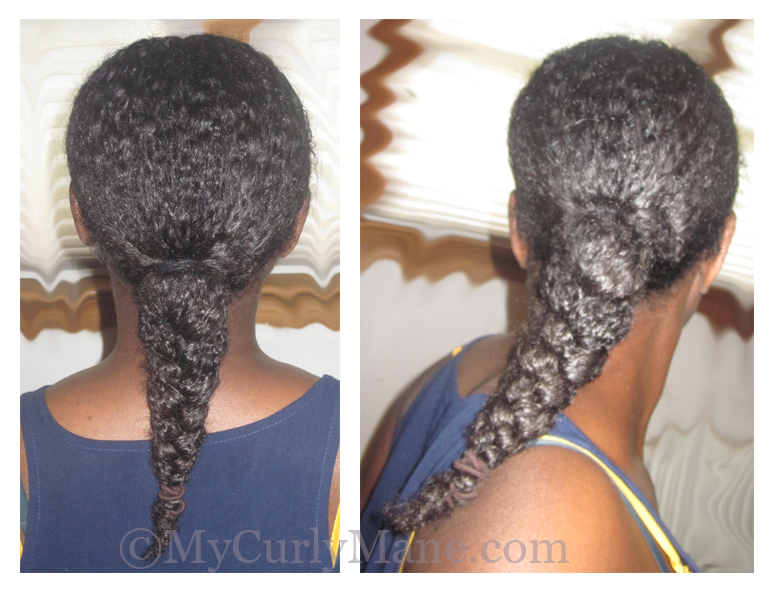
My curly mane in a perpetual ponytail!
For the past few months, I have been basking in the yummy warmth that summer presents. You could easily find me stretched out (in a quiet, bug free zone!), with my arms and legs extended wide. When my eyes are closed, a simple smile spreads across my face in the utter delight that the good Lord has given me light … literally!
I lay there lingering while the sun’s rays penetrate my bones. I feel my toes, legs, arms, and face grow warm. I freely surrender to the sun, and listen closely to the sound of my body inhaling and exhaling.
I thank God, the father, son, holy spirit, Allah, universe, and all for the summer and these utter sweet moments. To put it simply, I. Love. Summer.
However, somewhere in all that basking and sun worshiping, I lost my mojo! Yes, I went through a hair funk from May through June. I just couldn’t lift a finger to do another twist, rake and smooth another product through my hair, or experiment with more than a handful of products. Sorry, I know I slow rolled and let you down (hangs head in shame). You see, I just went through an easy, breezy period where I was beyond wash and go’s. I wanted to pull it back into a pony, braid the length, smooth the hairline with gel, and go-go-gadget! Aaaand that’s just what I did.
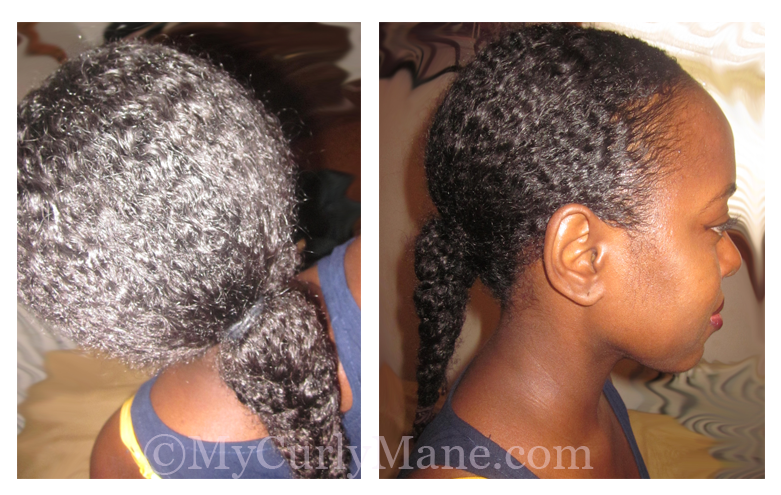
When I initially made the switch, I had a lot of people taking double takes. My own mother even asked (somewhat sadly), “Where’d all the hair go?” Now if you’re familiar with natural hair, you’ll know that it shrinks and reduces volume in its curly state. That’s what happened to me. When I turned around, I revealed my braid … and relieved my mother’s worries.
While snatching and gelling my hair into a pony, it encouraged me to explore the wonderful world of makeup, since the focus was already on me serving face. I enjoyed it, but I have to admit, come July, I wanted my curls back. I returned to wash and go’s, and recently, I’ve been sporting braid-outs.
I really do believe that the time I spent wearing my hair in a ponytail really helped my hair, namely because it is a protective style. It kept my hair and ends protected since they were neatly tucked into a braid and secured from friction and tugging. By the time I was ready to release the kraken, my curly mane was all sorts of popping and curling thanks to aloe vera gel (AVG).
To recap, here’s a quick and dirty breakdown of my summer routine, thus far. Oh, and by the way … drum roll! I think I may have reached waist length! Okay, okay, a few strands are hitting my waist, but the majority is at under boob length. I know you can’t tell by these pics. Ah, natural hair! When the weather cools, I’ll straighten it and share my length check to give you an accurate account. Here’s my routine so far:
- May and June = braided ponytail with As I Am leave-in conditioner and hair slicked down with aloe vera gel
- July = wash and go with aloe vera gel (I gave Eco Styler Gel a pause since AVG was working so well with As I Am)
- August = braid-outs with As I Am’s Twist Defining Cream. Review to come!
Ponytail protective styling with aloe vera gel
Have you been feeling experimental this summer, or have you simplified your routine? Caught in a rut? Spill the beans below!
by Nay | Apr 6, 2013 | Nay's Curly Mane
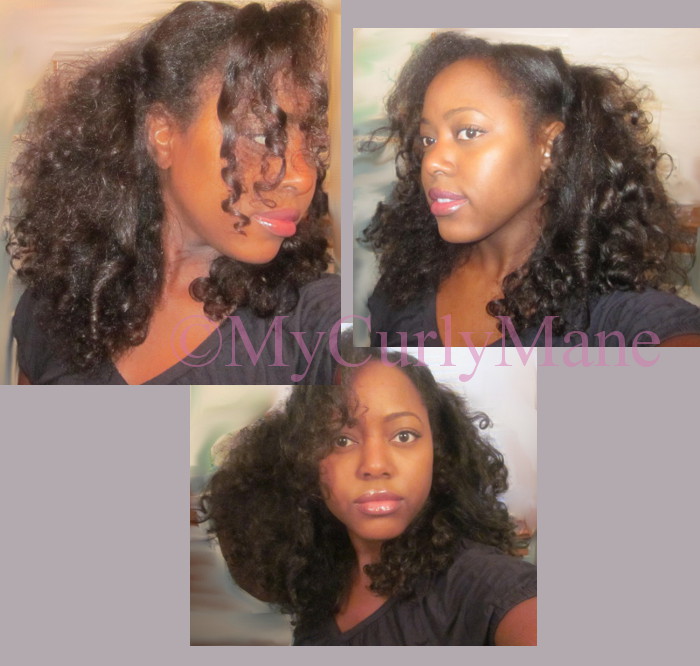
My Curly Mane in March 2013
Remember this simple mantra: If you keep your curly mane healthy, it will grow. Simple secret. End of story. You don’t necessarily need a hair whisperer or magic potions. Just keep up a consistent regiment that your hair responds well to and voila! You will see results. “Whoa, Nay! Not so easy,” you say? Continue reading.
Averages & Approximates
As I mentioned in my last hair update, hair grows approximately 0.5 inch per month. Keyword: approximately. Factor in your genetics, diet, hair routine, and hair type as additional influences on your growth rate. For tightly curly gals, moisture retention may become an issue, since it is harder for the oils from your scalp to travel down the length of your strands. Oiling your hair regularly will help to seal moisture/water into your strands. This is one of, if not the key element, that has been keeping my hair über soft and growing.
What’s Working?
- Oiling my hair daily. I’ve been doing this right before bed or in the morning on 2nd, 3rd, and even 4th-day hair styled in a wash-and-go.
- Regular wash-and-go styling. Occasionally, I mix it up with braid-outs. The frequent exposure to water/moisture and sealing with oils and conditioner is working well for my hair.
- Minimal straightening. In fact, the only time I’ve straightened my hair is to do this length check. The last time I did so was during my previous check in November. This has prevented me from experiencing heat damage, particularly with the use of a Maxiglide/Sonicglide.
- A generous amount of leave-in conditioner. This is always used on wash days and applied under my hair gel. In case you missed it, check out my 10 steps for a wash-and-go.
How Do I Know It’s Working?
I’ve received more compliments on my hair (thank you!), noting that it looks … different. Some say that it looks fuller. Others say it must be getting longer. Well, both are true. While it is getting healthier, my hair is taking on a bigger and bouncier look.
Believe me. It was just 3 or 4 years ago when I was struggling to get my hair to do anything. I had to cut off a considerable amount of heat damaged hair, and what was left wouldn’t curl right. Not to mention, I struggled with styling the dang-on thing. Needless to say, I am overjoyed to get to this state!
Now, remember that for some reason or another, the universe is always in search of balance. Uh, huh. These generous comments have been sadly balanced by the usual back-handed compliments to naturals. Oh, yes, they’ll come swooping down on your hit parade, ready to steal your sunshine. Here’s what you can do.
When People Try To Derail Your Progress …
- Remember to think of what Jesus would do. No, really. I am serious!
- Count to 10 … and then count to 10 again … alrighty, count to 20!
- Ruuuunn!! Click here to read about more ways to avoid Negative Nancies.
Comedian Kat Williams can be controversial and over-the-top. Regardless of your opinion of him, he has a point about one thing. He says, “So what? She/he keeps talking about you and hating on you. What do you think a hater’s job is? To hate! If you have someone hating on you right now, you better think of how to get five more people hating by Christmas! You need haters to make you stronger … without haters, most people wouldn’t try to become better.” LOL! Sad but true. Your hair is fab. Don’t listen to comments that will keep you from achieving your goals … in life and on your head.
What’s Not Working?
I’m experiencing some falling hair, which of course leads to tangles and knots. I noticed that this has happened since I’ve stopped oiling my scalp and when I go beyond 4th day hair styled in a wash-and-go. Using a Tangle Teezer has helped to curb the knotting of shed hair so far, which makes me believe that my hair just needs to be clarified of shed hair more often.
Also, my scalp has been flakier than usual. This may be due to my inconsistent scalp oiling. I’m going to resume oiling and massaging my scalp to see if this has any effect on my progress.
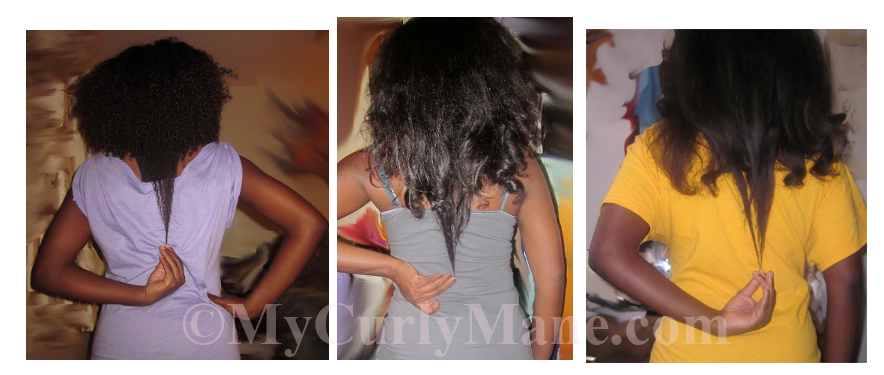
From left, My Curly Mane in May 2012, November 2012, and March 2013.
Measuring Up
When tugged on in its natural state, my curly mane reaches just past mid back length. Since it grows in layers, some areas are inching their way closer towards waist length. Yet, this go around, my straightened hair pic from November appears identical to the one in March. Optical illusion? I swear that my hair is growing! I won’t obsess. I won’t obsess! Instead, I’m giving it another three months and then I’ll see how my curly mane measures up.
Look at the photo above and note my progress. The growth is better seen when the duration between length checks is longer. Basically, hair needs time to grow. My next check will be in another 3 months. Let’s see if I can get a little closer to waist length by then.
Which one of the following describes you?
- On a mission for health/length
- Rocking strong with a short cut
Shout it out below!
by Nay | Nov 17, 2012 | Life Lessons, Mane Styles, Tips, Uncategorized
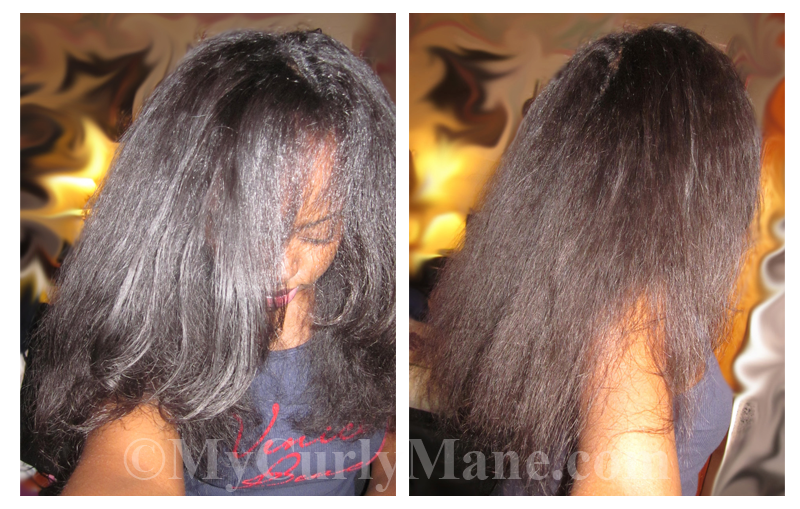
My natural hair was straightened and curled. This look lasts for 3-5 days (for my mane).
Attention dear friends. Recently I celebrated my birthday! Yes, curlies. My curly mane and I are literally older … and hopefully wiser! To celebrate this milestone (no, I won’t reveal the numbers as yet … gulp!), I straightened my mane! Believe it or not; I actually departed from curls to sport straightened locks. First, I wanted to mix it up for a few, celebratory days. Second, I wanted to conduct a length check.
You see. For about a year, I swore that my hair wasn’t budging past near mid-back/bra-strap length, but I now know that my hair needs less direct heat aka flat ironing in order for it to thrive. At the start of the summer, I made a commitment to reduce the amount of time in which I’d straighten my hair and experiment more with my natural hair. In doing so, my hair has gotten even healthier than before and longer!
That being said, it was time to straighten my hair the safer way—roller settting and then lightly flat ironing. Here are a few steps (as well as grown lady tips!) in which you can follow to capture this look.
Tools:
- Clarifying or Moisturizing Shampoo
- Conditioner
- Leave-in conditioner (I use Silicon Mix Intensive Leave in Hair Shine and Conditioner since the silicones it contains help to trap moisture into the hair and prevent frizz )
- Oil (I love my Vatika Oil mix)
- Regular tooth comb (not wide or fine, just right and easy to use)
- Snap-on, hard, magnetic rollers aka rolos 🙂 You can also use flexi rods if this is easier.
- Soft rollers covered in satin
- Spray Bottle (fill with water)
- Hard hat dryer (I have a Pibbs but Belson Elite Ionic Tourmaline Rollabout Dryer works well)
- Setting lotion = optional. I don’t use it, but if you want more hold then use this.
- Heat protectant spray (always recommended, but I tend to skip this in favor of an oil or butter)
- Flat iron (I use a Maxiglide)

Tools of the trade and steps needed in order to roller set natural hair.
Steps
- Start with a clean slate. Wash and condition your curly mane as you normally do. I like to clarify my hair, so it is completely clear of other products, particularly those that work with my natural curls but not with straight tresses.
- Apply leave-in conditioner. I tend to add a lot of product to the ends of my hair, since I will be using a flat iron, and I don’t want to dry out my ends. Calling all bandits! Split ends will rob you of length retention.
- Keep hard rollers (for drying under the hard hat) at your side, and section your hair from the back to the front of your head. Create sections at the appropriate size of each hard roller. If your section is too large for the roller, your hair will take much longer to dry.
- Comb out each section of hair, spritz to keep it moist, and roll it with a roller. Apply tension to your hair as you roll, so your hair is as straight as possible. If you want more hold, spritz setting lotion onto the hair as you roll it. Warning: I am absolutely the worst at roller setting! If you’re in this club, it’s okay. You want to focus on getting the hair smooth and simply roll it as close to the scalp as possible. When you flat iron, it will work out the kinks. I also do not create neat rows. I haven’t gotten this down, so I roll my hair in the same sections I use for braid outs.
- After roller setting your entire head of hair, sit under a hard hat dryer for at least 30 minutes. Please gauge this according to your hair length and drying needs. Your hair must be completely dry to avoid frizz.
- Undo your rollers. You’ll notice that your roots may still be poofy. Ah, our curly manes win again! Once again this is okay. See my photo. My hair length may not be as kinky curly as it was originally, but my roots are still poofy. Once again, no need to fret.
- Apply oil all over your hair. This works as a heat protectant and adds sheen.
- Dust off your flat iron. My Maxiglide felt a little foreign in my hands. It took me a minute to remember how to use it! Anyhoo, grab your flat iron and straightened your hair, working in small sections from the back to the front of your head. I apply a minimal amount of heat needed to straighten it. I also like to bump (curl) the ends for body.

That’s it! You now have straight hair!
Optional: Do you want beachy, bouncy curls? If so, as you flat iron each section, roll it with a soft, satin roller. Leave the soft rollers in your hair for at least an hour. When removed, you will have large, curls and waves.
Runway Styling & Nighttime Maintenance
While I like to have straight hair for the first day. Each day afterwards, I like to rock that Victoria’s Secret-esk, beachy look. Lol! This protects my ends and doesn’t require flat irons to maintain the look. To capture this look, I begin by oiling my entire hair, particularly the ends, each night. Afterwards, I use the soft, satin rollers to roll my hair. I apply a satin cap over the rollers for extra protection and to keep the positioning of the rollers. Off to bed you go! In the morning, remove all and voilá! Repeat each night for a hot look and simple, safe upkeep.

On the first day, my straightened mane easily reverted (on right). This tends to happen when natural hair hasn’t been straightened for a while. I applied a minimal amount of heat that night and roller set my hair with soft, satin rollers.
Grown Lady Lessons
As I mentioned prior, the clock is ticking and tocking. Sigh. You may have guessed it. I am one of those gals who hit a birthday and had a bit of the blues followed by the highs of all the lessons learned. I am blessed to blow out another candle, and in doing so, want to share a few lessons with you. As always, each one teach one.
On Hair (of course!) …
- Slow and steady wins the race. Chances are you will not figure out your hair overnight … and that’s okay! I’m still discovering my hair’s capabilities.
- The best manes are the result of gentle care and healthy hair. These tips are underrated but produce the best results. Healthy hair that’s treated kindly will always look good.
- It’s okay to keep the same style until you master your hair and other looks. Don’t feel pressured to have the same results as other curlies. Focus on your own progress. Remember #1: slow and steady wins the race!
On Life …
- It’s okay to be different. It’s everyone else’s problem if you do not fit into a mold. Seize the opportunity to enlighten them. If they don’t get it, keep it moving!
- Not everyone will like you. Ugh! “But why?” you say. “I am so kind and God-fearing.” Sadly, even the best of us will get shunned or bullied once in our lives. I know. It isn’t right. It’s just human nature. You just have to remember to be above it. Once again, it’s their problem. Keep it moving!
- There’s nothing better than being kind to yourself. Woooah there, lioness! Go easy. Don’t put so much pressure on yourself. Even if you believe you haven’t accomplished as much as you’d like to by your age, note the many lessons learned (I hope!), adventures undertaken (even the minis), and plain ol’ fashioned growing up that you’ve done. Be kind to yourself. You deserve it. If you’ve had a b’day or you’re approaching one, happy you day to you!
by Nay | Jun 25, 2012 | Mane Styles, Tips
It’s summer time! Woo hoo!
It’s the perfect season to lay out in the sun and usher in your wash-and-go routine. There’s no better way to showcase your curls than through this technique. Not to mention, this basic, natural hairstyle for natural hair can also help some curlies maintain healthy hair and experience growth.

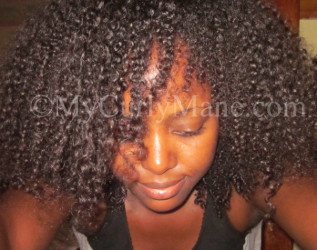
My wash and go results using Hair Rules Kinky Curling Cream
Pros:
This easy hairstyle showcases your natural texture. It creates faster hair growth (for me), keeps your scalp cool and hair clean on hot, sticky days
Cons:
Wet hair (if you air dry), single strand knots (for me, some people do not have this problem), unpredictable results based on how your hair is feeling that day or reacting to the weather, shrinkage (for me)
Please note that the steps provided below work for me. You may want to adjust these wash and go tips to suit your curly mane’s needs.
Before you begin, repeat the following:
I will respect my hair in all its states, even if this style proves to be unsuccessful. I will remain patient and pay attention to its needs, but most importantly, I will continue to love my curly mane.”
Tools:
- Spray bottle (filled with water)
- Hair clips (for sectioning, I use two clips)
- Leave-in conditioner (that works well with your styler and does not produce white balls)
- Styler aka your holding product or gel (some curlies are able to skip this). I used Hair Rules Kinky Curling Cream in these photos.
- Oil (if it works with your styler)
- Blow dryer (Turbo Blow Dryer
 )
)
- Afro Pik
 (optional)
- Diffuser (optional)
- Denman D31 or Denman D41 Volumizing Brush
 (optional)
- Fingers (just kidding!)

Blow drying my mane after washing … so I can go!
Steps:
- Wash your natural hair with a moisturizing shampoo or co-wash. If you use a product that builds up on your hair, please use a clarifying shampoo. Always follow shampoos with a moisturizing conditioner. Key word = moisture!
- Squeeze out excess water and begin working on your damp hair (don’t allow for air drying just yet). This will allow products to easily absorb into your hair shaft. Keep your trusty spray bottle at hand to rewet areas that dry faster.
- Apply a leave-in condition all over hair. Don’t forget to section your hair and smooth the product in as needed. I apply extra conditioner to my ends (to prevent split ends).
- Part hair into small sections, beginning in the back and working your way towards the front of your head. I gather together the large areas that I’m not working on by using a clip.
- Apply styler onto hair in sections, using the rake and smooth method (literally raking and smoothing products for African-American hair or afro textured hair with your fingers). Some curlies prefer to whip out a Denman brush to help their curls pop. I have had hits and misses with this brush, so it’s out of my routine for now. You can also coil stubborn strands around your finger to help achieve a defined look.
- Do not touch!!
- Use a blow dryer to dry your hair, using high heat and speed. It is recommended that you use low heat, but I increase this because my dryer is older and gives off less heat. Point the nozzle down your hair shaft (to prevent frizz) and move it around your hair. Don’t dry one spot for too long, or you will damage your hair. Use a diffuser if preferred. I don’t. For the first 6 minutes, do not touch your hair. It will create frizz. You can gently part sections or shake your head to help reach your scalp area with the dryer (and also separate curls as needed). After 6 minutes, shake hair and use dryer to reach the inner sections of your hair. It takes me approximately 10 minutes of total drying time when using Miss Jessie’s Quick Curls
 or Fantasia IC Polisher Gel. With some other products like Hair Rules Kinky Curling Cream
 , it take me 15-20 minutes. Your drying time will vary depending on your hair length and products.
- Smooth oil onto hair in sections after your hair is about 90% dry. This helps to fight frizz and also aids in de-stiffening stylers.

I like to use a tug-and-stretch method to lengthen curls.
- Blow dry for a few seconds while flipping hair about for volume (literally whipping hair back and forth). You should do this as/if it suits your desired look.
- Tug and stretch sections (about mid length) that you’d like to stretch and briefly blow dry the first 2 inches from your roots (adjust according to your hair length) for a few seconds per section to help elongate your hair. Optional: Use an afro pick to lift and stretch sections you’d like to volumize (typically the top and front of your hair). You will only need to literally pick up the first ½ inch to 1 inch of hair from roots and blow dry this area for a few seconds.
You’re now done with washing and styling. Off you go! Weeeeerk!
Find out how to preserve your curls through nighttime routines and sexy sleeping techniques.


Recent Comments