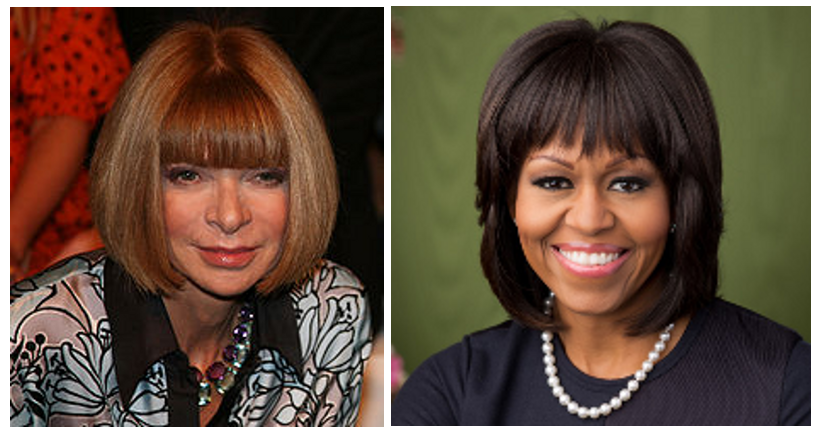
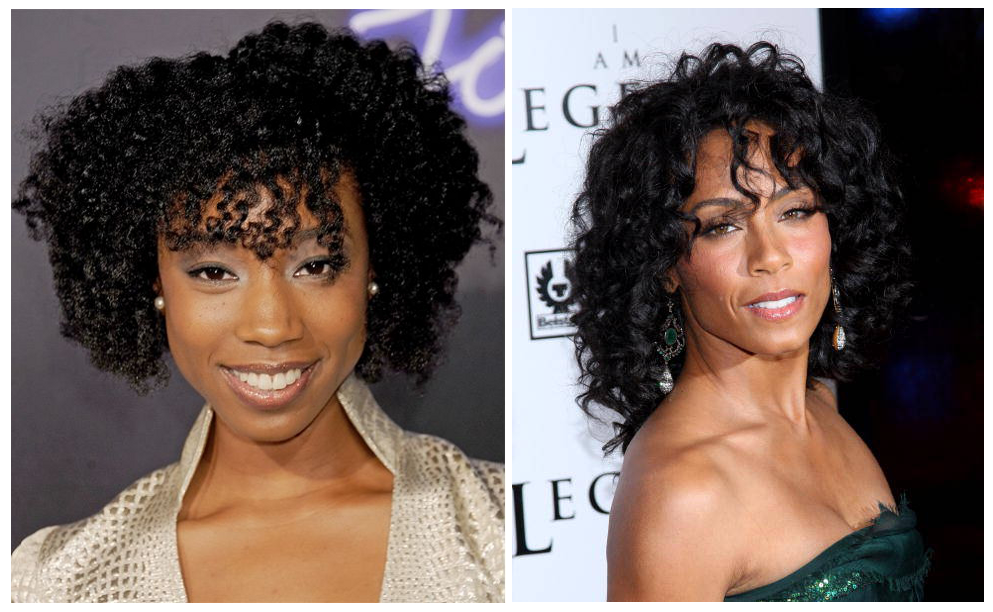
When First Lady Michelle Obama displayed her newly shorn, straight fringe a few months ago, it was like the snip heard around the world. True to its name, bangs have come, gone, and resurfaced once again. Bang! They can decorate a mean bob, as seen by Anna Wintour, legendary editor-in-chief of American Vogue. They also soften beautifully angular features, as seen in Mrs. Obama.
Anna Wintour & Michelle Obama bangs it out the ballpark.
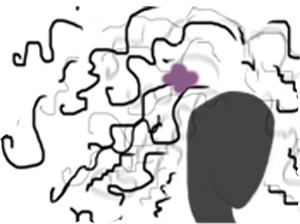
Bangs can frame just about any face shape, depending on how they’re cut. Every girl can be bangin’! Most importantly: They can be worn with a curly mane. Use them to top off a bun, twist, or pony. There are several ways that you can werk a curly bang with natural hair. Here are a few:
Natural
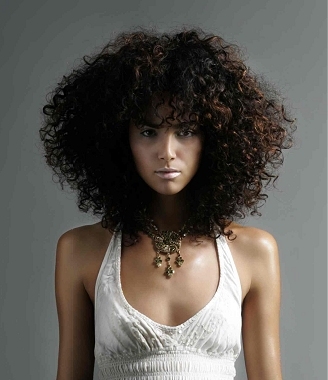
If you’re sporting a full-frontal, froey fringe, make sure that your curly mane frames your face. The fuller the look, the better. Don’t be afraid of volume! In fact, whip out an Afro pik to add some lift.
Style your afro-textured bangs as you do with the rest of your hair. I like to use my usual layering method consistent of a leave-in conditioner and gel. If your curly mane frowns on gels, use a leave-in and seal with an oil or butter. Just remember, a little frizz never hurt anybody. 🙂
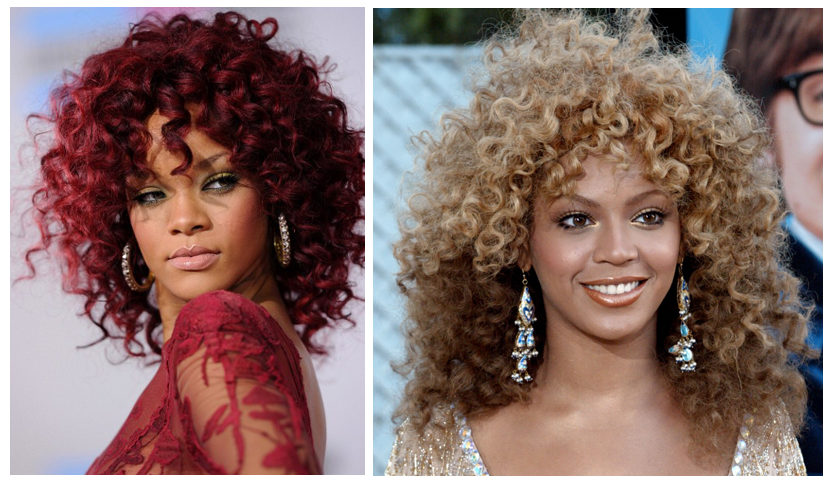
Songstresses Rihanna and Beyoncé are stunning with faux curly bangs and hair.
Defined
For a structured look, try a wet or dry braid-out or twist-out. The smaller the braids or twists, the more defined the look. Add curlers to the ends to accentuate the style.
If you’d like a looser bang, use curlers or perm rods on the entire length of your wet or dry bangs. I recommend doing both styles on wet hair that has been combed out, so you can better manipulate your natural texture and set the look.
An American Idol contestant and Jada Pinkett-Smith are spotted wearing curly bangs.
Half bangin
If you have short layers in the front or bangs that are growing out, a side part is your friend. Once again, use an Afro pik to volumize the layer or tuck/bobby pin these hair under your ear or on top of the hairs at the side of your head. Whether worn naturally or defined, a half bang still looks completely chic.
Curly Bangs by Nay. All rights reserved.
Faux Bangs
Afraid to commit to a cut? Clip-ins and extensions are the way to go for a quick change-up. Adding faux bangs can add a new spin on an old look. If you’re wearing a curly clip in, make sure that the magic hair matches your texture. Once again, make sure that the magic hair matches your own texture. This may require some manipulation of the curly clip-in/weave by cutting, braiding, twisting, or curling the hairs. Remember the goal is for it to look realistic … not like a brokedown palace!
Can’t find clip-ins that are the same as your texture? Try purchasing full-length clip-ins or weaves that are a close match. This DIY method may require some cutting, sewing, sweating, tearing (ha!), and bobby pinning of the hairs into your own. You may want to don a headband over the area where the weave meets your real hair in order to hide the transition. Want to really switch it up? Try coloring your magic hair. Now that’s bangin’!
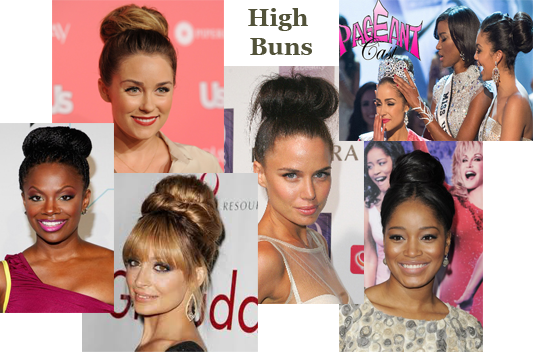
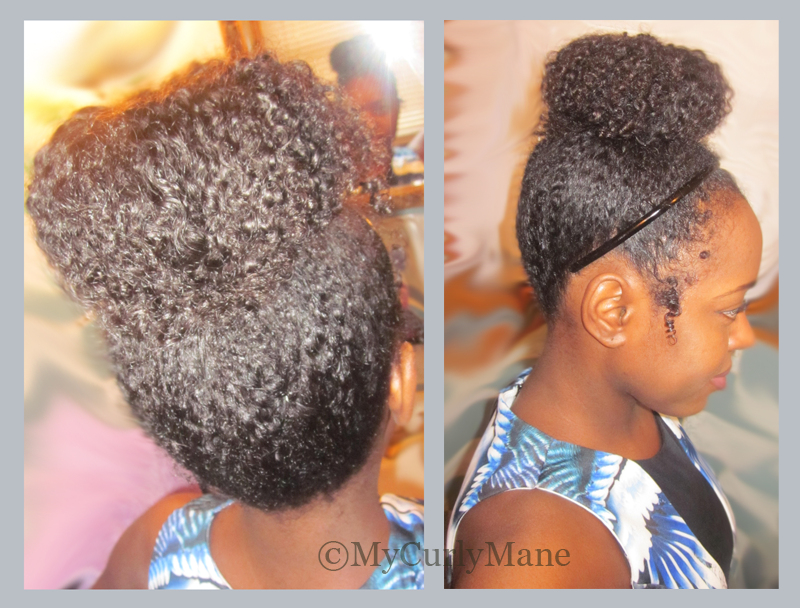
Above: Celebrities wearing high buns. Photo Credit for Miss Universe: pageantcast
No longer regulated for spinsters and schoolmarms, high buns have made a comeback! Gone are the days that buns rendered images of awkward ladies with lipstick stained teeth. From Demi Lovato to Jennifer Lopez, celeb after celebs are donning this ’do as a way to dress up their look.
Need further proof that this ballerina-esk style is #gonewiththewindfabulous? When Olivia Culpo took the stage during the Miss Universe pageant a month ago, she wore a massive, eye-catching high bun. Guess what? I noticed her bunned regality during the competition and even mentioned it on Twitter. Did you see it? Retweet if you did. Sure enough, Culpo and her high bun won the competition! If these glamour gals got it down, er, high up, then we can too!
Wearing your hair in a bun aka bunning is the perfect solution to bad hair days. It is not only chic, but it is also a protective style. It allows our ends to be carefully tucked and sheltered into our hair, freeing them from exposure to the elements. While I recognize this benefit, I used to bypass this style because it seemed too difficult for me to do. Wrong! It’s actually easy peasy. In fact, our textured tresses are perfectly suited for this look. I’ve got it down, and now I want you to get it too!
Get This Look!
The directions below are for creating a traditional bun as opposed to a top knot (more of a knot-like formation). This look is best styled on second-day, wash and go hair—perfect for those of you who can’t nail down second-day looks. You can also bun hair that’s currently in or freed from twists and braids.
Tools
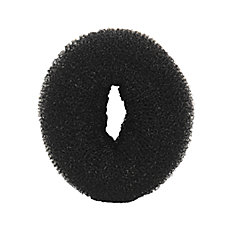
Hair Donut/Sock Bun (see pic at the right) – I visited a couple of beauty supply stores until I found the right donut, but you can make one out of an old rolled up sock or stockings. Just cut off the foot area and make sure it’s the right size for your hair length. Now you know you have at least one gym sock that’s missing its buddy. Snag it!
Rubber band without metal clasp
Bobby pins – I used about 5 long pins for securing the bun and 3 short pins for tucking in flyaways/shorter curls.
Gel – I whipped out my old trusty Eco Styler Gel.
Oil – Any will do. I used Vatika Oil.
Headband – Optional
Boar Bristle Brush – Optional
Steps
Oil hair to soften curls, particularly if it’s been previously styled with gel. This will make your hair a bit more supple.
Pull your hair to the top of your head and position it at the crown. Before you leave it there, run and face the mirror. Does this position work for your face? Look at the angles of your jawline and face shape. You may want to gather your hair a little further forward or backward. It’s up to you.
Secure your hair in its position with a rubber band. Waaaiiiit! Remember not to make it too tight. We have to watch those sensitive edges! It’s okay if your high pony isn’t perfect. In fact, a messy bun works just as nicely.
Grab your donut (purchased or make-shift) and slide your ponytail through the donut hole.
Part hair in center of your pony and wrap it around the donut. As you wrap your hair, tuck your ends under or nearly under your donut and secure it with a bobby pin. Ideally, you want to cover the donut completely. Take a 360 view of your head to ensure that your sock bun is covered.
Got short, loose curls sticking out from the back of your head? Wraps the ends around a short bobby pin and tuck it into your hair. Make sure that the pin runs vertically/semi-vertically, so it blends into your curls.
Oil fingers and smooth down frizzy strands.
For a precise bun, apply gel to the front, sides, and back of your hair—not the bun itself! You can use a boar bristle brush to assist in the finish. This will give you a smoother look.
Voila! You’re done. Now you’re serving face! Leave your hair as is or dress it up with accessories.
Bonus Tips: Dressing It Up
I have a thin, uneven hairline, which bugs me when my hair is pulled back. Solution: I use a headband to finish the look and help frame my face.
Add a bow to the back of your bun for flair.
Use faux color on your hair or just towards the ends for a highlighted bun.
Once you get this down, you’ll be able to take your own spin on it. Watch out! It’s addictive!
Are you a fan or foe of high buns? Sound off below!
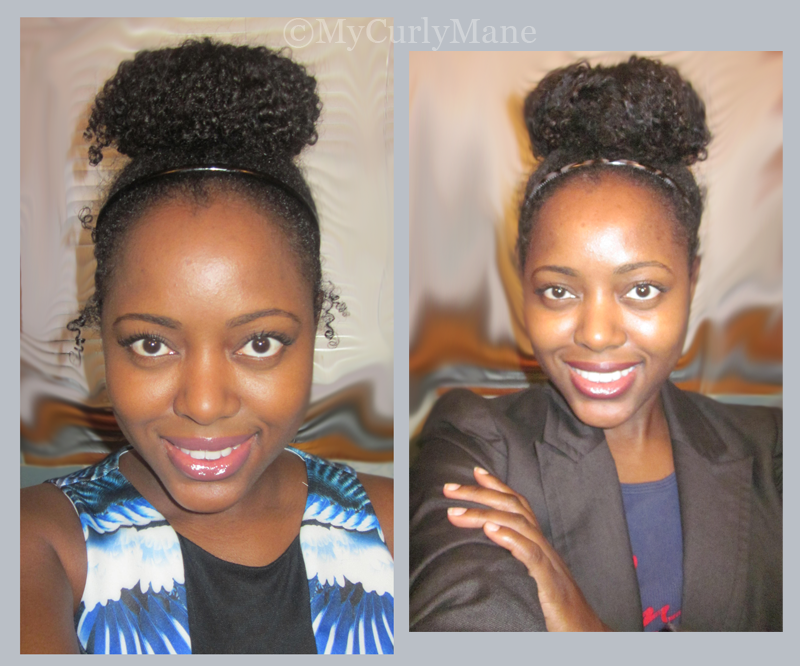
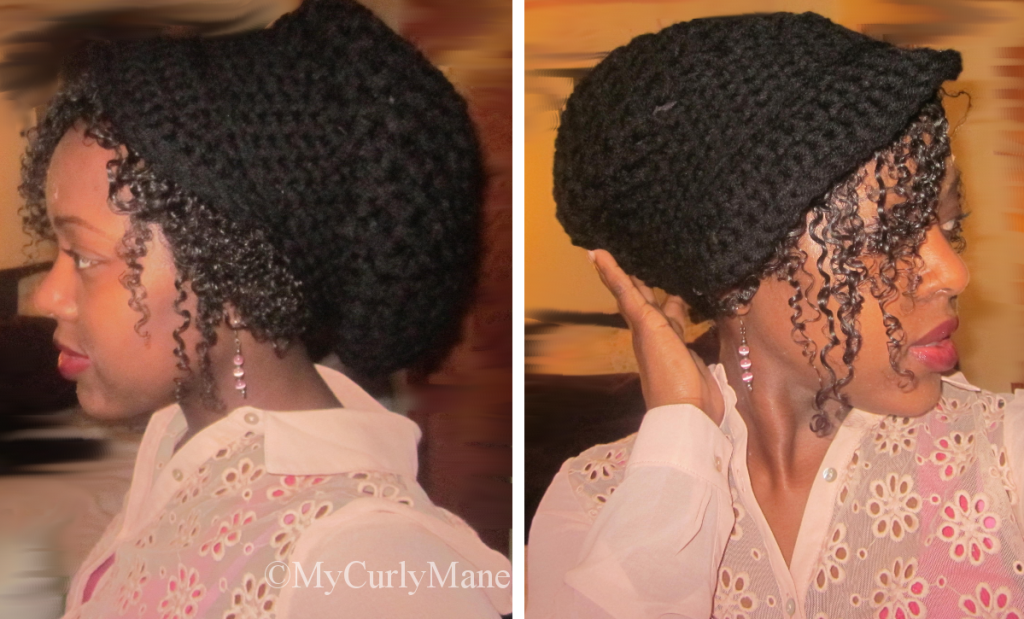
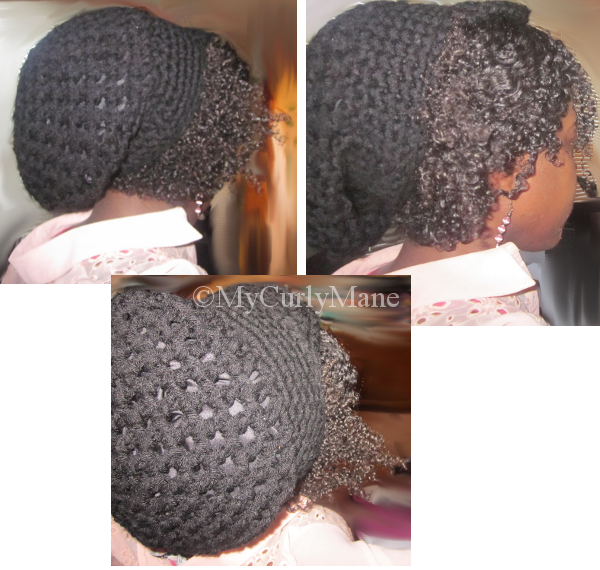
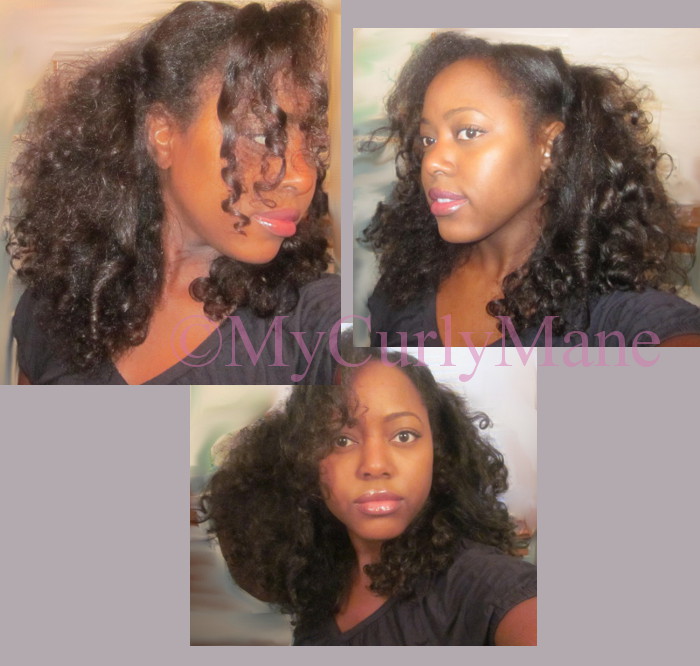
My curly mane in a Threadmill satin-lined Brimster.
I may not have mentioned this, but I’m no longer the only curly girl in my family. A few years ago, my big sister, Kay, did the big chop after struggling with constantly shedding relaxed hair. Perhaps I’ll convince her to share her journey soon!
What you should know is that Kay is still in the process of learning about her hair. She also has a different texture from me, so items that work on my hair won’t necessarily work on her hair. Believe me, I understand those of you with different hair types from my own!
Anyhoo, my sis tasked me with finding hats for natural hair, particularly ones for the winter. I was equally intrigued, since it’s tough to find fashionable hats with materials that are ‘fro friendly. I’ve typically defaulted to stuffing my hair in a satin cap before placing a separate, decorative hat on my head.Why satin? As you may have read in my post on preserving your hair overnight, satin and silk materials help to keep hair moisturized and add the necessary slip needed to glide over strands, preventing split ends.
With my task in hand, off I went on a mad hunt for a solution. This came in the form of the highly recommended Etsy’s shop, Threadmill.
Designer
Threadmill is the brainchild of Dottie Mabry. On her shop profile, Mabry describes herself as an artist (10 cool points!) and art teacher (20 cool points!) “who loves her students, and her yarn fiercely.” She writes, “I view crochet as a sculptural medium … and delight in the endless possibilities of creating wearable art in yarn.”
Shelli of hairscapades.com gave Dottie Mabry the idea to line her stylish brimsters and boho hats with satin to help preserve natural hair. I am ever grateful, as she gave a much loved Christmas present for my sis.
Selection
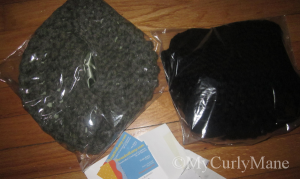
At Threadmill, you can find crocheted brimsters, beanies, hats for babies, scarves, ponchos, and more. I chose two variations of a rasta tam … like a true Jamaican gal 😉 For Kay, I got a slouchy crocheted brimless hat in soft green with a green, satin lining, as expertly recommended by Mabry. Of course, I snagged a little something for myself. I picked up a brimmed rasta tam in black with black lining. You can customize the look of both your hat and its lining’s color, so it is truly an original. Love!
Quality
Both of my purchases were created in thick, wool yarn and felt very soft. I was also surprised that they had a little weight to them. They are definitely constructed with well-made materials. I made the mistake of placing my hat in a pile of clothes … and got a single thread pulled and loosened by a hanger. Take care with how you handle your hat!
The Look
My hat’s pattern was a little more holey than Kay’s, so the lining is more noticeable up close. I like this, as I think it adds to the look. However, if you’re seeking a traditional look, select a hat with a closer woven design.
Tip: Select a loser crotched design and a contrasting colored satin lining for a creative spin.
Price
Hats range in price, with many costing approximately $30 without lining. The satin lining costs an additional $19. For my thrifty gals, you can follow my previous technique of donning your own satin-lined caps under your hats, but for ease and style, check out Threadmill’s collection.
Service
Etsy’s service was fast. I received both hats earlier than anticipated, and this was just before the holidays. Threadmill’s service also was very impressive. Both hats arrived carefully wrapped in plastic. Dottie Mabry was very accessible and oh, so kindly answered all my questions and offered suggestions for the designs. I appreciate it! Thank you!
If you decide to pick up a Threadmill hat, please let me know below. Share how you’re topping off your look this winter! UPDATED 7-5-16: After losing my beloved hat at a hospital (It disappeared real quick!). I repurchased the same hat and ordered an additional one for my sister. Her design was similar to mine but in the same grey color. We are both still happy with the look and customer service! If you decide to purchase some threads, please share your comments or pics below.
Like chestnuts roasting on an open fire, the holiday season is ablaze! I hope you are enjoying it, whether you are celebrating traditionally or just going about your days. If you have dinner plans or are heading out on the town, I’ve got holiday hairstyles for you to ring in the new year, courtesy of a few savvy YouTube vloggers. I purposely selected these on-camera mavens since their textures vary from my own and showcase natural hair’s versatility. If you’re like me, you often desire to mix up your look but need baby steps. These styles are simple, so trust me, curlie. We can do them too!
Dinner Party Looks
Our first vlogger, IamNaturallyCurious, presents a sophisticated updo. Stop right there! Don’t get overwhelmed by the final look. I was right there with you, ready to click out of the screen, until I watched this lady easily twist her hair into this classic style. Add pins, garnish, heck even left over Christmas decor, and you’re more than ready for tea with the queen. Sit back and enjoy the music!
Ms. RosieVelt takes another spin on the classic updo by working her hair into a low twisted bang and braided back. One of the best things about this look is that it doesn’t require neat parts and rolls. Instead, you can keep it loose and even a little messy, and it still looks pretty darn neat for formal or informal events.
Fun Time Style
For my ladies who really want to stand out, there’s the infamous hair bow, famously sported by Lady Gaga and Paris Hilton. Vlogger Cassandre Beccai walks us through a quick and easy tutorial. I just love, love this look! Oh, and no, I don’t care that I’m not 5 years old. I will be one of those ladies who wears pigtails til the age of 80, God willing! For a different spin, work the hair bow into a half up (hair bowed), half down look.
Talk Of The Town TWA
For my ladies with teeny-weeny afros (TWAs), there are styles for you as well. TWAs truly help to showcase our facial beauty, but did you know that they can be worked into lovely looks? InTheTikiLounge shows us how to dress up shorter hair, so you won’t get stuck with the same ol’ style.
Bonus Tips
Want to mix it up? Adorn these looks with headbands, hairpins, clips, and even faux color (view my recent post on a temporary color trick). You can also use them as blue prints for your own look. Get creative!
If you try any of these styles or variations of your own, please let me know. Post pics, comments, tips, etc. below! Happy Holidays!
I’ve got color; yes, I do! I’ve got color; how about you?!
I just love hair color. I think it’s a great way to accent our curls, particularly in the form of highlights. Warning! As much as I love coloring my hair, it was one of the evil culprits that caused damage. Sit back and relax for a quick recap!
History Lesson
Years ago, I would embark on weekly adventures with color, changing my hair from red to blond and back again. That was until my curly mane had enough. It drop-kicked my bottles of developer and dyes and played dead on my head … well, hair is naturally dead (ha!), but this was something entirely different. Over processing my hair through bleach and dyes left it in a limp state.
Just when I began to rehab my curls, I once again decided to get color in the form of highlights. I figured this would be less damaging, particularly since I was seeking the help of a professional stylist. Mistake! The hairdresser, who between breaks of nibbling on her lunch, over processed the front, left section of my hair. This area stopped curling as well, not to mention it was completely colored instead of highlighted! Needless to say, these and other experiences made me walk away from hair coloring.
Still, I just can’t help drooling over other curlies’ expert highlights. It makes me pause and briefly consider another bout with dyes. Fortunately, natural hair blogger Curly Nikki recently flagged a sneaky way in which we can get faux hair color by using cream eye shadow. Boing! That’s the sound of your head rattling. I know. I know. You must be thinking that us natural ladies have lost it again. Here comes another crazy concoction or method of styling. No, actually this one is quick and easy. It’s also a fun way to mix up your look.
Tools:
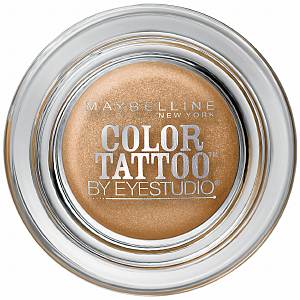
Maybelline 24 Hour Eyeshadow, Bold Gold
Your curly mane, of course! – My hair was styled in a wash and go.
10 minutes max
Faux Hair Color with Maybelline 24 Hour Eyeshadow, Bold Gold
Instructions
I literally dug my fingers into this creamy eye shadow (frowning and naysaying along the way), and randomly smoothed it down my strands, twirling it around my finger. I concentrate more of the product on the hairs around my face. I had to use a generous amount since it wasn’t initially apparent on my dark hair. You’ll need to wash and scrub this from your hands and nails. Not too bad, but it can be a little messy.
Appearance
The eye shadow gave my hair a slight shimmer and gold highlights! I was pleasantly surprised. Although the shadow itself is marketed as lasting 24 hours, hence its name as a tattoo, this faded out of my hair throughout the night.
When I woke up in the morning, it was gone! I had to check my pics to remember that I applied it! The only evidence is slight traces of shimmer. This worked perfectly for styling my hair (and eyes) before I headed out to a reggae concert. I think the rocker look is perfect for heading out on the town, but it may be too much for conservative office environments. The choice is yours.
My natural hair was straightened and curled. This look lasts for 3-5 days (for my mane).
Attention dear friends. Recently I celebrated my birthday! Yes, curlies. My curly mane and I are literally older … and hopefully wiser! To celebrate this milestone (no, I won’t reveal the numbers as yet … gulp!), I straightened my mane! Believe it or not; I actually departed from curls to sport straightened locks. First, I wanted to mix it up for a few, celebratory days. Second, I wanted to conduct a length check.
You see. For about a year, I swore that my hair wasn’t budging past near mid-back/bra-strap length, but I now know that my hair needs less direct heat aka flat ironing in order for it to thrive. At the start of the summer, I made a commitment to reduce the amount of time in which I’d straighten my hair and experiment more with my natural hair. In doing so, my hair has gotten even healthier than before and longer!
That being said, it was time to straighten my hair the safer way—roller settting and then lightly flat ironing. Here are a few steps (as well as grown lady tips!) in which you can follow to capture this look.
Tools:
Clarifying or Moisturizing Shampoo
Conditioner
Leave-in conditioner (I use Silicon Mix Intensive Leave in Hair Shine and Conditioner since the silicones it contains help to trap moisture into the hair and prevent frizz )
Regular tooth comb (not wide or fine, just right and easy to use)
Snap-on, hard, magnetic rollers aka rolos 🙂 You can also use flexi rods if this is easier.
Soft rollers covered in satin
Spray Bottle (fill with water)
Hard hat dryer (I have a Pibbs but Belson Elite Ionic Tourmaline Rollabout Dryer works well)
Setting lotion = optional. I don’t use it, but if you want more hold then use this.
Heat protectant spray (always recommended, but I tend to skip this in favor of an oil or butter)
Flat iron (I use a Maxiglide)
Tools of the trade and steps needed in order to roller set natural hair.
Steps
Start with a clean slate. Wash and condition your curly mane as you normally do. I like to clarify my hair, so it is completely clear of other products, particularly those that work with my natural curls but not with straight tresses.
Apply leave-in conditioner. I tend to add a lot of product to the ends of my hair, since I will be using a flat iron, and I don’t want to dry out my ends. Calling all bandits! Split ends will rob you of length retention.
Keep hard rollers (for drying under the hard hat) at your side, and section your hair from the back to the front of your head. Create sections at the appropriate size of each hard roller. If your section is too large for the roller, your hair will take much longer to dry.
Comb out each section of hair, spritz to keep it moist, and roll it with a roller. Apply tension to your hair as you roll, so your hair is as straight as possible. If you want more hold, spritz setting lotion onto the hair as you roll it. Warning: I am absolutely the worst at roller setting! If you’re in this club, it’s okay. You want to focus on getting the hair smooth and simply roll it as close to the scalp as possible. When you flat iron, it will work out the kinks. I also do not create neat rows. I haven’t gotten this down, so I roll my hair in the same sections I use for braid outs.
After roller setting your entire head of hair, sit under a hard hat dryer for at least 30 minutes. Please gauge this according to your hair length and drying needs. Your hair must be completely dry to avoid frizz.
Undo your rollers. You’ll notice that your roots may still be poofy. Ah, our curly manes win again! Once again this is okay. See my photo. My hair length may not be as kinky curly as it was originally, but my roots are still poofy. Once again, no need to fret.
Apply oil all over your hair. This works as a heat protectant and adds sheen.
Dust off your flat iron. My Maxiglide felt a little foreign in my hands. It took me a minute to remember how to use it! Anyhoo, grab your flat iron and straightened your hair, working in small sections from the back to the front of your head. I apply a minimal amount of heat needed to straighten it. I also like to bump (curl) the ends for body.
That’s it! You now have straight hair!
Optional: Do you want beachy, bouncy curls? If so, as you flat iron each section, roll it with a soft, satin roller. Leave the soft rollers in your hair for at least an hour. When removed, you will have large, curls and waves.
Runway Styling & Nighttime Maintenance
While I like to have straight hair for the first day. Each day afterwards, I like to rock that Victoria’s Secret-esk, beachy look. Lol! This protects my ends and doesn’t require flat irons to maintain the look. To capture this look, I begin by oiling my entire hair, particularly the ends, each night. Afterwards, I use the soft, satin rollers to roll my hair. I apply a satin cap over the rollers for extra protection and to keep the positioning of the rollers. Off to bed you go! In the morning, remove all and voilá! Repeat each night for a hot look and simple, safe upkeep.
On the first day, my straightened mane easily reverted (on right). This tends to happen when natural hair hasn’t been straightened for a while. I applied a minimal amount of heat that night and roller set my hair with soft, satin rollers.
Grown Lady Lessons
As I mentioned prior, the clock is ticking and tocking. Sigh. You may have guessed it. I am one of those gals who hit a birthday and had a bit of the blues followed by the highs of all the lessons learned. I am blessed to blow out another candle, and in doing so, want to share a few lessons with you. As always, each one teach one.
On Hair (of course!) …
Slow and steady wins the race. Chances are you will not figure out your hair overnight … and that’s okay! I’m still discovering my hair’s capabilities.
The best manes are the result of gentle care and healthy hair. These tips are underrated but produce the best results. Healthy hair that’s treated kindly will always look good.
It’s okay to keep the same style until you master your hair and other looks. Don’t feel pressured to have the same results as other curlies. Focus on your own progress. Remember #1: slow and steady wins the race!
On Life …
It’s okay to be different. It’s everyone else’s problem if you do not fit into a mold. Seize the opportunity to enlighten them. If they don’t get it, keep it moving!
Not everyone will like you. Ugh! “But why?” you say. “I am so kind and God-fearing.” Sadly, even the best of us will get shunned or bullied once in our lives. I know. It isn’t right. It’s just human nature. You just have to remember to be above it. Once again, it’s their problem. Keep it moving!
There’s nothing better than being kind to yourself. Woooah there, lioness! Go easy. Don’t put so much pressure on yourself. Even if you believe you haven’t accomplished as much as you’d like to by your age, note the many lessons learned (I hope!), adventures undertaken (even the minis), and plain ol’ fashioned growing up that you’ve done. Be kind to yourself. You deserve it. If you’ve had a b’day or you’re approaching one, happy you day to you!