by Nay | Sep 4, 2012 | Life Lessons, Mane Styles, Tips

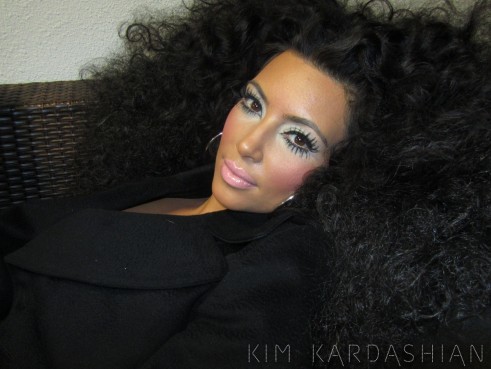
Kim Kardashian channels Diana Ross. Photo by Hype Williams. Photo Credit: kimkardashian.celebuzz.com
From TV to magazines, it’s hard not to keep up with the Kardashians since they are just about everywhere, particularly the family’s star, Kim. Recently, Kim K. publicized her experimental hair style in which she channeled Supreme du jour Diana Ross circa the 1970s. Donning big, curly hair and lots of makeup, Kim Kardashian struck a few diva-esk poses.
In describing the look, Kim says that she and her glam squad “went for a fun, crazy look.” Let’s listen to this again. It was a “fun, crazy look.” Even celeb reporters have covered this story by highlighting Kim’s “wild” look. Call me captain over analytical, but is it true that full, natural hair is also a crazy look? Let’s rewind here and clarify.
I love Kim’s makeup in the pics, which is for most purposes too dramatic for day wear but perfect for this shoot. I’m honing in on her hair, which I adore. That same ‘do is quintessential Diana Ross back in her heyday, and she was herald for it. Today, as women are embracing their naturally curly hair once more, I have to pause and ask, “Is natural hair a wild, crazy look?”
Natural hair is big and can even reach the same lengths and volume in real life that Kim possessed with her magic hair. Does this mean that this same look is fun and crazy when it’s for kicks and not as the actual look coming from your head? Is it only acceptable when being experimental?

Kim Kardashian’s look is inspired by Diana Ross. Photo by Hype Williams. Photo Credit: kimkardashian.celebuzz.com
I’m only drawing this correlation because of the many hair commercials that you and I have seen. How many times have you heard products—mousses, gels, sprays, serums, and chemical concoctions—aimed at “fixing frizz” and “taming wild hair?” This is of course followed by models of all ethnicities celebrating the results of their straightened locks instead of their “frizzy” curly hair. We even have a host of salons that cater to cuts that tame curly hair, helping to reduce the bulk.
This brings me back to my initial question. Is curly hair equivalent to wild hair? Hmmm. Perhaps, depending on your comfort with natural hair. As a naturally curly gal my whole life, I’m quick to say that my curly mane is … my hair. It is what it is, and I am who I am. Yes, it’s big. As it flops and swirls in the wind, it can look a bit free spirited. However, it isn’t something that necessarily needs taming or fixing. There’s no need to beat it into submission through products or other methods … or is that exactly what us curly girls do on our quest for products that work for us?
Whether you consider it naturally wild or not, naturally curly manes can roar. Its beauty commands attention by nature. To gain it, the curls will often volumize itself. For those of you with quieter manes, there are techniques you can use to turn up the volume (see my post on using an afro pik).
If having naturally curly hair is living on the wild side, ladies it’s time to channel your inner Miss Ross. Bend over, shake, fluff, or pic your mane. Go big or go home! 😉
by Nay | Aug 9, 2012 | Hair-raising, Mane Styles, Uncategorized

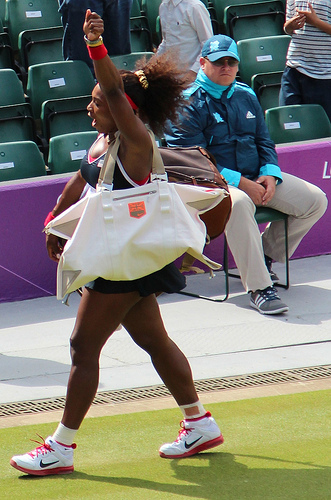
Serena Williams’ faux natural hair is winning. Photo credit: mjh0
The summer Olympic games have been the “hairiest” one by far, with fire storms whirling around African-American women’s heads (please see my previous post for details). Whether worn naturally curly, weaved, or permed, hair has taken center stage, unfortunately overshadowing the performances of many world-class athletes. Among those gaining attention for their manes is tennis ace Serena Williams.
Let me forewarn you, I don’t want to take away from Serena’s Olympic gold medal achievements. In fact, I want to explain to you the importance of her winning look, namely the hairstyle she sported as she won this year’s games.
Regardless of your opinions about Serena’s tresses, we can thank her for:
- Inspiring women everywhere to be physically strong
- Placing the spotlight on natural hair … Simmer down curlies! Yes, I know that Serena’s was magically enhanced. More on this later!
From Physical To Spiritual Strength
Put down those Cheetos!! Yes, you heard me. I know you’re munching on them right now at your desk or on the couch … I know because that’s what I would have been doing if I hadn’t changed my diet a few months ago! Apparently, Serena would be right there with us.
She says, “I’ve actually never liked sports, and I never understood how I became an athlete. I don’t like working out; I don’t like anything physical. If it involves sitting down or shopping, I’m excellent at it.”
Despite her challenges with being active, Serena remains committed to her passion. This dedication made her an all-star, and her body is legend! You don’t need to become a professional athlete, but you can become physically stronger (and maybe even have guns like Serena). Why? Working out not only gives you bodily strength, but it also leads to emotional, mental, and spiritual vitality. You can credit this to the endorphins that are released or just the time spent in solitude.
If you like to meditate or pray, this is a great time to just breathe … literally. As a former runner, there have been numerous times in which I enjoyed moving and meditating, sorting through my life in my head. I’m taken into a zone where I feel as if I am more connected to the Universe and myself (hippie alert!), and everything will be okay. Seriously, you should try it, even if it means walking for just 15 minutes during your day.
Lights, Camera, … Natural Hair!
In addition to her form, Serena has helped to shine a light on natural hair … even if it’s not her own. Hear me out. I know that there have been colorful comments on Twitter regarding Miss Williams’ tendrils, but I think that Serena/her stylist has done a good job of capturing the overall look.

My curly (and straightened) mane with sweatbands and a scrunchie.
Her hair wasn’t styled in an over-the-top way. It looked pretty accurate. It was big. It was voluminous. It bounced as she moved. It blew freely in the wind … just like our curly manes. To me, her faux natural look (Pause. Think about that for minute. Funny!) was the equivalent of Meryl Streep playing Julia Childs. Not exactly the same but definitely Oscar worthy. You can feel free to disagree with me on this one.
In the meanwhile, you can get this look with your natural (or faux) hair by using a sweatband and hair tie/band. I prefer to use a scrunchie instead of a hair band since it doesn’t misshape curls or leave dents in straightened locks once removed.
You can find sweatbands in an assortment of colors and materials, from nylon to polyester, but I prefer the ones made out of terrycloth. This material definitely absorbs sweat, is easy to use, and can help preserve your edges when they’re straightened. Just remember to stretch out the sweatband before using it since some brands are a bit snug at initial use and can stress tender edges.
Sweatbands are available at beauty supply stores or online for no more than $2. Can’t beat that! If you really want to bring back the ’80s or pretend to be a pro like Serena, pair a bright colored sweatband with matching wrist bands . It’s fun and functional!
Whether you are walking, running, or oming it out, just get moving. And don’t forget your sweat- and wristbands!
by Nay | Jul 17, 2012 | Mane Styles, Products
A girl without braids is like a city without bridges.” ~ Roman Payne, Rooftop Soliloquy

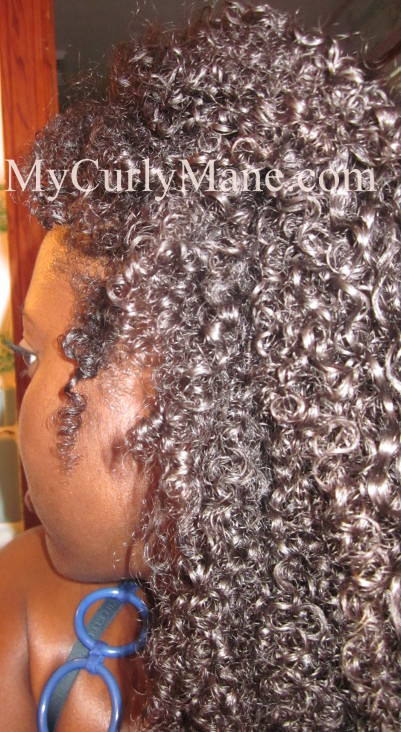
My curly mane braided out with aloe vera gel
Previously, I shared with you the many benefits of aloe vera on hair and my shock and awe at the results of my hair styled with aloe vera gel (AVG). Yes, shock and awe. Well, I didn’t want to leave you hanging, so I continued to use the gel for a full week (how’s that for due diligence?). I even incorporated it into my plaits/braid out routine, a welcomed change from my typical wash and go. The results?
Perfect! I am truly amazed. Aloe vera gel gave me a soft and defined braid out with little shrinkage. Typically, with other products, my hair results wane as the days go on. Not to mention that the product tends to dry out my hair, leave it dull after the first day, and/or leaves a slightly frizzed result. Not with aloe vera gel! I was able to resuscitate my braided out mane each night, getting 2nd, 3rd, and even 4th day hair! I kid you not. I also got some compliments … and confused stares (here she goes again with new hair).
You can achieve this look by following the steps below. You can also use braid outs as a protective style, meaning it will protect your strands from breaking and splitting by hiding and securing your ends (while in braids). This is particularly good for curlies whose hair does not like wash and gos or if your personal preference is for a more elongated curly look.

My first day results of a braid out using aloe vera gel. Great for working gals.
Tools:
- Spray bottle with water
- Leave-in conditioner (I’m experimenting with Beautiful Textures’ Tangle Taming Leave-in Conditioner and having positive results.)
- Oil/oils of choice (I used my Vatika Oil Mix. You can use plain Dabur Vatika Coconut Hair Oil)

- Aloe vera gel (I used Fruit of the Earth 100% Aloe Vera Gel
 )
)
- 2 rubber bands
- Hair dryer
- Hair clips
First Things First:
1. Work on freshly washed hair. Yes, curlie, wash your mane!
2. Start at the back of your head and work your way towards the front.
3. Part your first section of hair and section off the rest of your hair with a clip. The bigger the section, the larger the curls and waves will be.

Braid outs are a great way to check your growth progress. Slow and steady wins the race!
4. Layer products in the following order: leave-in conditioner, oil (for sealing in moisture), and aloe vera gel.

By placing my plaits in ponytails, it helps to stretch my hair. Check out the little wormy curl by my neck. LOL!
5. Braid your hair and twirl the ends around your finger. This will leave a curl at the ends. I applied a little extra conditioner to my ends to add moisture and aid in the twirling action.
6. Continue to braid all over your head. I do approximately 8-10 plaits.
7. You can leave your hair as is, or place your braids in two pony tails (see pic) using rubber bands. I use this method to further stretch my hair. If you like more body at the top of your head (va-voom!), skip the ponytails, as it will pull your hair south as opposed to up and out. I skipped the ponytails for my 2nd day hair results.
8. Let your hair air dry or sit under a hooded dryer. It may be easier to do this routine at night, and let your hair air dry overnight, which is what I did.
9. Once dry, gently unbraid your hair. If you let it dry overnight and it’s still a little wet, gently unbraid your hair and blow dry (not scorch) it. Once dry, I like to use a blow dryer (again) to tug and stretch my hair even more. The blow dryer also helps my products, particularly the oils, absorb into my hair, softening the hair further.
10. Fluff and separate curls as desired in order to hide the parts in your hair. You can also add accessories as desired. I added a black flower (and a little gloss and glam!) on my 2nd day.

My hair on the 1st day, after braiding it overnight.
For 2nd Day Hair
1. Work in sections again, from the back to the front of your head. You can use the same areas you used before or use new sections. If you’re using a new section, remember to gently separate your hair strands.
2. Lightly spritz sectioned off hair with water.
3. I added more aloe vera gel because I wasn’t sure if I’d get enough definition. You can skip this or go in the opposite direction and add aloe vera gel, oil, and/or more leave-in. This will require some experimentation. Please listen to your hair and its needs.
4. Re-braid hair.
5. Air or blow dry.
6. Unbraid and fluff. You can also briefly blow dry and stretch your hair.
For 3rd Day Hair

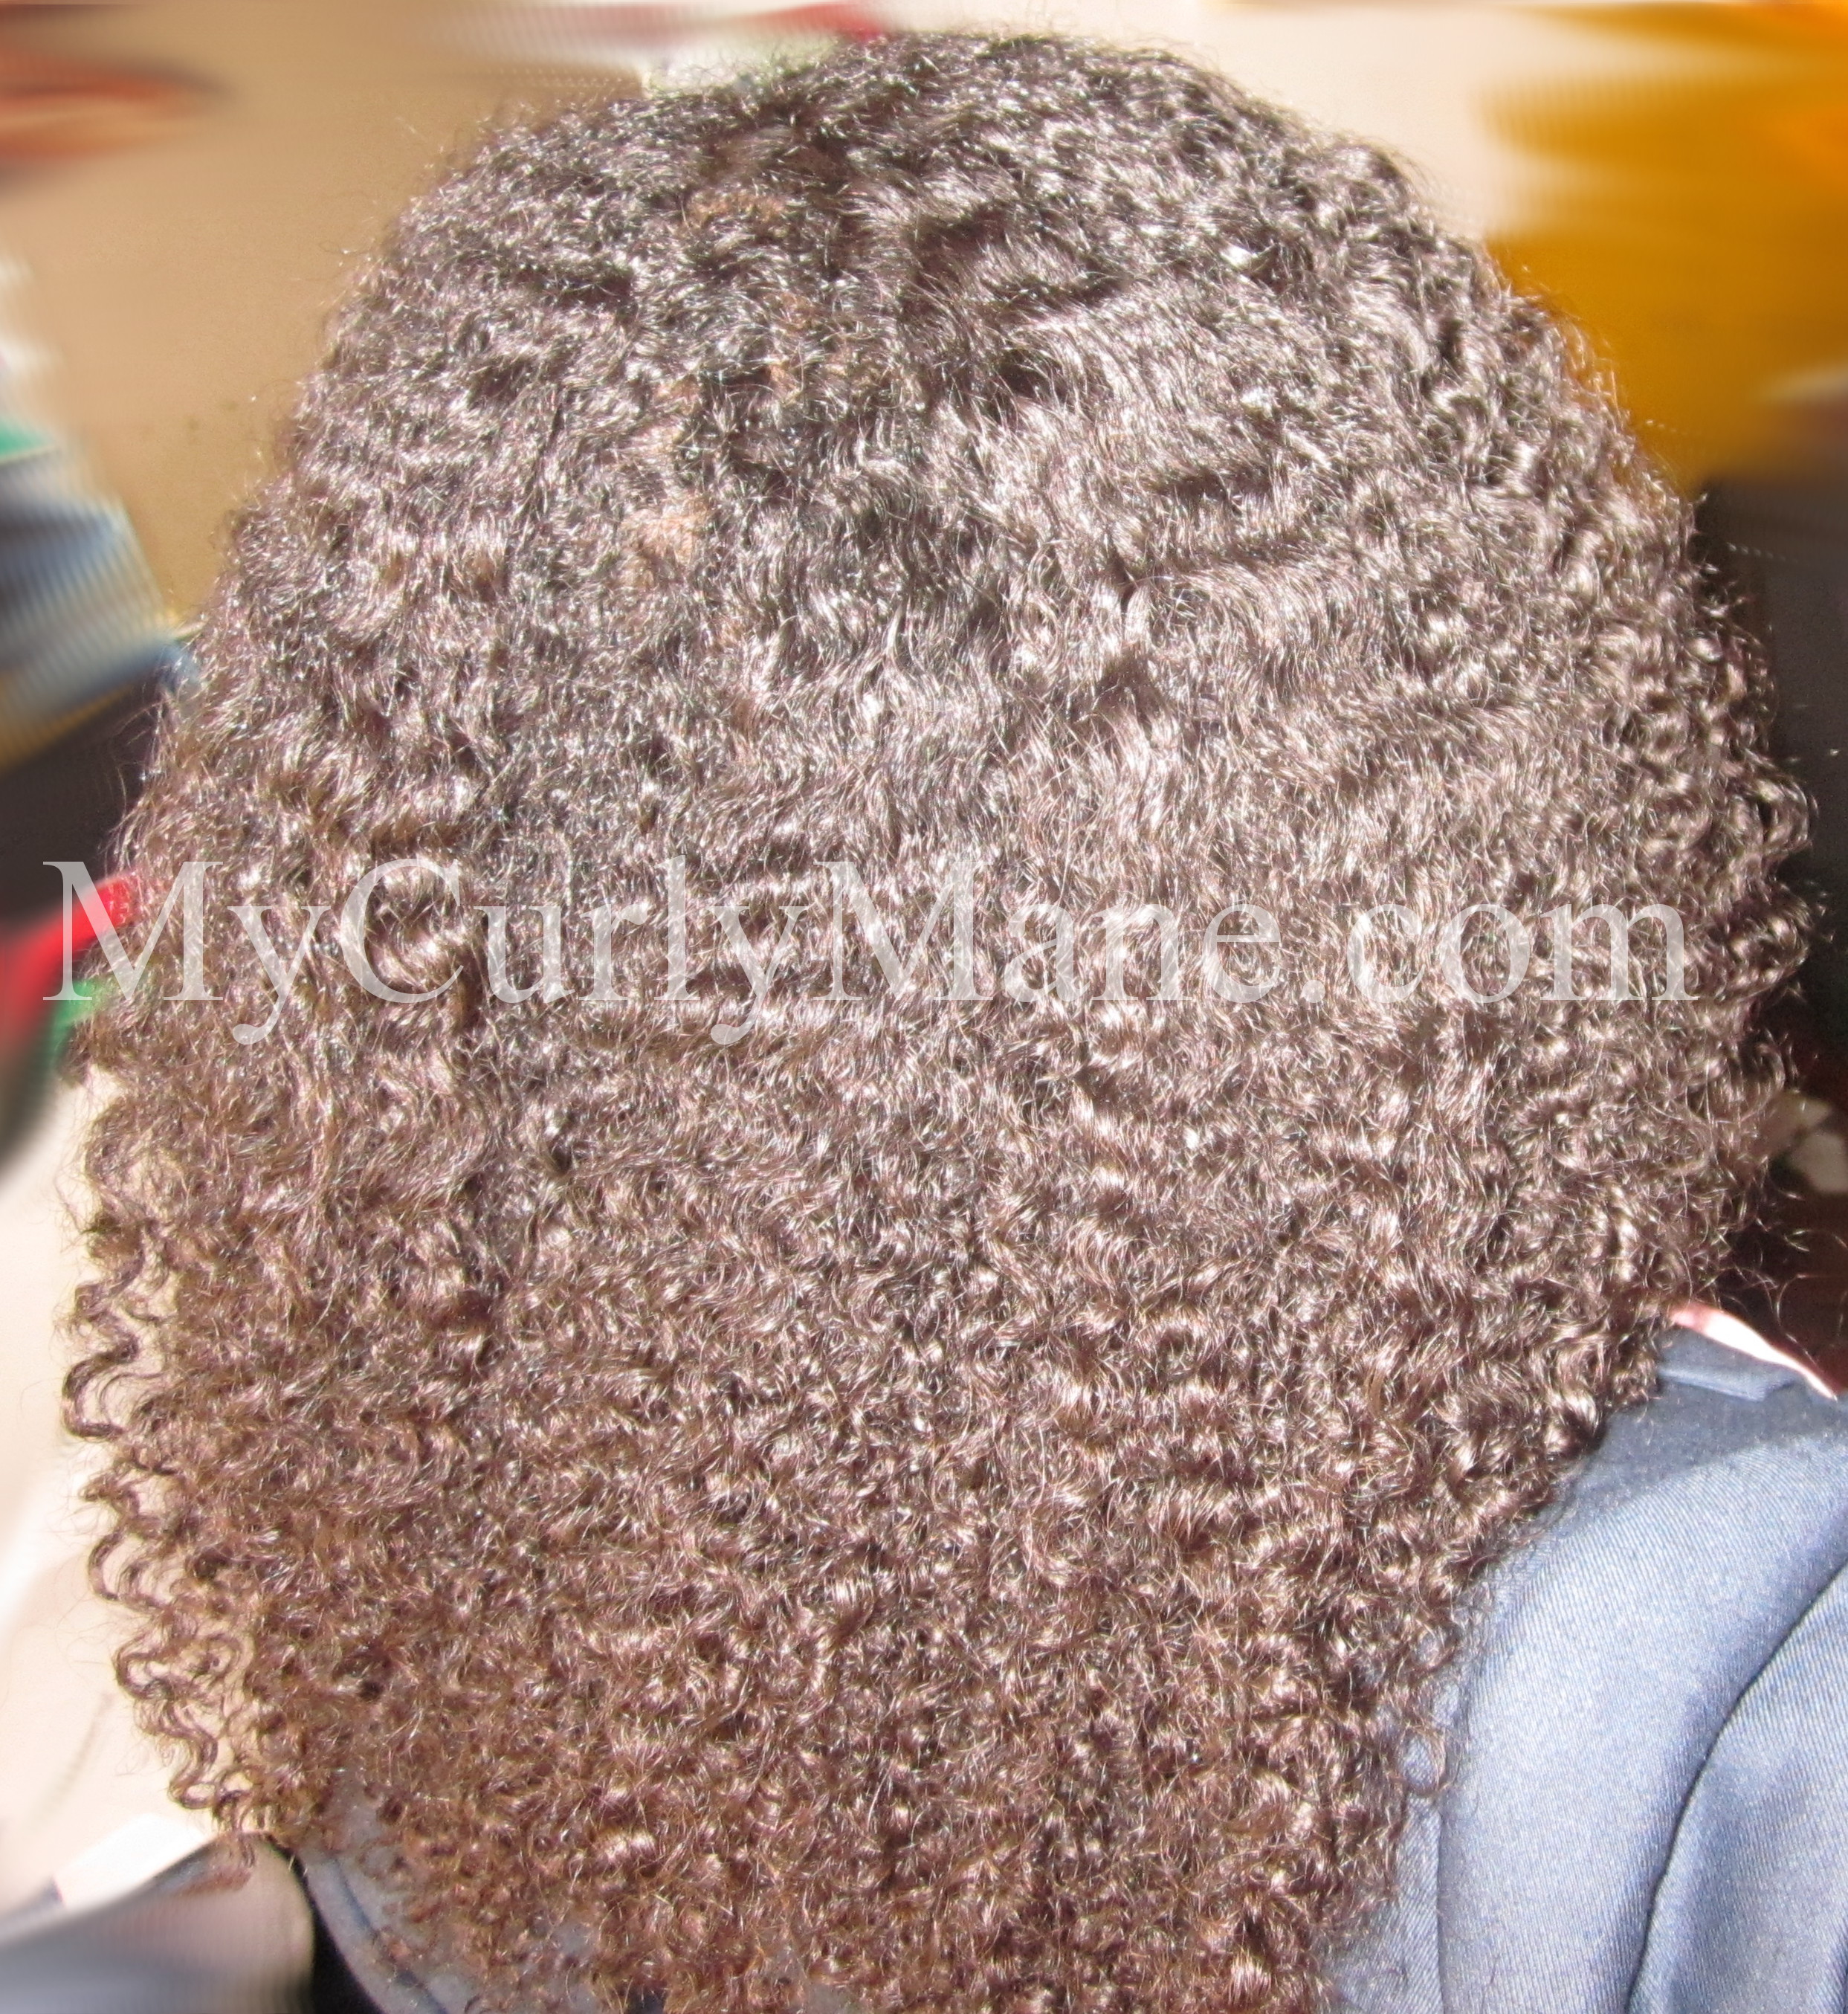
This is my hair on the 2nd day. I had near duplicate results on the 3rd day. Note the fuller texture due to humidity. AVG still gave me great definition, soft hair, and little frizz. I accessorized this look with a black flower.
Repeat the steps used for the 2nd day (above). I skipped the aloe vera gel and just added more leave-in, as I felt my hair needed a little more moisture. Once again, listen to your hair.
Try aloe vera gel on your natural hair. If your hair and scalp permits, you can continue to wear your hair in this style for consecutive days. Just repeat the steps above. Try it (don’t forget the gloss and glam!) and share your results.
by Nay | Jul 9, 2012 | Mane Styles, Products

My curly mane’s popping curls thanks to aloe vera gel.
With the recent bout of extreme heat and high humidity, I’ve found that my usual go-to products for wash and gos just aren’t able to tame my curly mane. The perfectly styled and defined curls that I leave the house with in the morning have ended up as a frizzed out, shrunken cotton ball in the evening (whomp, whomp). While I am taking fellow curly girls’ suggestion to embrace the frizz, I am also exploring another curlie’s suggestion—seal with oil and use Fruit of the Earth 100% Aloe Vera Gel.
Three years ago, I purchased aloe vera gel (AVG) upon the suggestion of natural hair boards. At that time, it just didn’t seem to work on my hair, leaving it dry and crunchy. In hindsight, there may have been many factors which impacted the results of the gel (see if the following applies to you):
- My hair wasn’t in its true state, as it was damaged and rehabbing from my straightening addiction.
- I regularly rotated products in an attempt to find a holy grail, so my hair may not have been clarified enough.
- I can’t recall, but I might have tried the gel during the winter, when humectants like aloe vera gel tend to dry out hair. Unfamiliar with humidity’s impact on curls? The basic breakdown is that humectants can either draw moisture into or out of the hair, depending on humidity. Yes, it gets a little technical. For a full breakdown, Pittsburgh Curly does a great job of explaining humidity and humectants.
Since a full bottle of aloe vera gel has been patiently waiting under my bathroom sink all these years (pick me, pick me!) and my hair is in a much healthier state, I decided to take up the suggestion and revisit the all-natural gel, particularly since it’s an ingredient in a lot of the stylers that I use.
Benefits

Wet hair styled with aloe vera gel.
1. AVG is typically 100% organic.
2. AVG moisturizes the scalp, treating dandruff problems.
3. AVG treats hair loss and promotes fast hair growth (I’m in!).
4. AVG adds sheen to dull hair.
5. AVG balances hair’s pH level, thereby sealing hair’s cuticle layer. This locks moisture into your strands and minimizes frizz.
6. AVG makes curls pop and gives a light hold.
7. AVG leaves your hair super soft.
8. AVG doesn’t contain mineral oil, so you can conditioner wash your hair, thereby adding more moisture into your strands.
9. You can snag a bottle of AVG at any Target or Walmart for under $5. I prefer to use Fruit of The Earth Aloe Vera Gel.
10. If AVG doesn’t work on your hair for styling, you can add it to your shampoo or conditioner for added moisture. If that doesn’t work, you can save it for when you or the next person you know has sun burn!
Styling Tips
Some curlies are successfully mixing aloe vera gel into their own brews. Since I’m not a mixologist, I’ve been layering the gel as I do with my stylers. Do whatever suits your fancy. Here’s how I apply aloe vera gel.

My curly mane styled with aloe vera gel and blow dried.
1. Work on wet, newly washed/co-washed hair.
2. Smooth a leave in conditioner all over your curly mane. I usually use Silicon Mix, but I recently tried Beautiful Textures’ leave in conditioner. So far, it responds well and easily absorbs into my hair. I’ll elaborate more on this product line soon.
3. Style your hair in sections, beginning in the back and working towards the front.
4. In each section, layer products, beginning with additional leave in conditioner.
5. Seal the conditioner with a layer of oil. I like to use Vatika Oil or my oil mix (Vatika Oil, Jamaican Black Castor Oil, Jojoba Oil, and Avocado Oil).
6. Layer aloe vera gel on top of your oil.
7. Repeat layering your leave in, oil, and gel on all sections.
8. Part your hair how you’d like to style it (in middle, side, etc.).
9. Blow or air dry hair. I blow dried my hair because I like to have predictable results and do additional fluffing when dried.

The final, dry haired results, of using aloe vera gel.
Results
Amazing! When I applied aloe vera gel on my wet hair, I was shocked by how smooth and defined my curls appeared (see photos). There was virtually no frizz. After drying, my curls were still seriously defined and fluffy, with minimal frizz.
I used aloe vera gel during three scorching hot, humid days, and I still had great results. I looove how soft and shiny my hair is. I can even now co-wash, since I don’t have to clarify a product to avoid build up. This has been keeping my hair extremely soft and moisturized thus far, which should aid in hair growth. We shall see!
The only downfall is that the gel doesn’t allow me to stretch my hair as well (for length), since my hair is so curly. However, I am able to still have big, fluffy hair.
I will continue to explore the wonderful world of aloe vera gel, particularly on braid/twist outs, and I’ll report back. In the meanwhile, test it out, and share your pics and tips!
UPDATE: Check out the wicked results of my braid-outs with aloe vera gel.
by Nay | Jul 3, 2012 | Mane Styles
For the night shows stars and women in a better light.” ~ Lord Byron, Don Juan
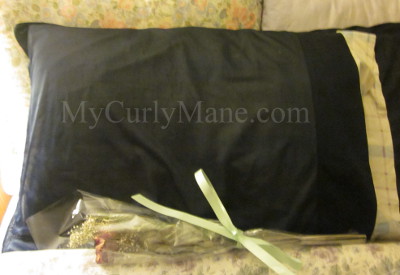
You spent all day proudly sporting your best mane style, but now it’s time for bed. How do you go about preserving the ‘do you worked so diligently on? First things first, remember satin and silk are your best friends.
Pros:
- Satin and silk materials do not absorb the moisture in your hair (unlike cotton), preventing your hair from drying out and breaking.
- Your hair will effortlessly slip across the fabric. Try it and see!
- The slipping action is great for your face. Satin/silk pillow cases do not cause creases across your face like cotton pillowcases, thereby reducing wrinkles.
- You can prevent having “bed head” and smushed ’fros.
Cons:
- If you are sans air conditioning, you will sweat a lot!
Long-Haired Curly Gals:
- Before bed, pineapple your curly mane at the top of your head. Huh, what? New to school? This means gathering your hair at the very top of your head and tying it with a band, so it literally looks like a pineapple. I like to use a scrunchie since it leaves little-to-no hair dents. I also prefer to gather my curly mane at the very front of my head, close to my forehead. It tends to look more like a unicorn than pineapple, but it works! The unicorn method is especially good for us wild sleepers. It also keeps your ends safe from being rubbed by the fabric of your sheets and pillows (if you skip the satin/silk pillows), preventing splint ends.
- Sleep on a satin/silk pillow case, or stuff your hair in a satin/silk cap.
Short-Haired Curly Gals and Teeny Weenie Afros (TWAs):
- Wear a satin or silk cap before heading to bed. You can also go the extra mile and wrap your hair with a silk or satin scarf before putting on the cap. If your covering stays on (lucky gentle sleepers), you can sleep on a regular pillow case.
- If you’re a wild sleeper (toss and turners, leg kickers, and sleep walkers all apply), sleep on a satin or silk pillow case as a backup method.
Straightened Tresses
- If you want to preserve your fresh presses and blow-outs, wrap your hair with a satin or silk scarf. When I first began taking better care of my hair, I found this to be tricky, as it was nonexistent in my routine. I would just sleep on a cotton pillow and proceed to cook my hair with a flat iron in the morning. And I wondered why my hair health suffered!
Bonus Tip: If you smooth Vatika oil on longer straightened hair and place it in a bun before bed, you will wake up with silky waves. This particularly works for me when using my Maxiglide hair straightener.
Sexy Sleepers
Let’s face it, there may be occasions where you are in others’ company and want to “sleep sexy,” even just for your own comfort. Bolder curlies will call a spade a spade and keep on trucking with their routine. “Sexy sleepers” can try the pineapple and satin pillow case method, or at the very least keep a pillowcase handy, particularly if you’re traveling. They may call you a diva, but you’ll be waking up with your style preserved!
And while you’re sexy sleeping, don’t forget your body spray, cute socks, and lip balm/gloss. It may sound a little over the top, but I know ladies who go the extra mile!
Do you have sexy sleeping hair techniques? Pass them along and sound off.
by Nay | Jul 2, 2012 | Mane Styles
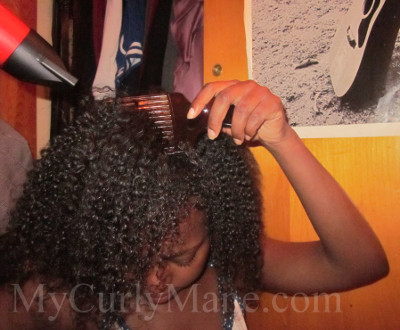
 Want a little lift? Invest in an afro pik!

I use the afro pik to lift hair at the roots, while using a blow dryer.
Although I have watched many a family members pick out their hair, I have to admit that I am late in discovering the benefits of the tried and true afro pick. Just a few weeks ago, I stumbled upon vlogger and curly hair extraordinaire, taren 916 aka Taren Guy’s video of her wash and go. She finished by using the ever reliable afro pick.
Taren’s hair went from flat curls, which were quite cute, to full on mane. Roar! I was mesmerized. Why hadn’t I thought of that? I guess it’s because when I think of an afro pick, I picture thicker, fully picked out fros. I didn’t realize that I could use it to “pick up/out” my hair from the roots. I tried it, and it works!
For my desired look, I work with hair that has been styled from my wash and go. Once this is finished, I grab a pick and only pick up the first ½ inch to 1 inch of hair (at the roots) and blow dry these areas with a hair dryer on high heat, high speed. It’s typically recommended to use low heat, high speed, but I up the heat due to my old dryer.
If you’re going for full on fro aka Afro Samurai (love that movie!), then motion the pick completely through your hair. You may not need heat to do this. Just make sure that your hair is moisturized. Play around with your picking motion to achieve the look that works for you. Results will vary depending on your hair texture.
If you like the fully froed out look, at under $5, this will do the do.


Recent Comments