by Nay | Aug 24, 2012 | Products, Uncategorized
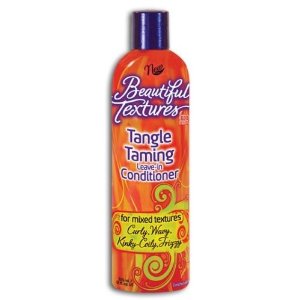
 Pop! Bounce! Sway! That’s the sound of my tresses doing their dance the minute they’re caressed by Beautiful Textures Tangle Taming Leave-in Conditioner. I have used this leave-in consistently for the last month, and … I am a fan of this product! Attention! Attention! Here lies a product that actually lives up to its promise. Yes, curlies. We have lift-off.
Here’s the rundown. A few months ago, I discovered Beautiful Textures on a trip to one of my go-to beauty supply stores (BBS). I entered the store with the intention of purchasing my previous staple, Silicon Mix’s Leave-in Conditioner. I turned the corner toward the Dominican section. You know the aisle with Lacio Lacio, La Bomba, and the other major Dominican players?
Well, on my way towards that area, I heard audio coming from another aisle. I walked over and was nearly blinded by a sea of bright yellow and orange. The colorful packaging of Beautiful Textures’ entire product line was on display, accompanied by a looping video of apparent biracial women swinging their pretty curly manes (some curls looked much better than the others that were featured).
Why biracial babes? Beautiful Textures is marketed as being “for mixed textures,” which made me pause and question if any of the products would work for tighter textures like my own. I also questioned the quality of the packaging and some of the model’s hair, but that lasted for a minute, as my curiosity and product junkism reared its ugly head again. Within a few seconds of scanning the product line, I swiped the Tangle Taming Leave-in Conditioner (approximately $6), Curl Control Defining Pudding, and Moisture Butter Whipped Curl Créme—all of which I will review just for you!

A preview of my hair with
Beautiful Textures Tangle Taming Leave-in Conditioner and Beautiful Textures Moisture Butter Whipped Curl Creme. Read my review of this butter.
Let’s begin today by focusing on the Tangle Taming Leave-in Conditioner. I’m still surprised to admit that I’m hooked on this bad boy! Yes, I have fallen hard, but I don’t want to be too hasty! I’ve got to let the love affair take its steady course. 😉
Beautiful Textures Tangle Taming Leave-in Conditioner has a thick, creamy consistency, so gauge your application according to your strands. I apply a generous amount to my freshly washed hair, basking in its fruity scent. Not to worry. The smell isn’t overpowering, at least not for me. If it does bother you, take comfort in the fact that it doesn’t linger for long.
The minute the cream touches my hair, it melts into it. I instantly notice a difference. My strands curl and spring into place, easily becoming defined. This isn’t a chemical reaction. Rather, it’s my hair soaking up the yummy goodness that the leave-in provides. The slippage this product gives is amazing. It allows me to easily separate my curls for finger combing and styling. It also works well with my stylers (aloe vera gel included), possibly even enhancing them.
While the distribution is impressive, this tangle tamer clearly nourishes my tresses from the inside out. After using it, my hair is much softer and moisturized compared to other products. In case you don’t already know, naturally curly hair thrives with moisture. Without it, you’ll quickly spiral into the land of hair breakage.
This product is jam packed with oils upon oils as well as aloe vera gel, which my hair loves. Other ingredients include: Aqua, Olea Europaea Fruit Oil/Olive Oil, Argania Spinosa Nut Oil/Argan Oil, Glycine Soja Oil/Soybean Oil, Cocos Nucifera Oil/Coconut Oil, Butyrospermum Parkii Fruit/Shea Butter, Mangifera Indica Seed Butter/Mango Butter, Rosmarinus Officinalis Leaf Extract/Rosemary Extract, Aloe Barbadensis Leaf Extract/Aloe Vera, Dimethicone, Panax Ginseng Root Extract/ Ginseng Extract, Polyquaternium 37, Propylene Glycol Dicaprylate/Dicaprate, Hydrogenated Vegetable Oil, Glycerin, DMDM Hydantoin, Cetearyl Alcohol, Ceteareth 20, Polysorbate 20, Propylene Glycol, Imidazolidinyl Urea, Phenyl Trimethicone, CI 15985/Yellow 6, Parfum/Fragrance, Benzyl Benzoate, Benzyl Salicylate, Coumarin, d-Limonene, Hexyl Cinnamal, Lyral, Methyl Ionone Gamma.
It is free from: paraben and protein.

Beautiful Textures’ product line, as seen at my local beauty supply store. Can you spot the sea of orange, yellow, and blue?
Pull the brakes! If your hair hates oils and aloe vera, sadly, this one may be a no go for you. Stick with whatever product your hair likes best and ignore me … well, just this once! LOL!
I really do hope that someday there will be one miracle product that fits all curlies, and we can skip along together, curls bouncing along into the sunset. Of course, that would mean that all of our curly manes would be the same, and what a boring world that would be!
Beautiful Textures has finally launched its Web site. You can learn more about the product line and catch those videos that piqued some of my interest by visiting: http://www.beautifultextures.com
by Nay | Aug 18, 2012 | Newly Natural, Products, Tips
Updated 8/4/13: This post lists key items to help you maintain your natural hair. Please note that there’s an eBook with the same title, A Curly Girl’s Essentials: A Guide for Navigating Your Curly Mane, that is now available for FREE when you sign up for My Curly Mane’s updates! The eBook includes basic information (including the list below) that will help you attain healthy hair. Subscribe and see!
____________________________________________________________________________________________
Back to the deets: The net is bubbling up with information on caring for naturally curly hair. Woo hoo! While there are more resources at our fingertips, it also makes it a bit more difficult to find simple, basic information on how to care for natural hair. I don’t want to confuse you even more, particularly you newbies out there.
Instead, I’m going to break down for you a few essential items that every curly girl needs in her stash. For my easy, breezy minimalist gals, this one’s up your alley! The products for natural hair and tools below are listed in the order in which they’re most likely used.
1. Moisturizing & Clarifying Shampoo / Sulfate Free Shampoo
If you are using products (mainly stylers) that contain mineral oil or non-water soluble silicones, you will need to use a shampoo to clarify your curly mane. Mineral oil and silicones can trap moisture within your strands or prevent it from entering your hair shaft. They tend to build up onto your hair, particularly African-American natural hair, and are best removed with shampoos.
Typically, shampoos contain sodium lauryl sulfate, a detergent that creates a foamy lather and strips hair of its natural oils. Frequent shampooing dries out our curly manes, making them susceptible to breakage. Unless your hair is naturally oily, please shampoo minimally. Your best bet is to purchase a shampoo that is also moisturizing.

If you’re following Lorraine Massey’s Curly Girl Method (Curly Girl: The Handbook ) aka the noo poo (no shampoo)/co-washing (conditioner washing) method, there may be times in which your curly natural hair is over moisturized. Yep, would you believe that one? Hair that is holding too much moisture will be limp. If you fall under this category, use a sulfate free shampoo to clarify and help wake up your strands. Just an aside, a protein treatment may help as well.
Recommendations:
Sulfate-free: Miss Jessie’s Crème De La Curl Cleansing Crème and Creme of Nature Moisture & Shine Shampoo with Argan Oil
Moisturizing: Creme of Nature Detangling Ultra Moisturizing Conditioning Shampoo and Dabur Vatika Moisturizing Shampoo with Sweet Almond
2. Moisturizing Conditioner
This is a must, especially if you use shampoo. Conditioners help to restore the moisture that shampoos take away. Not to mention, they add necessary slip for detangling tresses. In addition, conditioners can be left in your hair as a styler. This is known as Teri LaFlesh’s Tightly Curly Method. While I haven’t had success with this method, it may prove positive for you.
Recommendation: Herbal Essence’s Hello Hydration

3. Leave-in Conditioner
Another must have! Leave-ins are crucial to many, if not most, curly girls. When used under your styler and sealed with oil (unless your styler contains enough oils), leave-ins keep curly hair moisturized. It also adds definition and reduces frizz.
You can use a regular conditioner as a leave-in, just beware that some conditioners react to stylers and cause white balls to appear on one’s hair. Not all products play together nicely. 😉
Recommendations: I have recently switched from using Avanti Silicon Mix and swear by Beautiful Textures Tangle Taming Leave-in Conditioner. This product is amazing!! Check out my product review.
4. Wide Tooth Comb/Detangling Brush
Unless you’re seeking a wickedly neat part, leave your fine tooth combs in the back of your draw. Our tresses need wide tooth combs to easily glide their way through our hair. They are extremely helpful when paired with a moisturizing conditioner to detangle hair in the shower. Some curlies prefer to use a Denman brush or Tangle Teezer. This is particularly helpful if you’re using the Tightly Curly Method mentioned above. I prefer wide-tooth combs, as I’m one of those curlies who get serious shrinkage and lose a lot hair from brushes.
5. Oil and/or Butter
Your curly mane may work well with butter, oil … or both! Either one will seal moisture into your strands, literally making your hair feel like butta! This should be included as a step in your wash and go (see my 10 steps for wash and gos). You can also use oil or butter as a heat protectant when straightening. In addition (yes, there’s more!), they can be used nightly to seal in moisture into your hair or help to soften and revive your look in the morning.


Recommendations: Almond Oil, Coconut Oil, Dabur Vatika Coconut Hair Oil , Jojoba Oil, and Olive Oil
6. Styler
Not every girl needs a styler, but this curlie does. Stylers are products that literally help to style your hair. They increase definition, can freeze curls, and can reduce shrinkage. Stylers prevent my hair from completely transforming into a cotton ball. If this is your desired look, then skip it.
Recommendations: III Sisters of Nature Curly Whip Pudding, Eco Styler Gel, Fantasia IC Olive Oil Style Gel, Fruit of the Earth 100% Aloe Vera Gel , Hair Rules Kinky Curling Cream, and Miss Jessie’s Quick Curls,
7. Hair Clips
They aid in styling your hair or can be used as part of your finished looked. Hair clips section your hair as your work through your head. They are particularly helpful as your hair grows longer. It’s either that or invest in more hands!
8. Spray Bottle
Water is nature’s moisturizer. It is a curly girls’ best friend. At some point in your regiment, you’ll need a spray bottle to help douse your hair as you style it. If you’re into rewetting your hair throughout the day, a spray bottle will ease the process.

9. Satin or Silk Pillowcase/ Scarf/Sleeping Cap
Another must! You can read my information on Nighttime Routines & Sexy Sleeping For Naturals for more details on satin materials. Please note that satin and silk materials do not absorb the moisture in your hair (unlike cotton), preventing your hair from drying out and breaking. Not to mention, it will save you from “bed head.”
10. Camera
This is a must for chronicling your curls. Documenting your hair journey through photos or videos will help you to keep track of your routine and hair health. Aside from badgering your friends, how else will you know what’s working for you?
Once you have these items, you’re pretty much set to go. For those of you in pursuit of how to grow natural hair, these items will keep you on course. Of course, if you are seeking additional styling aids, there are tons of other tools (hair dryers, flat irons, etc.) and products in which you can add to your arsenal. Don’t worry. I’ll keep you posted! 😉
by Nay | Aug 16, 2012 | Product Battle, Products
He who knows when he can fight and when he cannot, will be victorious.” ~ Sun Tzu
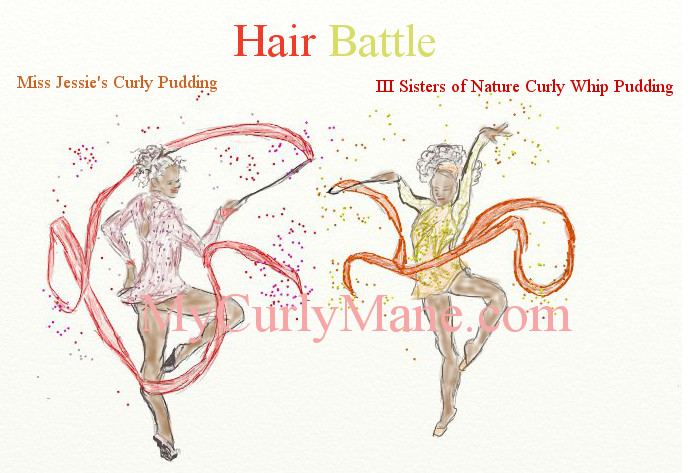
With tons of theatrics and a classic performance by the Spice Girls (sadly no signature natural curls by Scary Spice), the summer Olympics came to a close. Sniffle, sniffle. The games will be missed. In honor of all the stellar athletes who inspired and amazed us, I present to you another epic Hair Battle!
On the left, we have Miss Jessie’s Original Curly Pudding . This all-star has been saving many a curlies’ tresses by offering a variety of styling options. Some have regarded it as among the best curly hair products. From spiraling twist-outs to bouncing shingles, this product delivers. According to Miss Jessie’s packaging, “This curl creme was specifically formulated to stretch out and elongate your curls for soft, maximum curl definition. Amazing for natural curls, kinks & waves, finger styling, TWAs, coiling, transitioning, kinky weaves and more. Excellent for combating curl shrinkage!”
On the right, we have III Sisters of Nature Curly Whip Pudding . Marketed as comparable to Miss Jessie’s Curly Pudding, this newcomer has a few tricks up its sleeves. According to its packaging, “III Sisters of Nature Curly Whip Pudding is formulated to bring dull, frizzy and tight curls to life with moisture, shine, and length. Our cleaner and natural blends are reduced to the smallest molecule for maximum penetration and definition of curls, waves and twists, and kinks. Compare to the more expensive brand and save.” This knockoff is an all natural curly hair product.

On left: Miss Jessie’s Curly Pudding. On right: III Sisters of Nature Curly Whip Pudding.
Remove the packaging; open the jars; and you’ll notice that both products are nearly identical. But are they really? Let’s put them to the test.
The Rules
Both products will be measured according to My Curly Mane’s criteria. A full point will be given for successful completion of each category. A half point will be given for satisfactory results. The categories are: price, ingredients, scent, application, look, feel, and the wild card—ability to produce second day hair. Final scores can range from zero to 7 (perfect) points.
Let’s get ready to battle!
1. Price
- Miss Jessie’s = approximately $22
- III Sisters of Nature = $13
There’s not much of a battle here when it comes to price. III Sisters has purposely set its price point much lower than Miss Jessie’s. As a result, the sisters easily skip and twirl their way to a quick and easy full point.
Miss Jessie’s
Point = 0 /Total = 0
III Sisters
Point = 1 / Total = 1
2. Ingredients
Once you learn how to understand product ingredients, it will save you a lot of headaches … and money! Here’s the breakdown on our contenders:
- Miss Jessie’s Curly Pudding contains mineral oil aka parafinium liquidum, which can either dry out your hair or help it to maintain moisture. You will need to shampoo your hair to remove the mineral oil. Typically, mineral oil doesn’t affect my hair, but I’ve noticed that this is changing as my hair grows. When using this product, my hair tends to shed. I’ve even had whole strands come out while washing the product out of my hair! However, I’m hesitant to write this off, as Curly Pudding saved me while I was rehabbing my curly mane. I didn’t have this problem when my hair was shorter. Instead, I’m advising you to pay close attention to your hair when using this product.

My curly mane’s definition with Miss Jessie’s (on left) and III Sisters of Nature (right).
Curly Pudding (unscented) also contains water, parafinium liquidum, glycerin, dipropylene glycol, Ordenone™ Triethanolamine, carbomer, PEG-12 dimethicone, wheat amino acids, aloe barbadensis leaf extract, avocado oil, shea butter, sweet almond oil, jojoba seed oil, macademia seed oil, oleth05, ethylhexyl methoxycinnanate, disodium EDTA, DMDM hydantoin, lodopropynyl butylcarbamate.
Pros: This product is free of sulfate and paraben
- III Sisters of Nature’s Curly Whipped Pudding prides itself on being naturally made.
Curly Whipped Pudding contains Deionized Water (Aqua),Polyquaternium 10 and PEG 14, Glycerol, DMDM Hydantoin, PEG 33 and PEG 8 Dimethicone, Triethanolamine, Sodium Polyacrylate and Ethylhexylstearate Trideceth-6, Fragrance (Parfum), Aloe Extract ( Aloe Barbadensis), Soybean Oil (Glycine Soja), Babassu Oil (Orbignya Oleifera), Honey, Macadamia Nut Oil (Macadamia Ternifolia), Papaya Extract (Carica), Avocado Oil (Persea Gratissma), Bay Laurel Extract (Lauris Nobilis), Sweet Almond Extract (Prumus Amygdalus), Chamomile Extract (Anthemis Nobilis).
Pros: As written on the label, Curly Whip Pudding is a “natural product containing no alcohol, no waxes, no silicones, no petrolatum, mineral oil, parabens, formaldehyde, carbomer, gimmicks, and hype. Just style and savings.”
It’s just hard to beat anything that delivers in the style department and contains all natural ingredients. III Sisters takes a leap towards another full point.
Miss Jessie’s
Point = 0.5 /Total = 0.5

The view from the back of my curly mane with Miss Jessie’s (on left) and III Sisters (on right).
III Sisters
Point = 1 / Total = 2
3. Scent
- Miss Jessie’s pudding has a strong, signature smell reminiscent of grape flavored bubble gum. Love it or hate it, you definitely won’t miss it. You can probably smell Curly Pudding from a mile away, which is just too much for my sensitive sniffer. The good news is that Miss Jessie’s is aware of this potential headache-inducing trait and provides an unscented version, which I prefer to use.
- III Sisters smells … the same! Since they’re strategically competing against Miss Jessie’s, the sisters must realize that some people do enjoy Curly Pudding’s scent in doses. They’ve formulated their pudding as a lighter scented version. You’ll still get the grape candy smell, except the nasal volume is turned down a notch.
Despite their similar aroma, Miss Jessie’s stands out by offering an unscented version, earning a full point.
Miss Jessie’s
Point = 1 /Total = 1.5
III Sisters
Point = 0.5 / Total = 2.5
4. Application
Both products are applied in the same way–on damp, freshly washed hair. They each have a thick, cake batter consistency, which is what I love about puddings. They just seem to work better for braid-outs and twist-outs (with the exception of aloe vera gel). The difference lies in their penetration. Miss Jessie’s coats my hair strands, while III Sisters lightly absorbs into the hair shaft, causing less product build up and feel (see details below). III Sisters gets the edge.
Miss Jessie’s
Point = 0.5/Total = 2
III Sisters
Point = 1 / Total = 3.5

The look of my curly mane’s 2nd day results with Miss Jessie’s Curly Pudding (on left) and III Sisters of Nature’s Curly Whip Pudding (on right).
5. Look
I have not used these items for wash and gos, as I would go through them much more quickly than desired … particularly given the costs. If used for braid-outs or twist-outs, both products will amaze you. They produce mirror image results–shiny, defined styles. The only difference is that my braid-outs with Miss Jessie’s have more shrinkage on the 1st day (see attached photo), while III Sisters gives me a softer, more relaxed hold. For their identical results, these twins somersault their way to a full point.
Miss Jessie’s
Point = 1/Total = 3.5
III Sisters
Point = 1 / Total = 4.5
6. Moisture & Feel
This is where the two find their individuality.
Moisture

Second day hair results with Miss Jessie’s (on left) and III Sisters (on right).
Miss Jessie’s requires the use of its Baby Butter Creme to maintain moisture. I have had hits and misses with this one, as it (combined with the pudding) leaves my hair feeling oily and weighed down by waaaay too much product. III Sisters makes my hair a bit more moisturized on its own, but this may be credited to its natural ingredients.
Feel
I can definitely feel Miss Jessie’s Curly Pudding on my hair, as it also coats my hands when running my fingers through my hair. III Sisters of Nature’s Curly Whip Pudding gives a similar, but lighter coating.
Miss Jessie’s
Point = 0.5/Total = 4
III Sisters
Point = 1 / Total =5.5
7. Wild Card/Tie Breaker: Second day hair
You can get second day hair with both products, provided that you pineapple (gather your hair at the very top of your head) the night before, re-braid or re-twist your hair, or stuff your hair in a satin cap. I have to admit, I prefer my second day hair results with III Sisters because my hair isn’t as oily or masked by products. It’s also a bit more elongated.
Miss Jessie’s
Point = 0.5/Total = 4.5 out of 7
III Sisters
Point = 1 / Total =6.5 out of 7
And the winner is: III Sisters of Nature’s Curly Whipped Pudding! This newbie has surprisingly taken the medal from 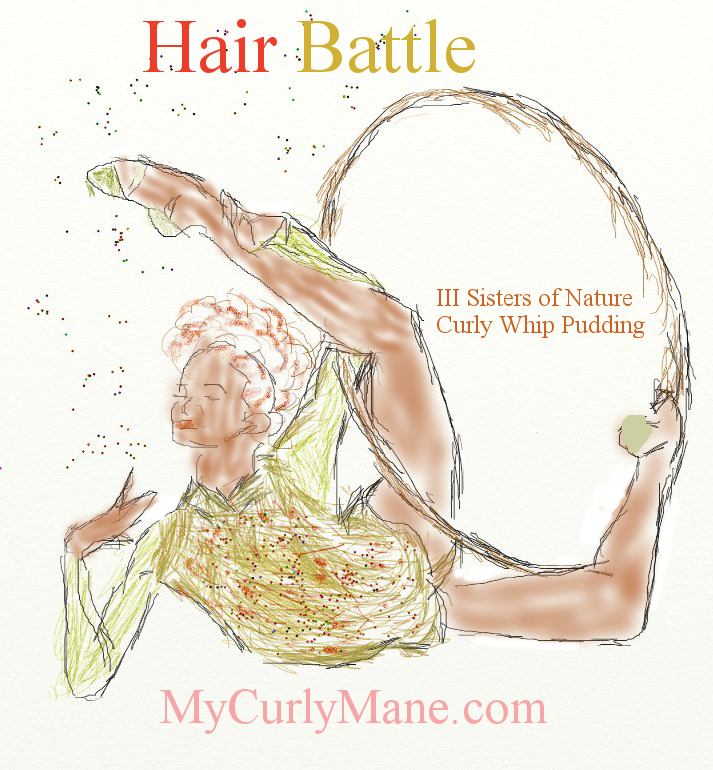 the champ.
If you are looking for a product that will deliver on the look (and don’t mind the scent), both products serve that purpose. As I mentioned before, Miss Jessie’s has saved this curlie many a times (specifically Curly Pudding and Quick Curls). I still have 3 full jars of Curly Pudding in my stash, so you will see its cameo in my routine. However, when it comes down to look AND feel AND hair health, III Sisters wins the gold.
UPDATED 6-10-13: III Sisters of Nature’s Curly Whipped Pudding is renamed as its Spiral Pudding.

by Nay | Jul 27, 2012 | Product Battle, Products
The hardest battle you’re ever going to fight is the battle to be just you.” ~ Dr. Leo F. Buscaglia

Throughout the years, epic battles have been fought among great contenders. These battles continue to be waged through generations, in our personal lives, and even on the top of our heads. Today, in the spirit of the Olympics, I’m waging a war between my current go-to products for wash and gos (not counting my recent love of aloe vera gel), so you can compare and place your bets.
In this corner, we have Hair Rules Kinky Curling Cream, a product that I’ve recently rediscovered. Hair Rules was one of many products sitting patiently under my bathroom sink, waiting to move up the ranks. These last few months, the styler has had an impressive showing. It is often toted as a product for 4c natural hair types.

In the opposite corner, we have Miss Jessie’s Quick Curls, a product I have been using for the last year. Initially dismissed as a product for looser textured gals, Quick Curls has proven itself as effective for my Afro texture. For the past year, it has held steady, with reliable results.

Both natural hair products will be reviewed and measured according to My Curly Mane’s criteria. A full point will be given for successful completion of each category. A half point will be given for satisfactory results. The categories are: price, ingredients, scent, application, look, feel, and the wild card—ability to produce second day hair. Scores can range from 0 to 7 (perfect) points.
Let’s get ready to battle!
1. Price
- Kinky Curling Cream = $20 for an 8 oz. bottle
- Quick Curls = $32 for an 8 oz. bottle
These two stylers are neck and neck when it comes to prices, which may be a little steep for some budgetnistas. Kinky Curling Cream requires you to use the product in the shower for best results, which may cause product waste down the drain (with my clumsiness it does!). Therefore, a 16 oz. bottle of Kinky Curling Cream can be equivalent to an 8 oz. bottle of Quick Curls.
Points: Both contenders are somewhat equally priced and worthy, pound for pound, of a half point.
Kinky Curling Cream
Point = 0.5/ Total = 0.5
Quick Curls
Point = 0.5/Total = 0.5
2. Ingredients
I have to admit. I haven’t always been good with monitoring ingredients. This blog and my revived health consciousness is forcing me to pay attention to what I’m putting on my head. While being more attentive, I recognize that my hair, perhaps like yours, is a very naughty girl. It tends to like many a “bad” things. My advice is to pay attention to how your hair reacts to products containing mineral oil aka paraffinum liquidum.
Both Kinky Curling Cream and Quick Curls contain mineral oil. The battle is still waging on whether mineral oil helps or harms your hair. It can either seal moisture into your hair or dry it out.
When using either natural hair care product, I clarify/shampoo my hair between applications to avoid the buildup of mineral oil, which has to be shampooed to be removed. This puts me in a cycle where I need to put more moisture (conditioner, leave in conditioner, water, oils/butters, etc.) back into my hair. In addition, both products contain hydrolyzed wheat protein (careful if you’re protein sensitive).

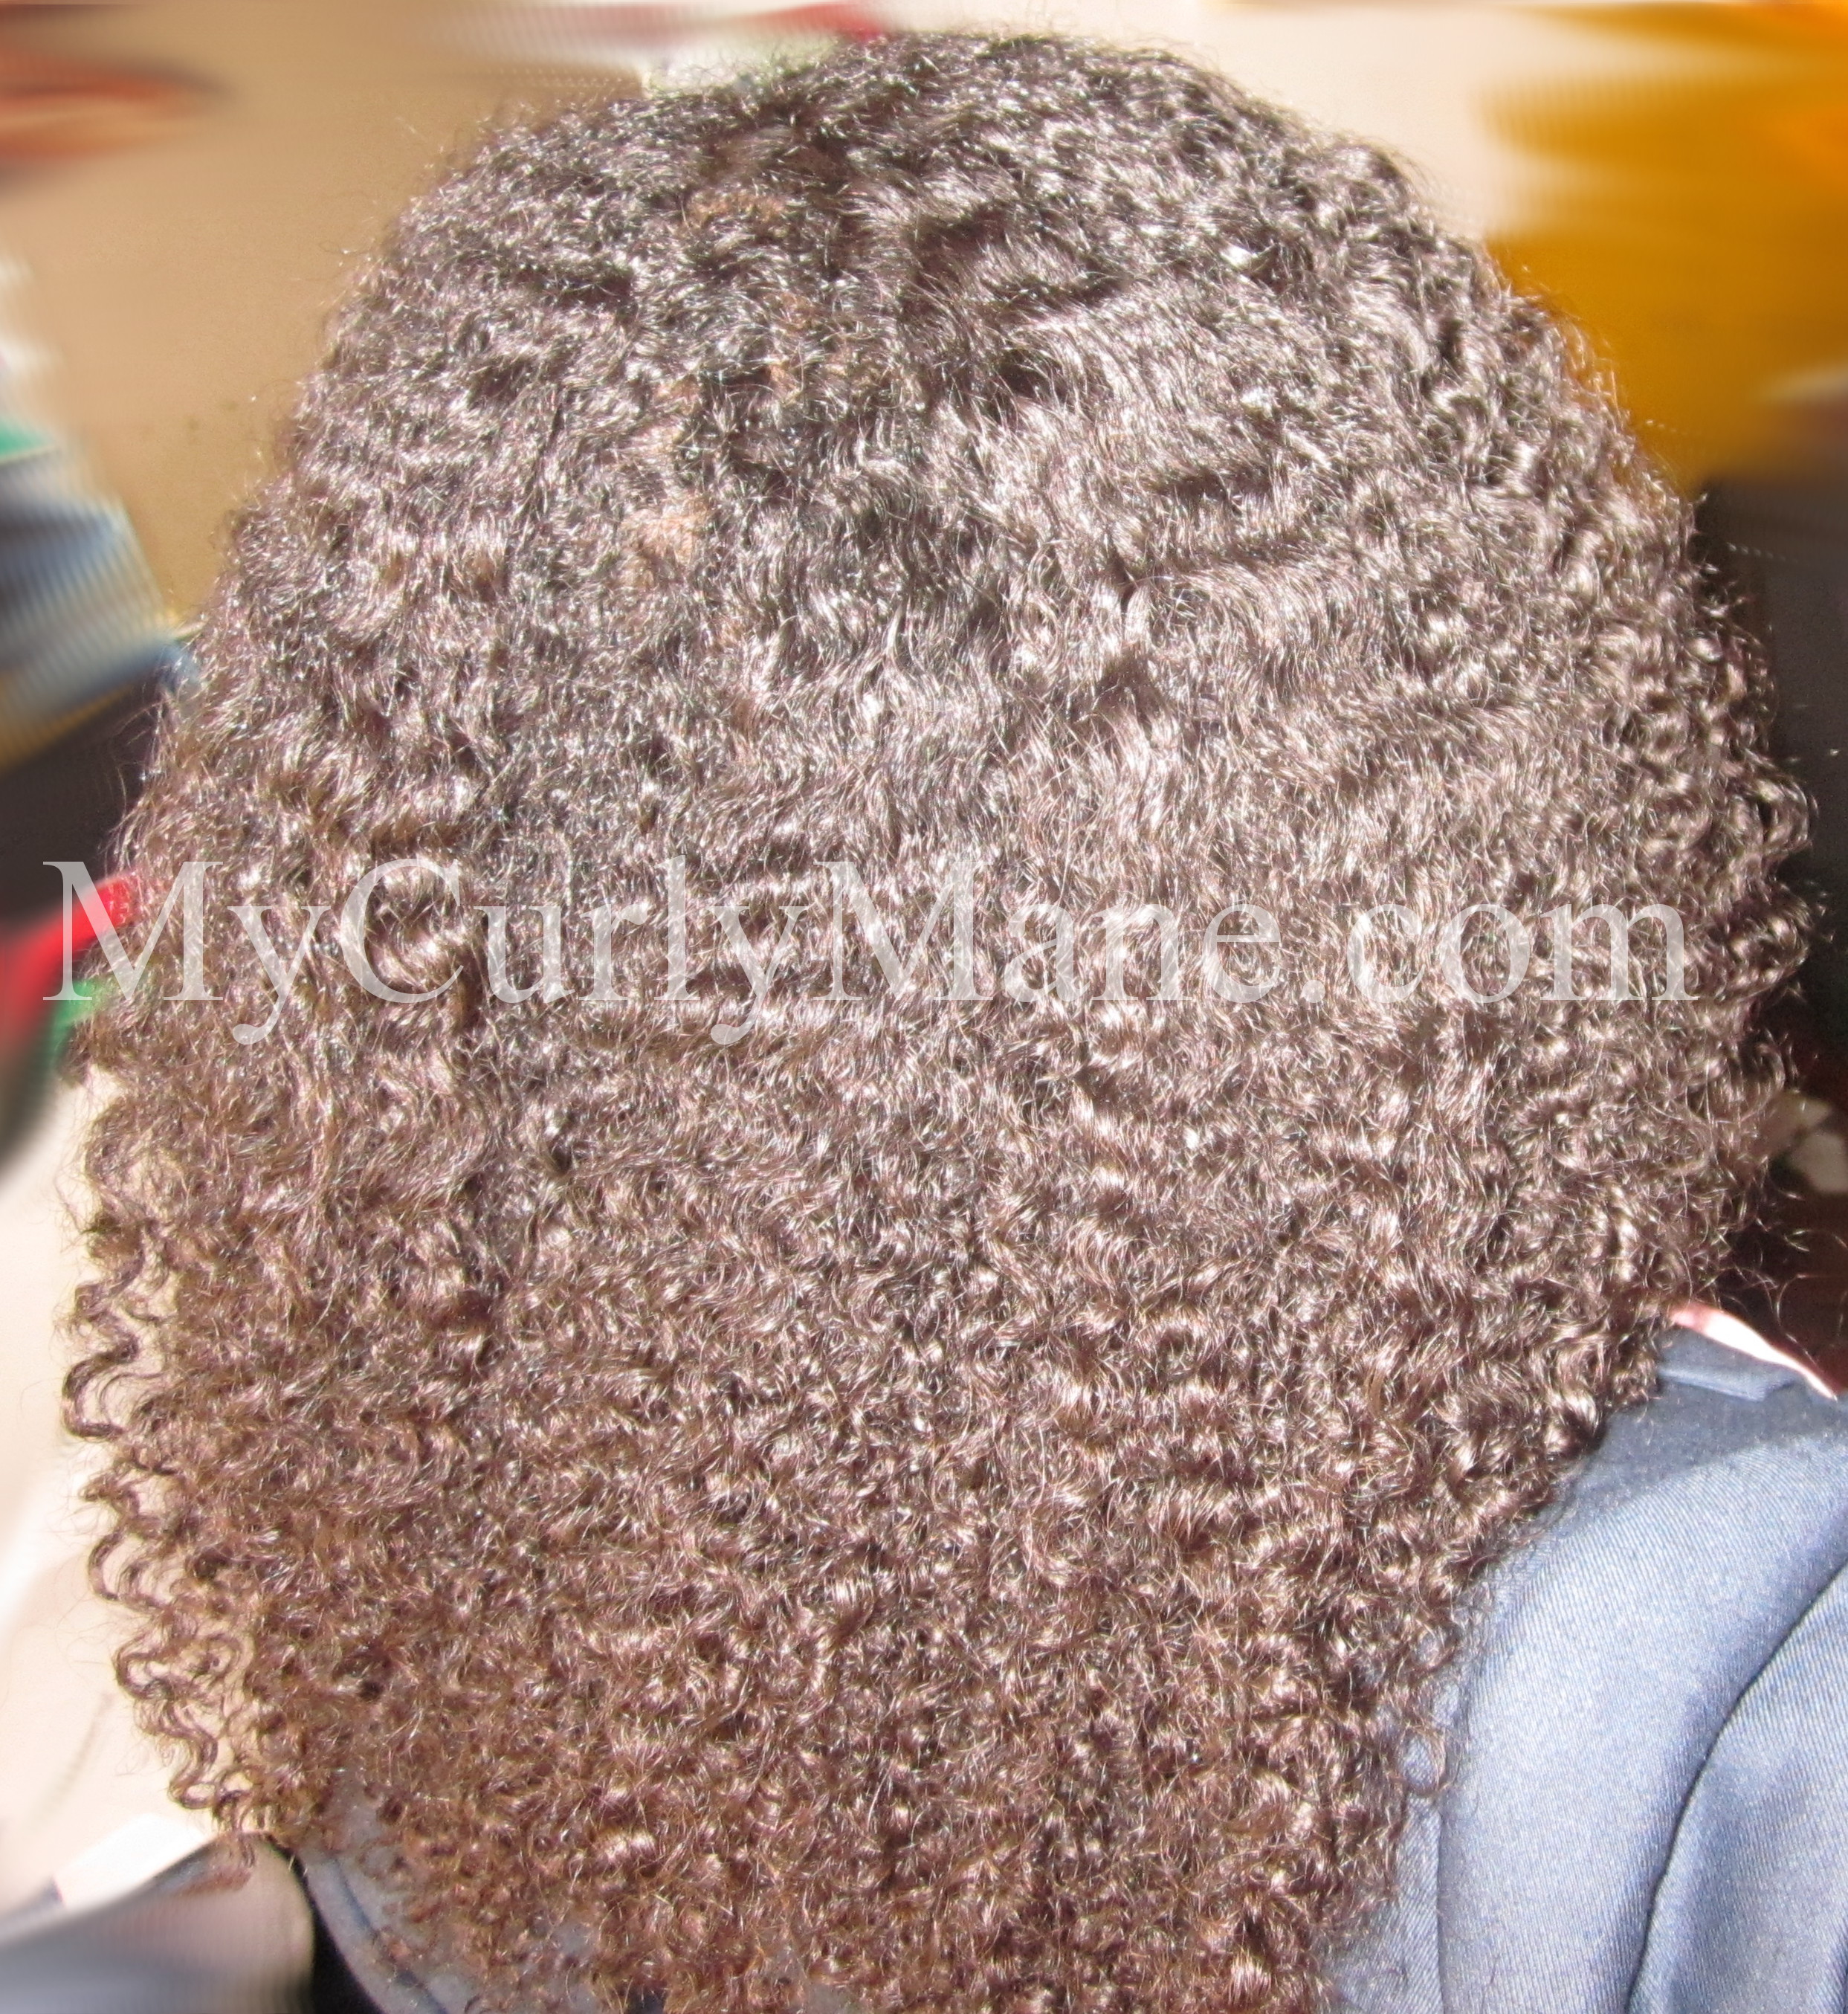
On left: My hair with Miss Jessie’s Quick Curls. On right: My hair with Hair Rules Kinky Curly Cream. Both products define my natural hair.
- Hair Rules Kinky Curling Cream contains honey and glycerin, humectants that may work with or against your hair, depending on the weather. It also contains: water, mineral oil, C13-16 isoparaffin, butylene glycol, glycerin, C18-21 alkane, carbomer, triethanolamine, hydrolyzed wheat protein, crambe abyssinica seed oil, honey, hedychium coronarium (awapuhi) root extract, cymbopogon schoenanthus (lemongrass) extract, humulus lupulus (hops) extract, olea europaea (olive fruit) oil, coix lacryma-jobi seed extract, PPG-26-buteth-26, dimethicone, ethylhexyl methoxycinnamate, fragrance, PEG-40 hydrogenated castor oil, DMDM hydantoin, disodium EDTA, idodpropynyl butylcarbamate. This product is free of paraben.
- Miss Jessie’s Quick Curls contains silicones, which can reduce frizz but needs to be shampooed to be removed, or it will cause build up.It also contains: Water, parafffinum liquidum, VP/DMAPA acrylates copolymer, polyquaternium-37, cyclopentasiloxane, grape seed extract, nettle extract, alfalfa extract, betula alba leaf extract, lavender extract, borago officinalis extract, fennel fruit extract, ginger root extract, laminum album flower extract, chestnut extract, calendula officinalis flower extract, sunflower seed extract, matricaria flower extract, linseed seed extract, rosa gallica flower extract, silybum marianum extract, viola tricolor extract, punica granatum extract, honeysuckle flower extract, bergamont fruit extract, apricot kernel extract, hydrolyzed wheat protein, hydrolyzed vegetable protein, PG-propyl silanetriol, fragrance, polyquaternium-11, propylene glycol dicaprylate/dicaprate, cyclohexasiloxane, PPG-5-ceteth-20, cetyl alcohol, stearyl alcohol, ceteareth-10, propylene glycol, hydroxyethyl cellulose, disodium EDTA, PPG-1-trideceth-6, ethylhexyl methoxycinnamate, DMDM hydantoin, iodopropynyl butylcarbamate, yellow 10, green 5. This product is free of paraben, glycerin, and sulfate.
Points: Since I don’t have too much trouble with either product’s ingredient, they both land a light punch. I’m going to award both contenders a half point.
Kinky Curling Cream
Point = 0.5/ Total = 1
Quick Curls
Point = 0.5/Total = 1

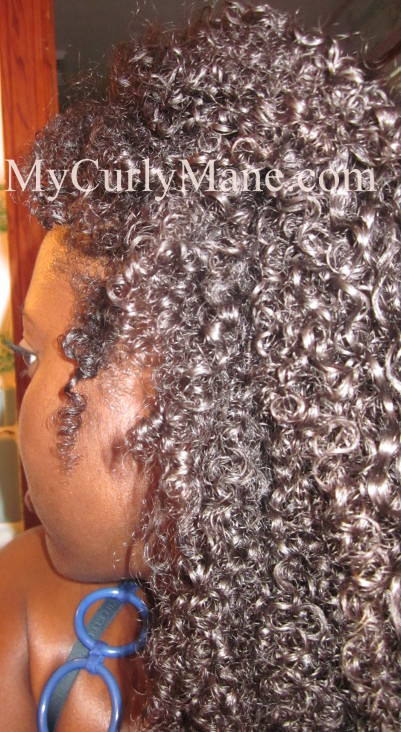
On left: First day results using Miss Jessie’s Quick Curls (tight, full, and shrunken curls that can be stretched with heat for length). On right: First day results using Hair Rules Kinky Curly Cream (fat, soft, and short curls).
3. Scent
- With its grape and honey blend, Kinky Curling Cream smells so good; you’ll want to eat it. It’s not that it smells edible; it’s just that its aroma appeals to my sweet tooth. Kinky Curling Cream tends to fade into a subtle fragrance. There isn’t too much of a lingering scent when blow drying.
- Quick Curls has a strong scent, a citrusy mix with a floral punch! When first applying this product, you will surely be able to smell it from a distance. I’ve had family members walk by my room as I’m doing my hair and compliment my “perfume”! If you use a hair dryer, you will up the ante, resulting in a slight chemical aroma. While Quick Curls has a pleasant smell, its strength should be noted, particularly if you prefer the smell of the other products you are layering onto your hair.
Points: I appreciate both products’ knockout scent and will award each a full point. The two are neck and neck.
Kinky Curling Cream
Point = 1/ Total = 2
Quick Curls
Point = 1/Total = 2
4. Application
- As I mentioned prior, Kinky Curling Cream must be applied in the shower for best results. This may result in the wasted product. It should be noted that the product has a thick consistency, so it takes a bit of raking and smoothing before it absorbs into the hair. I’m also able to skip a leave-in (yes, I actually skip the addition of a leave-in), and I still get great results.
- Quick Curls is used out of the shower and has a lighter consistency, so it can be easily raked and smoothed into the hair. It can also be used with my Silicon Mix Leave-in Conditioner, without products reacting thus far. Perhaps it’s because they both contain mineral oil!
Blame it on the honey or the glycerin, but Kinky Curling Cream takes much longer to dry with a hand held dryer. In fact, at 10-15 minutes, it’s double the drying time when compared to Quick Curls.
Points: Kinky Curling Cream comes up slightly short and gets a half point. Quick Curls lands the hook and gets the edge with a full point.
Kinky Curling Cream
Point = 0.5/ Total = 2.5
Quick Curls
Point = 1/Total = 3

On left: Second day hair results using Quick Curls (full, elongated, tight curls). On right: Second day hair results using Hair Rules (big, fat, and short curls).
5. Look
Pros: It delivers fat, fluffy curls. My SO prefers when I use this product for wash and gos. I’m convinced that it’s because it transforms my hair into a softer pillow for him to sleep on! The overall look is quite nice.
Cons: It can look a little frizzy and dull, as if my hair is in need of a sheen spray or glosser. Kinky Curling Cream also creates more shrinkage, even when stretching the hair with heat.
Pros: Skinny, shiny, thicker, defined, and elongated curls. My hair gets lots of shine.
Cons: My hair can look a little frizzy.
Points: Based on the positive comments I’ve recently received using this product, Kinky Curling Cream comes in as the ultimate showman. It gets a full point. Quick Curls gets a half point.
Kinky Curling Cream
Point = 1/ Total = 3.5
Quick Curls
Point = 0.5/Total = 3.5
6. Moisture & Feel
- Kinky Curling Cream: My hair feels soft and light weight.
- Quick Curls – You can feel the product on your hair. It can also dry a bit stiff, but nothing that a little oil can’t fix.
Points: Kinky Curling Cream swings, uppercuts, and gets the edge with a full point. Quick Curls gets a half point.
Kinky Curling Cream
Point = 1/ Total = 4.5
Quick Curls
Point = 0.5/Total = 4
7. Wild Card/Tie Breaker: Second day hair
It’s a phenomenon that only few stylers are able to help a curlie achieve second day hair. Let’s see how our contenders stack up.
- For Kinky Curling Cream, second day hair is a hit or miss due to the product’s light hold. When it works, my hair looks great. When it doesn’t (due to extreme weather or product’s light hold) my hair looks like an undefined poof ball. It may be the look you’re going for, but I prefer some definition. I’ve been unable to consistently sustain this look, but I’ll keep trying.
- Quick Curls’ secret move is its ability to keep on giving. I always get big, elongated, and fluffy 2nd day hair. If I’m sleeping sexy and protecting my hair, I’m even able to get equally good results on the 3rd day!
Points: Kinky Curling Cream gets a half point. Quick Curls lands the jab and gets a full point.
Kinky Curling Cream
Point = 0.5/ Total = 5
Quick Curls
Point = 1/Total = 5
And the winner is: A tie! Both products deliver and receive 5 out of 7 points. It comes down to the look you are seeking–elongated and tight curls vs. short and full curls. We’ll have to conduct a rematch. Better yet, help me to select a winner by submitting your results. Share your experiences and/or battle with either products by commenting below.
by Nay | Jul 17, 2012 | Mane Styles, Products
A girl without braids is like a city without bridges.” ~ Roman Payne, Rooftop Soliloquy

My curly mane braided out with aloe vera gel
Previously, I shared with you the many benefits of aloe vera on hair and my shock and awe at the results of my hair styled with aloe vera gel (AVG). Yes, shock and awe. Well, I didn’t want to leave you hanging, so I continued to use the gel for a full week (how’s that for due diligence?). I even incorporated it into my plaits/braid out routine, a welcomed change from my typical wash and go. The results?
Perfect! I am truly amazed. Aloe vera gel gave me a soft and defined braid out with little shrinkage. Typically, with other products, my hair results wane as the days go on. Not to mention that the product tends to dry out my hair, leave it dull after the first day, and/or leaves a slightly frizzed result. Not with aloe vera gel! I was able to resuscitate my braided out mane each night, getting 2nd, 3rd, and even 4th day hair! I kid you not. I also got some compliments … and confused stares (here she goes again with new hair).
You can achieve this look by following the steps below. You can also use braid outs as a protective style, meaning it will protect your strands from breaking and splitting by hiding and securing your ends (while in braids). This is particularly good for curlies whose hair does not like wash and gos or if your personal preference is for a more elongated curly look.

My first day results of a braid out using aloe vera gel. Great for working gals.
Tools:
- Spray bottle with water
- Leave-in conditioner (I’m experimenting with Beautiful Textures’ Tangle Taming Leave-in Conditioner and having positive results.)
- Oil/oils of choice (I used my Vatika Oil Mix. You can use plain Dabur Vatika Coconut Hair Oil)
- Aloe vera gel (I used Fruit of the Earth 100% Aloe Vera Gel)
- 2 rubber bands
- Hair dryer
- Hair clips
First Things First:
1. Work on freshly washed hair. Yes, curlie, wash your mane!
2. Start at the back of your head and work your way towards the front.
3. Part your first section of hair and section off the rest of your hair with a clip. The bigger the section, the larger the curls and waves will be.

Braid outs are a great way to check your growth progress. Slow and steady wins the race!
4. Layer products in the following order: leave-in conditioner, oil (for sealing in moisture), and aloe vera gel.

By placing my plaits in ponytails, it helps to stretch my hair. Check out the little wormy curl by my neck. LOL!
5. Braid your hair and twirl the ends around your finger. This will leave a curl at the ends. I applied a little extra conditioner to my ends to add moisture and aid in the twirling action.
6. Continue to braid all over your head. I do approximately 8-10 plaits.
7. You can leave your hair as is, or place your braids in two pony tails (see pic) using rubber bands. I use this method to further stretch my hair. If you like more body at the top of your head (va-voom!), skip the ponytails, as it will pull your hair south as opposed to up and out. I skipped the ponytails for my 2nd day hair results.
8. Let your hair air dry or sit under a hooded dryer. It may be easier to do this routine at night, and let your hair air dry overnight, which is what I did.
9. Once dry, gently unbraid your hair. If you let it dry overnight and it’s still a little wet, gently unbraid your hair and blow dry (not scorch) it. Once dry, I like to use a blow dryer (again) to tug and stretch my hair even more. The blow dryer also helps my products, particularly the oils, absorb into my hair, softening the hair further.
10. Fluff and separate curls as desired in order to hide the parts in your hair. You can also add accessories as desired. I added a black flower (and a little gloss and glam!) on my 2nd day.

My hair on the 1st day, after braiding it overnight.
For 2nd Day Hair
1. Work in sections again, from the back to the front of your head. You can use the same areas you used before or use new sections. If you’re using a new section, remember to gently separate your hair strands.
2. Lightly spritz sectioned off hair with water.
3. I added more aloe vera gel because I wasn’t sure if I’d get enough definition. You can skip this or go in the opposite direction and add aloe vera gel, oil, and/or more leave-in. This will require some experimentation. Please listen to your hair and its needs.
4. Re-braid hair.
5. Air or blow dry.
6. Unbraid and fluff. You can also briefly blow dry and stretch your hair.
For 3rd Day Hair

This is my hair on the 2nd day. I had near duplicate results on the 3rd day. Note the fuller texture due to humidity. AVG still gave me great definition, soft hair, and little frizz. I accessorized this look with a black flower.
Repeat the steps used for the 2nd day (above). I skipped the aloe vera gel and just added more leave-in, as I felt my hair needed a little more moisture. Once again, listen to your hair.
Try aloe vera gel on your natural hair. If your hair and scalp permits, you can continue to wear your hair in this style for consecutive days. Just repeat the steps above. Try it (don’t forget the gloss and glam!) and share your results.
by Nay | Jul 9, 2012 | Mane Styles, Products

My curly mane’s popping curls thanks to aloe vera gel.
With the recent bout of extreme heat and high humidity, I’ve found that my usual go-to products for wash and gos just aren’t able to tame my curly mane. The perfectly styled and defined curls that I leave the house with in the morning have ended up as a frizzed out, shrunken cotton ball in the evening (whomp, whomp). While I am taking fellow curly girls’ suggestion to embrace the frizz, I am also exploring another curlie’s suggestion—seal with oil and use Fruit of the Earth 100% Aloe Vera Gel.
Three years ago, I purchased aloe vera gel (AVG) upon the suggestion of natural hair boards. At that time, it just didn’t seem to work on my hair, leaving it dry and crunchy. In hindsight, there may have been many factors which impacted the results of the gel (see if the following applies to you):
- My hair wasn’t in its true state, as it was damaged and rehabbing from my straightening addiction.
- I regularly rotated products in an attempt to find a holy grail, so my hair may not have been clarified enough.
- I can’t recall, but I might have tried the gel during the winter, when humectants like aloe vera gel tend to dry out hair. Unfamiliar with humidity’s impact on curls? The basic breakdown is that humectants can either draw moisture into or out of the hair, depending on humidity. Yes, it gets a little technical. For a full breakdown, Pittsburgh Curly does a great job of explaining humidity and humectants.
Since a full bottle of aloe vera gel has been patiently waiting under my bathroom sink all these years (pick me, pick me!) and my hair is in a much healthier state, I decided to take up the suggestion and revisit the all-natural gel, particularly since it’s an ingredient in a lot of the stylers that I use.
Benefits

Wet hair styled with aloe vera gel.
1. AVG is typically 100% organic.
2. AVG moisturizes the scalp, treating dandruff problems.
3. AVG treats hair loss and promotes fast hair growth (I’m in!).
4. AVG adds sheen to dull hair.
5. AVG balances hair’s pH level, thereby sealing hair’s cuticle layer. This locks moisture into your strands and minimizes frizz.
6. AVG makes curls pop and gives a light hold.
7. AVG leaves your hair super soft.
8. AVG doesn’t contain mineral oil, so you can conditioner wash your hair, thereby adding more moisture into your strands.
9. You can snag a bottle of AVG at any Target or Walmart for under $5. I prefer to use Fruit of The Earth Aloe Vera Gel.
10. If AVG doesn’t work on your hair for styling, you can add it to your shampoo or conditioner for added moisture. If that doesn’t work, you can save it for when you or the next person you know has sun burn!
Styling Tips
Some curlies are successfully mixing aloe vera gel into their own brews. Since I’m not a mixologist, I’ve been layering the gel as I do with my stylers. Do whatever suits your fancy. Here’s how I apply aloe vera gel.

My curly mane styled with aloe vera gel and blow dried.
1. Work on wet, newly washed/co-washed hair.
2. Smooth a leave in conditioner all over your curly mane. I usually use Silicon Mix, but I recently tried Beautiful Textures’ leave in conditioner. So far, it responds well and easily absorbs into my hair. I’ll elaborate more on this product line soon.
3. Style your hair in sections, beginning in the back and working towards the front.
4. In each section, layer products, beginning with additional leave in conditioner.
5. Seal the conditioner with a layer of oil. I like to use Vatika Oil or my oil mix (Vatika Oil, Jamaican Black Castor Oil, Jojoba Oil, and Avocado Oil).
6. Layer aloe vera gel on top of your oil.
7. Repeat layering your leave in, oil, and gel on all sections.
8. Part your hair how you’d like to style it (in middle, side, etc.).
9. Blow or air dry hair. I blow dried my hair because I like to have predictable results and do additional fluffing when dried.

The final, dry haired results, of using aloe vera gel.
Results
Amazing! When I applied aloe vera gel on my wet hair, I was shocked by how smooth and defined my curls appeared (see photos). There was virtually no frizz. After drying, my curls were still seriously defined and fluffy, with minimal frizz.
I used aloe vera gel during three scorching hot, humid days, and I still had great results. I looove how soft and shiny my hair is. I can even now co-wash, since I don’t have to clarify a product to avoid build up. This has been keeping my hair extremely soft and moisturized thus far, which should aid in hair growth. We shall see!
The only downfall is that the gel doesn’t allow me to stretch my hair as well (for length), since my hair is so curly. However, I am able to still have big, fluffy hair.
I will continue to explore the wonderful world of aloe vera gel, particularly on braid/twist outs, and I’ll report back. In the meanwhile, test it out, and share your pics and tips!
UPDATE: Check out the wicked results of my braid-outs with aloe vera gel.


Recent Comments