by Nay | Dec 9, 2012 | Products
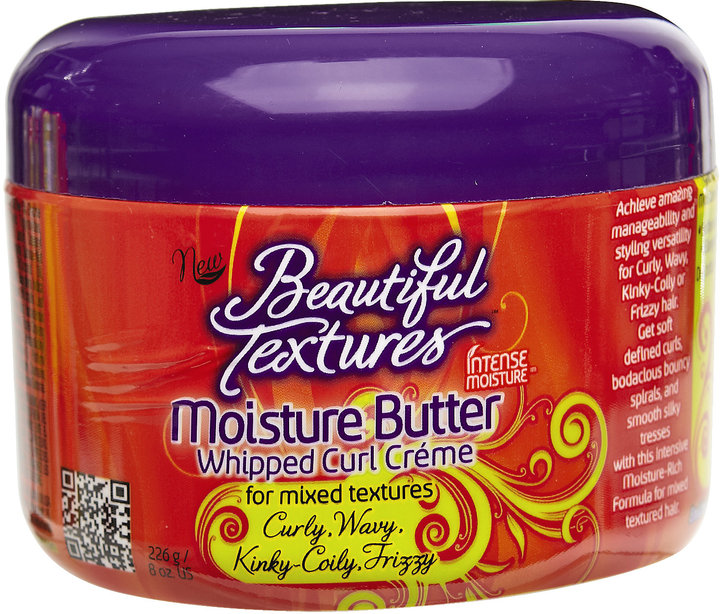
Beautiful Textures Moisture Butter Whipped Curl Crème
When I tried Beautiful Textures Leave-in Conditioner months ago, I had such good results that I ran back to my favorite beauty supply store like a mad woman and scooped up the whole product line in eager anticipation of equally good results. Crazy? Who? Me? The leave-in was such a success that it is now my staple, so naturally I placed my bets on the other items in the collection without even trying them. This included Beautiful Textures Moisture Butter Whipped Curl Crème (looong title).
Fortunately, this butter crème, which I’ll refer to as BTB for Beautiful Textures Butter, meets my expectations … provided that I use it just for braid-outs. BTB is marketed as being for mixed textured girls, which you can argue includes all textured tresses. Hmmm … Still on the fence about how I feel about this, but let me break down some of its elements for you.
Price – Cha Ching or Minor Ding?
You can exhale curlie, this one won’t break the bank. An 8 oz jar of this butter crème only cost me approximately $6. That’s it!
Ingredients – Powerful Potions
Okay this list is loooong. It includes a mixture of natural and chemical compounds. BTB is marketed as being enriched in aloe vera (my curly mane loves this, as you know), coconut oil (love!), soy (for hair?? Allllrrrrighty then.) argan oil (the latest oil of the month), shea butter, and mango butter. The full shabang includes: Aqua, Olea Europaea Fruit Oil/Olive Oil, Glycine Soja Oil/Soybean Oil, Caprylic/Capric Triglycerides, Behentrimonium Methosulfate, PEG 75 Lanolin, Cetearyl Alcohol, Ceteareth 20, Cetyl Alcohol, Argania Spinosa Nut Oil/Argan Oil, Cocos Nucifera Oil/Coconut Oil, Butyrospermum Parkii Fruit/Shea Butter, Mangifera Indica Seed Butter/Mango Butter, Rosmarinus Officinalis Leaf Extract/Rosemary Extract, Dimethicone, Aloe Barbadensis Leaf Extract/Aloe Vera, Phenyl Trimethicone, Panax Ginseng Root Extract/Ginseng Extract, Polysorbate 20, Imidazolidinyl Urea, DMDM Hydantoin, CI 15985/Yellow 6, Parfum/ Fragrance, Benzyl Benzoate, Benzyl Salicylate, Coumarin, d-Limonene, Hexyl Cinnamal, Lyral, Methyl Ionone Gamma.
Scent – Mmmm or Grrrr?
BTB smells a lot like mangos … which I love! Very delish.

Un-braided hair with BTB, without fluffing and separation
Moisture & Feel – The Goodies
Off-white, peachy in color, this butter has a very light consistency. It is oily and will coat your fingers, but hello! It’s a butter! 😉 Unlike some other products, it does not leave a tacky feeling. On my hair, this does leave a moisturized albeit oily coating. I tend to apply a lot of it, so watch out for the oily build up. In fact, I had to warn a friend, who was admiring my tresses, before she dove her fingers into my hair. She was surprised by the feeling to say the least! This is where you’ll need to decide between the appearance and feeling of your curly mane. Can’t we just have it all?!
Application – Getting The Look
According to the packaging, you should use this to “refresh and hydrate your mixed textured hair every day.” It goes on to say that “Moisture Butter helps maximize the styling options of mixed textured hair by helping achieve softer, more defined curls, healthier looking elongated coils, or simply silky-smooth hydrated hair.”
I tried to use this butter for a wash and go. Hey, I was feeling experimental! However, I didn’t like the oil slick it produced. The best way to use this product is for braid- and twist-outs, as indicated on the package. Sometimes it does help to read directions! While you can use this on your first day braid-outs, I get the best results using this on the second day. Stay with me here.
First Day
I do my typical braid-out with aloe vera gel (AVG) and use this butter lightly over it. As an alternative, you can just layer oils (I prefer Dabur Vatika Oil) over your AVG braid-out, as I usually do, and skip BTB. Still with me? If not, read my review of AVG for detailed instructions.
Second Day
This is where BTB works its magic. I spritz sections of my hair with water, apply a little bit of this butter, and re-braid my hair. In the morning, I do my typical process. I un-braid my hair and briefly blast it with a blow dryer. During this time, I separate my strands and fluff my hair. The blow dryer warms up the butter in my hair. I believe that this enhances my look as well as the penetration of BTB’s butters and oil into my hair.
Third Day
I repeat the process I used on the second day. After this day, I wash my hair because my scalp gets product build up from this butter, and my hair is oilier than desired.

Look – Thumbs Up or Down?
On the first day, my AVG + oil/AVG + BTB combo produces curly waves. In comparison, BTB produces thicker, even more defined waves on the second and third day. Both braid-outs create an elongated style, but the look and thickness differs. My hair is also lighter looking and feeling on the first day, since it is not yet weighed down by the butter. It becomes fuller looking on the second and third day with BTB. I love big hair!
As I mentioned before, I always wash my curly mane after the third day due to the build up and oiliness. My hair also starts to look a bit dirty … whether you’re seeking this look or not is up to you!
All in all, this product has now been initiated into my routine. Braid-outs are my preferred protective style this winter, and this butter is working. I give it thumbs up, as I love the results. However, I am leaving myself room to play and explore other butters. I’ll report back.
You can purchase this at your local beauty supply store or Walmart. Updated 8/7/2024: It looks as if the company has discontinued its butter. If you can locate it online, comment down below to help a curlie.
Do you give Beautiful Textures Moisture Butter Whipped Curl Crème thumbs up or down? Shout it out below. If you know of other butters that are working for you, share and share alike!
by Nay | Nov 4, 2012 | Tips, Uncategorized
May it be a light to you in dark places, when all other lights go out.”
~ J.R.R. Tolkien, The Fellowship of the Ring

Washing my curly mane in the sink. No, don’t use the dish washing liquid shown! 🙂
Before she even arrived, Hurricane Sandy was called the perfect storm. Perhaps this is because she was perfectly disastrous. On the east coast, Miss Sandy uprooted many trees, destroyed homes, cars, streets, and left many without electricity, including myself. Our lifestyle definitely went back to basics. With work still a possibility the next day, I needed to have my hair somewhat presentable in the event that I was called into the office. This required a much needed washing of my hair … without hot water!
Those of us with easy access to clean, hot water are veeerrrry lucky. I remember my first experience as a child visiting family in Jamaica and experiencing the culture shock … of my own culture! At that time many places in Jamaica did not have hot water running through the pipes. Today, here in the states, Sandy has contaminated water supplies and left many without access to power and ultimately clean, warm water. I extend my prayers to all whom have been affected by this travesty.
First day results of a braid-out with aloe vera gel.
In the sake of actual necessity and much needed levity, let me share some hair care tips in the event that you’re left without warm water and for some reason or another need to wash your hair. This is simple and maybe common sense, but sometimes, you’re thrown off when comforts are removed. We’re gonna take this back Little House on the Prairie-style! 😉
Tools:
- Kettle
- Large Pot
- Sink or Bathtub (to wash hair in)
- Water (seriously, you’ll need this)
- Gas/electric or solely gas burning stove (seriously!)
- Preferred Moisturizing Shampoo – skip if you’re doing the conditioner only/Curly Girl Method. I used Crème of Nature Argan Oil Moisture and Shine Shampoo.
- Preferred Conditioner – My staple is Herbal Essences Hello Hydration Moisturizing Conditioner.
Steps:
- Pre-poo – Before washing my hair, I applied conditioner onto it, since I recently straightened my curly mane and wanted to restore its moisture balance. You can do this too if you simply want to ensure that your shampoo doesn’t completely strip your hair from oils. I left the conditioner in for about 10 minutes.
- Heat water in a kettle – Gauge the amount based on your curly mane’s needs.
- Place large pot aside, where you can easily grab and use it. You will pour water from the pot onto your hair—not straight from the kettle! Hey, some curlies need a slower pace and heads up. I’m not mad at you!
- Transfer some of the heated water into your pot. You’ll want to leave some water for additional rinsing of your hair.
- Shampoo hair in a sink or bathtub.
- Add cold water to the pot with hot water. The temperature should be comfortable for pouring onto your hair.
- Pour warmed water from the pot onto your hair.
- Condition your hair.
- Transfer more hot water from kettle to the pot and add cold water.
- Pour warmed water from the pot onto your hair.

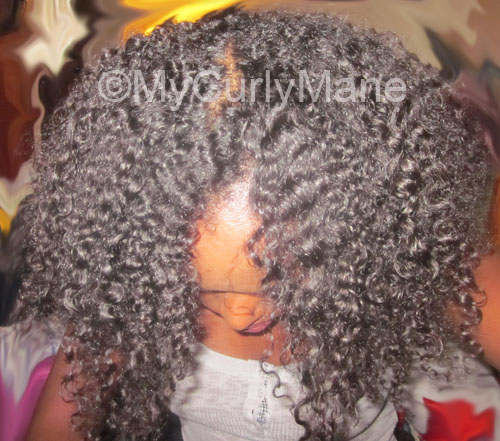
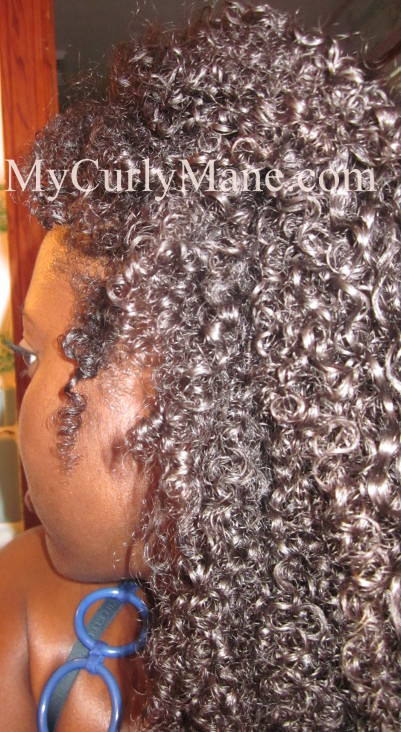
Second day results of re-braided hair using Beautiful Textures Moisture Butter
Work in this manner (combining water from the kettle and cold water from your sink into the pot) until your hair is clarified. Simple!
Styling:
You can proceed with a wash and go. However, I knew that I wouldn’t be able to stretch and style my hair using a blow dryer (no electricity), as I typically do. If you have time on your hands, here’s what you can do—Braid-outs!
Check out my post on how to get stretched results with Fruit of the Earth 100% Aloe Vera Gel. Of course, you’ll have to skip the steps in which a blow dryer is used. I used aloe vera gel on the first day and Beautiful Textures Moisture Butter Whipped Curl Creme to re-braid my hair on the second day. Details on this butter will be shared in an upcoming post.
I re-braided my hair at night until our hot water returned, saving water and electricity, while gaining time needed to tend to my family. That’s it! Simple lifestyle, easy hair care, many blessings.
by Nay | Aug 24, 2012 | Products, Uncategorized
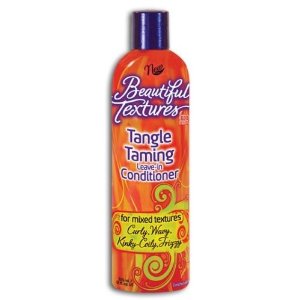
 Pop! Bounce! Sway! That’s the sound of my tresses doing their dance the minute they’re caressed by Beautiful Textures Tangle Taming Leave-in Conditioner. I have used this leave-in consistently for the last month, and … I am a fan of this product! Attention! Attention! Here lies a product that actually lives up to its promise. Yes, curlies. We have lift-off.
Here’s the rundown. A few months ago, I discovered Beautiful Textures on a trip to one of my go-to beauty supply stores (BBS). I entered the store with the intention of purchasing my previous staple, Silicon Mix’s Leave-in Conditioner. I turned the corner toward the Dominican section. You know the aisle with Lacio Lacio, La Bomba, and the other major Dominican players?
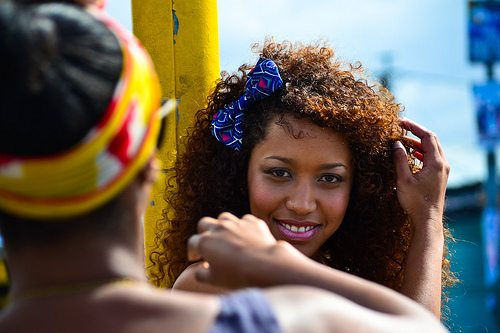
Well, on my way towards that area, I heard audio coming from another aisle. I walked over and was nearly blinded by a sea of bright yellow and orange. The colorful packaging of Beautiful Textures’ entire product line was on display, accompanied by a looping video of apparent biracial women swinging their pretty curly manes (some curls looked much better than the others that were featured).
Why biracial babes? Beautiful Textures is marketed as being “for mixed textures,” which made me pause and question if any of the products would work for tighter textures like my own. I also questioned the quality of the packaging and some of the model’s hair, but that lasted for a minute, as my curiosity and product junkism reared its ugly head again. Within a few seconds of scanning the product line, I swiped the Tangle Taming Leave-in Conditioner (approximately $6), Curl Control Defining Pudding, and Moisture Butter Whipped Curl Créme—all of which I will review just for you!

A preview of my hair with
Beautiful Textures Tangle Taming Leave-in Conditioner and Beautiful Textures Moisture Butter Whipped Curl Creme. Read my review of this butter.
Let’s begin today by focusing on the Tangle Taming Leave-in Conditioner. I’m still surprised to admit that I’m hooked on this bad boy! Yes, I have fallen hard, but I don’t want to be too hasty! I’ve got to let the love affair take its steady course. 😉
Beautiful Textures Tangle Taming Leave-in Conditioner has a thick, creamy consistency, so gauge your application according to your strands. I apply a generous amount to my freshly washed hair, basking in its fruity scent. Not to worry. The smell isn’t overpowering, at least not for me. If it does bother you, take comfort in the fact that it doesn’t linger for long.
The minute the cream touches my hair, it melts into it. I instantly notice a difference. My strands curl and spring into place, easily becoming defined. This isn’t a chemical reaction. Rather, it’s my hair soaking up the yummy goodness that the leave-in provides. The slippage this product gives is amazing. It allows me to easily separate my curls for finger combing and styling. It also works well with my stylers (aloe vera gel included), possibly even enhancing them.
While the distribution is impressive, this tangle tamer clearly nourishes my tresses from the inside out. After using it, my hair is much softer and moisturized compared to other products. In case you don’t already know, naturally curly hair thrives with moisture. Without it, you’ll quickly spiral into the land of hair breakage.
This product is jam packed with oils upon oils as well as aloe vera gel, which my hair loves. Other ingredients include: Aqua, Olea Europaea Fruit Oil/Olive Oil, Argania Spinosa Nut Oil/Argan Oil, Glycine Soja Oil/Soybean Oil, Cocos Nucifera Oil/Coconut Oil, Butyrospermum Parkii Fruit/Shea Butter, Mangifera Indica Seed Butter/Mango Butter, Rosmarinus Officinalis Leaf Extract/Rosemary Extract, Aloe Barbadensis Leaf Extract/Aloe Vera, Dimethicone, Panax Ginseng Root Extract/ Ginseng Extract, Polyquaternium 37, Propylene Glycol Dicaprylate/Dicaprate, Hydrogenated Vegetable Oil, Glycerin, DMDM Hydantoin, Cetearyl Alcohol, Ceteareth 20, Polysorbate 20, Propylene Glycol, Imidazolidinyl Urea, Phenyl Trimethicone, CI 15985/Yellow 6, Parfum/Fragrance, Benzyl Benzoate, Benzyl Salicylate, Coumarin, d-Limonene, Hexyl Cinnamal, Lyral, Methyl Ionone Gamma.
It is free from: paraben and protein.

Beautiful Textures’ product line, as seen at my local beauty supply store. Can you spot the sea of orange, yellow, and blue?
Pull the brakes! If your hair hates oils and aloe vera, sadly, this one may be a no go for you. Stick with whatever product your hair likes best and ignore me … well, just this once! LOL!
I really do hope that someday there will be one miracle product that fits all curlies, and we can skip along together, curls bouncing along into the sunset. Of course, that would mean that all of our curly manes would be the same, and what a boring world that would be!
Beautiful Textures has finally launched its Web site. You can learn more about the product line and catch those videos that piqued some of my interest by visiting: http://www.beautifultextures.com
by Nay | Aug 18, 2012 | Newly Natural, Products, Tips
Updated 8/4/13: This post lists key items to help you maintain your natural hair. Please note that there’s an eBook with the same title, A Curly Girl’s Essentials: A Guide for Navigating Your Curly Mane, that is now available for FREE when you sign up for My Curly Mane’s updates! The eBook includes basic information (including the list below) that will help you attain healthy hair. Subscribe and see!
____________________________________________________________________________________________
Back to the deets: The net is bubbling up with information on caring for naturally curly hair. Woo hoo! While there are more resources at our fingertips, it also makes it a bit more difficult to find simple, basic information on how to care for natural hair. I don’t want to confuse you even more, particularly you newbies out there.
Instead, I’m going to break down for you a few essential items that every curly girl needs in her stash. For my easy, breezy minimalist gals, this one’s up your alley! The products for natural hair and tools below are listed in the order in which they’re most likely used.
1. Moisturizing & Clarifying Shampoo / Sulfate Free Shampoo
If you are using products (mainly stylers) that contain mineral oil or non-water soluble silicones, you will need to use a shampoo to clarify your curly mane. Mineral oil and silicones can trap moisture within your strands or prevent it from entering your hair shaft. They tend to build up onto your hair, particularly African-American natural hair, and are best removed with shampoos.
Typically, shampoos contain sodium lauryl sulfate, a detergent that creates a foamy lather and strips hair of its natural oils. Frequent shampooing dries out our curly manes, making them susceptible to breakage. Unless your hair is naturally oily, please shampoo minimally. Your best bet is to purchase a shampoo that is also moisturizing.

If you’re following Lorraine Massey’s Curly Girl Method (Curly Girl: The Handbook ) aka the noo poo (no shampoo)/co-washing (conditioner washing) method, there may be times in which your curly natural hair is over moisturized. Yep, would you believe that one? Hair that is holding too much moisture will be limp. If you fall under this category, use a sulfate free shampoo to clarify and help wake up your strands. Just an aside, a protein treatment may help as well.
Recommendations:
Sulfate-free: Miss Jessie’s Crème De La Curl Cleansing Crème and Creme of Nature Moisture & Shine Shampoo with Argan Oil
Moisturizing: Creme of Nature Detangling Ultra Moisturizing Conditioning Shampoo and Dabur Vatika Moisturizing Shampoo with Sweet Almond
2. Moisturizing Conditioner
This is a must, especially if you use shampoo. Conditioners help to restore the moisture that shampoos take away. Not to mention, they add necessary slip for detangling tresses. In addition, conditioners can be left in your hair as a styler. This is known as Teri LaFlesh’s Tightly Curly Method. While I haven’t had success with this method, it may prove positive for you.
Recommendation: Herbal Essence’s Hello Hydration

3. Leave-in Conditioner
Another must have! Leave-ins are crucial to many, if not most, curly girls. When used under your styler and sealed with oil (unless your styler contains enough oils), leave-ins keep curly hair moisturized. It also adds definition and reduces frizz.
You can use a regular conditioner as a leave-in, just beware that some conditioners react to stylers and cause white balls to appear on one’s hair. Not all products play together nicely. 😉
Recommendations: I have recently switched from using Avanti Silicon Mix and swear by Beautiful Textures Tangle Taming Leave-in Conditioner. This product is amazing!! Check out my product review.
4. Wide Tooth Comb/Detangling Brush
Unless you’re seeking a wickedly neat part, leave your fine tooth combs in the back of your draw. Our tresses need wide tooth combs to easily glide their way through our hair. They are extremely helpful when paired with a moisturizing conditioner to detangle hair in the shower. Some curlies prefer to use a Denman brush or Tangle Teezer. This is particularly helpful if you’re using the Tightly Curly Method mentioned above. I prefer wide-tooth combs, as I’m one of those curlies who get serious shrinkage and lose a lot hair from brushes.
5. Oil and/or Butter
Your curly mane may work well with butter, oil … or both! Either one will seal moisture into your strands, literally making your hair feel like butta! This should be included as a step in your wash and go (see my 10 steps for wash and gos). You can also use oil or butter as a heat protectant when straightening. In addition (yes, there’s more!), they can be used nightly to seal in moisture into your hair or help to soften and revive your look in the morning.


Recommendations: Almond Oil, Coconut Oil, Dabur Vatika Coconut Hair Oil , Jojoba Oil, and Olive Oil
6. Styler
Not every girl needs a styler, but this curlie does. Stylers are products that literally help to style your hair. They increase definition, can freeze curls, and can reduce shrinkage. Stylers prevent my hair from completely transforming into a cotton ball. If this is your desired look, then skip it.
Recommendations: III Sisters of Nature Curly Whip Pudding, Eco Styler Gel, Fantasia IC Olive Oil Style Gel, Fruit of the Earth 100% Aloe Vera Gel , Hair Rules Kinky Curling Cream, and Miss Jessie’s Quick Curls,
7. Hair Clips
They aid in styling your hair or can be used as part of your finished looked. Hair clips section your hair as your work through your head. They are particularly helpful as your hair grows longer. It’s either that or invest in more hands!
8. Spray Bottle
Water is nature’s moisturizer. It is a curly girls’ best friend. At some point in your regiment, you’ll need a spray bottle to help douse your hair as you style it. If you’re into rewetting your hair throughout the day, a spray bottle will ease the process.

9. Satin or Silk Pillowcase/ Scarf/Sleeping Cap
Another must! You can read my information on Nighttime Routines & Sexy Sleeping For Naturals for more details on satin materials. Please note that satin and silk materials do not absorb the moisture in your hair (unlike cotton), preventing your hair from drying out and breaking. Not to mention, it will save you from “bed head.”
10. Camera
This is a must for chronicling your curls. Documenting your hair journey through photos or videos will help you to keep track of your routine and hair health. Aside from badgering your friends, how else will you know what’s working for you?
Once you have these items, you’re pretty much set to go. For those of you in pursuit of how to grow natural hair, these items will keep you on course. Of course, if you are seeking additional styling aids, there are tons of other tools (hair dryers, flat irons, etc.) and products in which you can add to your arsenal. Don’t worry. I’ll keep you posted! 😉
by Nay | Jul 9, 2012 | Mane Styles, Products

My curly mane’s popping curls thanks to aloe vera gel.
With the recent bout of extreme heat and high humidity, I’ve found that my usual go-to products for wash and gos just aren’t able to tame my curly mane. The perfectly styled and defined curls that I leave the house with in the morning have ended up as a frizzed out, shrunken cotton ball in the evening (whomp, whomp). While I am taking fellow curly girls’ suggestion to embrace the frizz, I am also exploring another curlie’s suggestion—seal with oil and use Fruit of the Earth 100% Aloe Vera Gel.
Three years ago, I purchased aloe vera gel (AVG) upon the suggestion of natural hair boards. At that time, it just didn’t seem to work on my hair, leaving it dry and crunchy. In hindsight, there may have been many factors which impacted the results of the gel (see if the following applies to you):
- My hair wasn’t in its true state, as it was damaged and rehabbing from my straightening addiction.
- I regularly rotated products in an attempt to find a holy grail, so my hair may not have been clarified enough.
- I can’t recall, but I might have tried the gel during the winter, when humectants like aloe vera gel tend to dry out hair. Unfamiliar with humidity’s impact on curls? The basic breakdown is that humectants can either draw moisture into or out of the hair, depending on humidity. Yes, it gets a little technical. For a full breakdown, Pittsburgh Curly does a great job of explaining humidity and humectants.
Since a full bottle of aloe vera gel has been patiently waiting under my bathroom sink all these years (pick me, pick me!) and my hair is in a much healthier state, I decided to take up the suggestion and revisit the all-natural gel, particularly since it’s an ingredient in a lot of the stylers that I use.
Benefits

Wet hair styled with aloe vera gel.
1. AVG is typically 100% organic.
2. AVG moisturizes the scalp, treating dandruff problems.
3. AVG treats hair loss and promotes fast hair growth (I’m in!).
4. AVG adds sheen to dull hair.
5. AVG balances hair’s pH level, thereby sealing hair’s cuticle layer. This locks moisture into your strands and minimizes frizz.
6. AVG makes curls pop and gives a light hold.
7. AVG leaves your hair super soft.
8. AVG doesn’t contain mineral oil, so you can conditioner wash your hair, thereby adding more moisture into your strands.
9. You can snag a bottle of AVG at any Target or Walmart for under $5. I prefer to use Fruit of The Earth Aloe Vera Gel.
10. If AVG doesn’t work on your hair for styling, you can add it to your shampoo or conditioner for added moisture. If that doesn’t work, you can save it for when you or the next person you know has sun burn!
Styling Tips
Some curlies are successfully mixing aloe vera gel into their own brews. Since I’m not a mixologist, I’ve been layering the gel as I do with my stylers. Do whatever suits your fancy. Here’s how I apply aloe vera gel.

My curly mane styled with aloe vera gel and blow dried.
1. Work on wet, newly washed/co-washed hair.
2. Smooth a leave in conditioner all over your curly mane. I usually use Silicon Mix, but I recently tried Beautiful Textures’ leave in conditioner. So far, it responds well and easily absorbs into my hair. I’ll elaborate more on this product line soon.
3. Style your hair in sections, beginning in the back and working towards the front.
4. In each section, layer products, beginning with additional leave in conditioner.
5. Seal the conditioner with a layer of oil. I like to use Vatika Oil or my oil mix (Vatika Oil, Jamaican Black Castor Oil, Jojoba Oil, and Avocado Oil).
6. Layer aloe vera gel on top of your oil.
7. Repeat layering your leave in, oil, and gel on all sections.
8. Part your hair how you’d like to style it (in middle, side, etc.).
9. Blow or air dry hair. I blow dried my hair because I like to have predictable results and do additional fluffing when dried.

The final, dry haired results, of using aloe vera gel.
Results
Amazing! When I applied aloe vera gel on my wet hair, I was shocked by how smooth and defined my curls appeared (see photos). There was virtually no frizz. After drying, my curls were still seriously defined and fluffy, with minimal frizz.
I used aloe vera gel during three scorching hot, humid days, and I still had great results. I looove how soft and shiny my hair is. I can even now co-wash, since I don’t have to clarify a product to avoid build up. This has been keeping my hair extremely soft and moisturized thus far, which should aid in hair growth. We shall see!
The only downfall is that the gel doesn’t allow me to stretch my hair as well (for length), since my hair is so curly. However, I am able to still have big, fluffy hair.
I will continue to explore the wonderful world of aloe vera gel, particularly on braid/twist outs, and I’ll report back. In the meanwhile, test it out, and share your pics and tips!
UPDATE: Check out the wicked results of my braid-outs with aloe vera gel.


Recent Comments